This article guides inspectors through the process of creating a re-inspection in Facilitron FIT. Re-inspections help inspectors follow up on unresolved violations and verify whether they’ve been corrected.
1. Complete the Original Inspection
FIT carries unresolved violations into the re-inspection so you can focus on the locations that need follow-up instead of repeating the entire original inspection. Before creating a re-inspection, complete the original inspection, including every applicable location and task. When inspecting a location, complete the inspection criteria and document any violations you find.
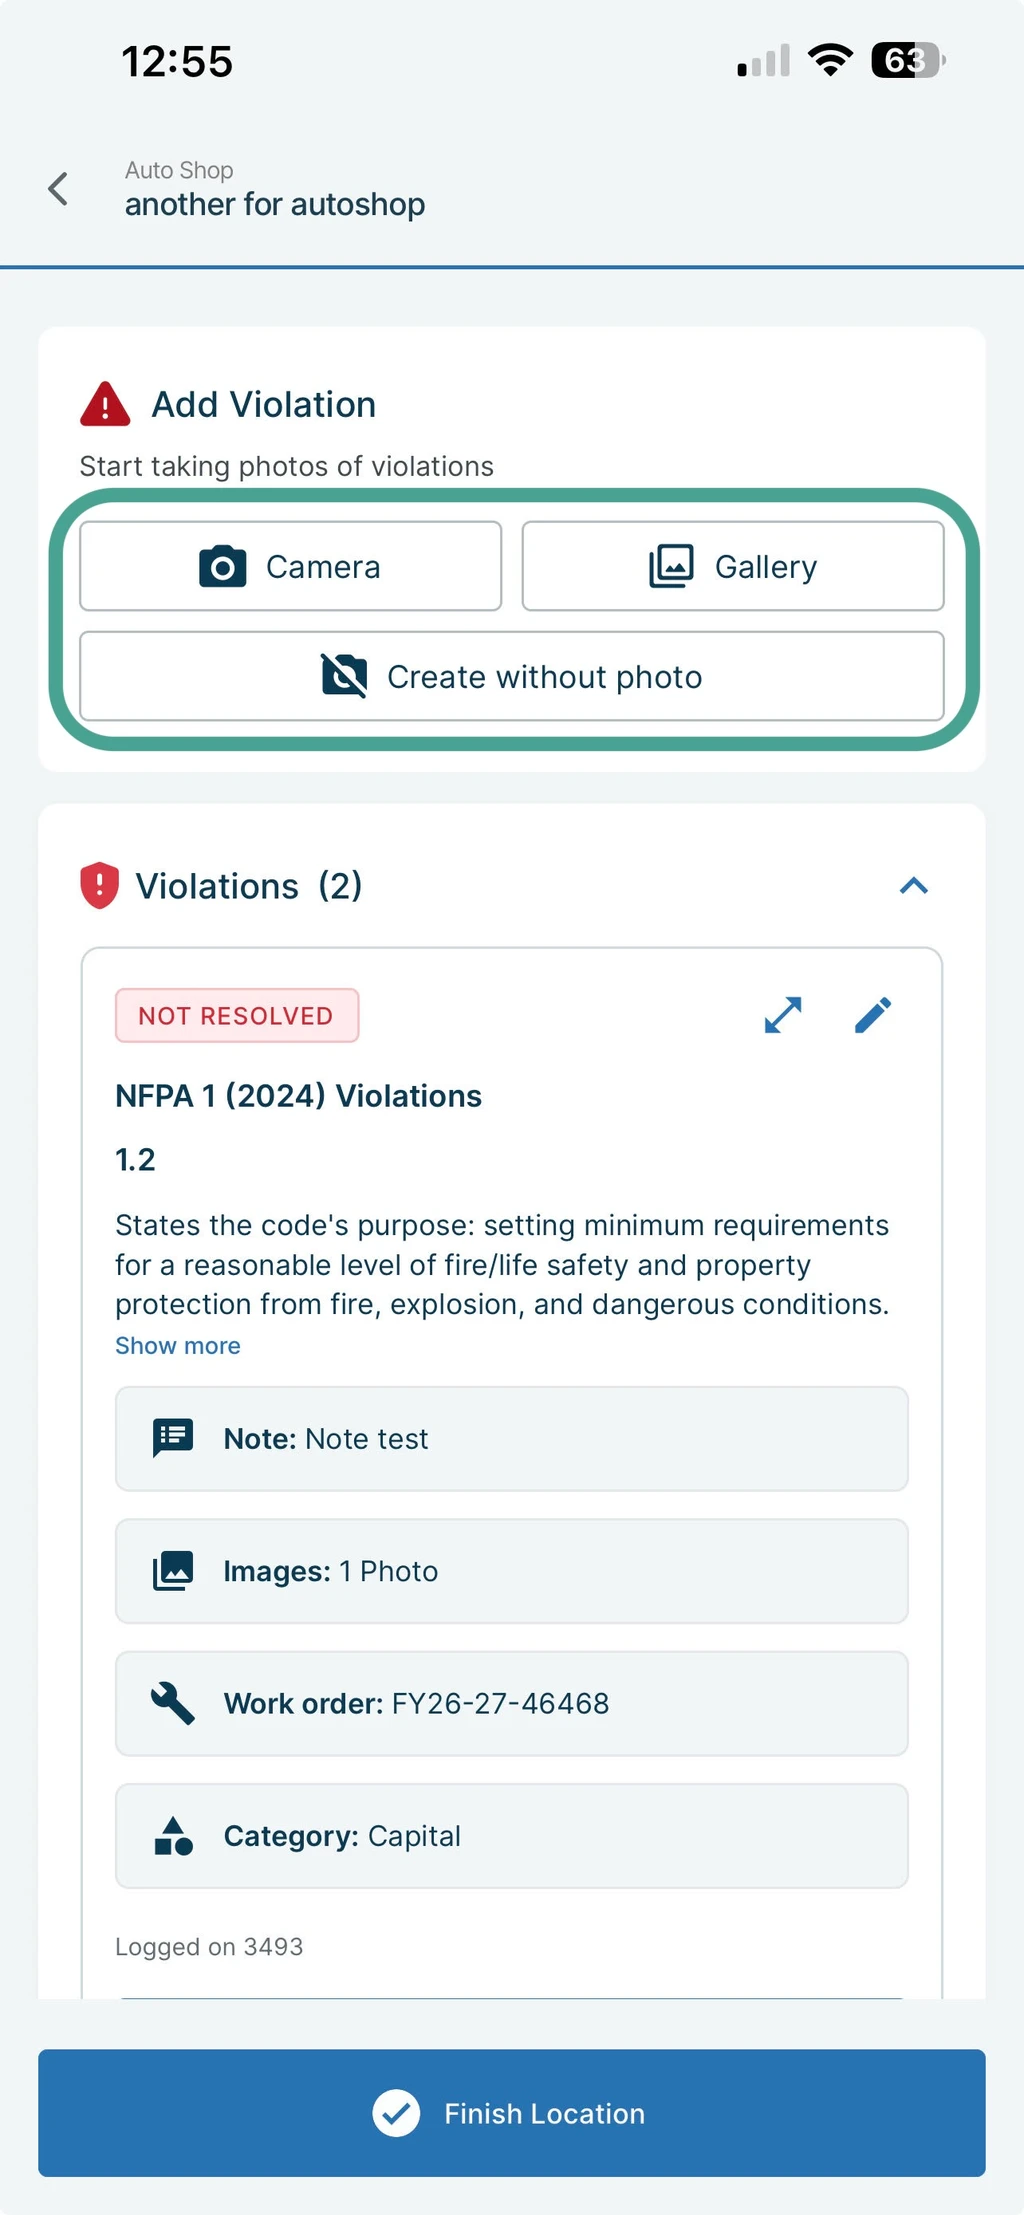
To record a violation, start by selecting Camera to take a photo, Gallery to upload one, or Create without photo to continue without including an image. If using photos, select one or more photos from the gallery and choose the photo to associate with the violation.
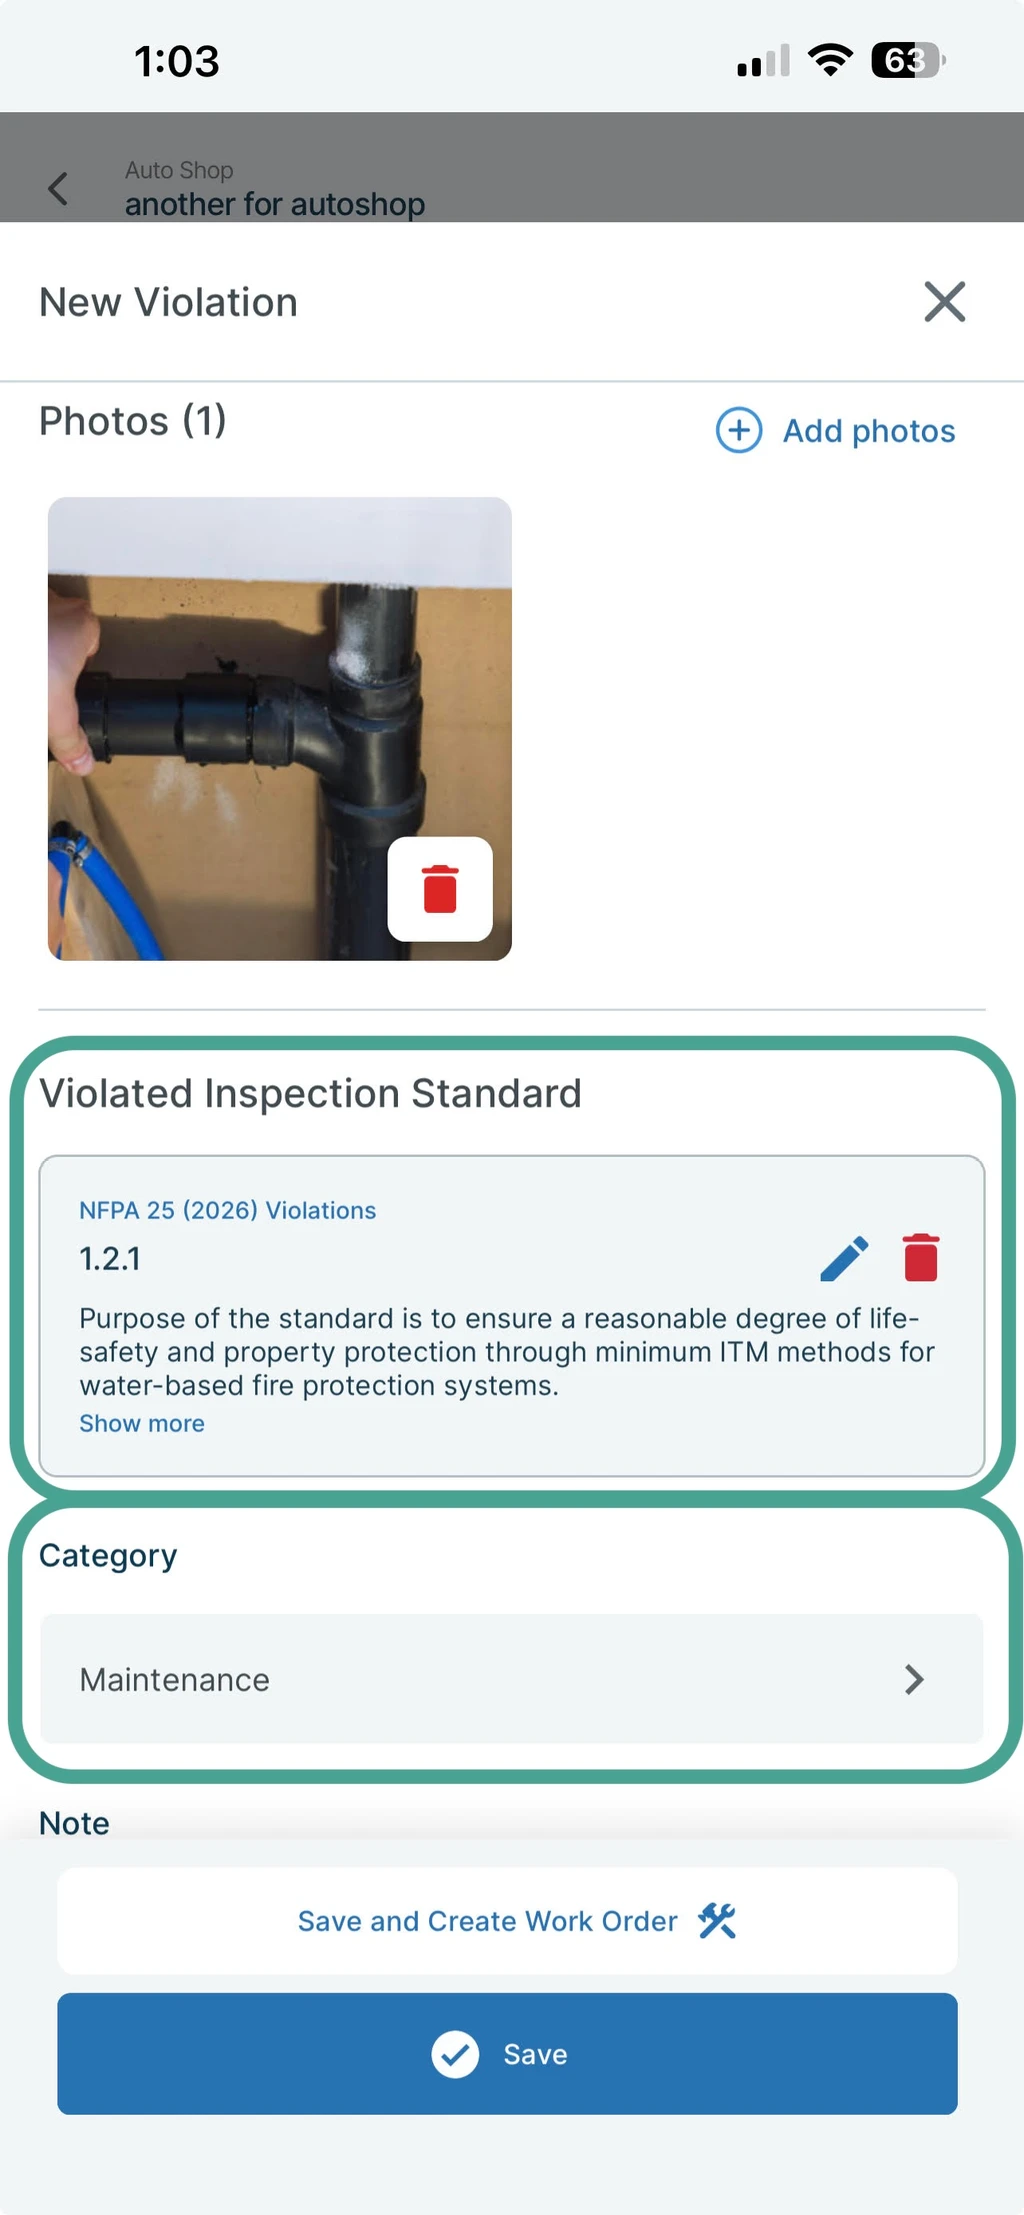
Enter the appropriate violation information, including the violation category and any applicable notes.
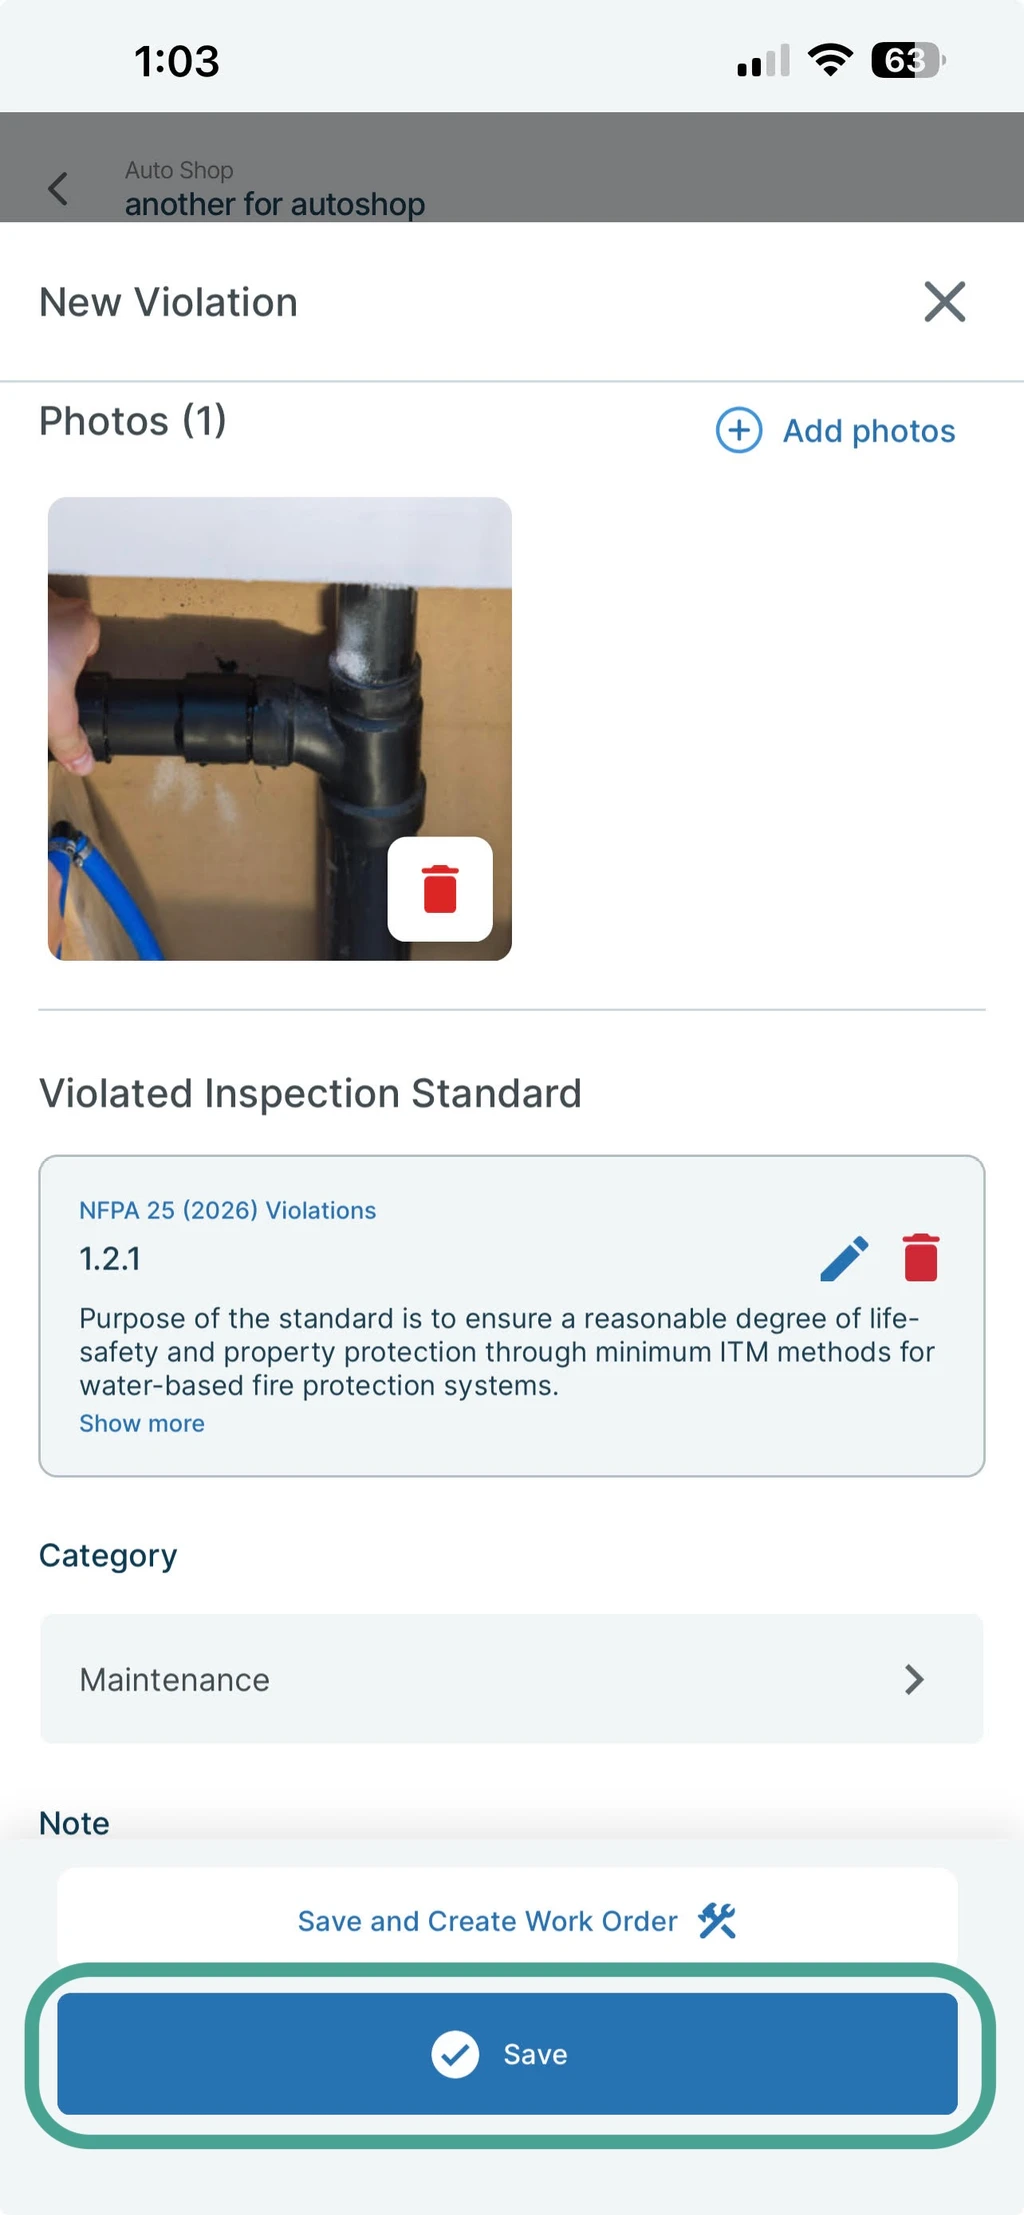
Tap Save to add the violation.
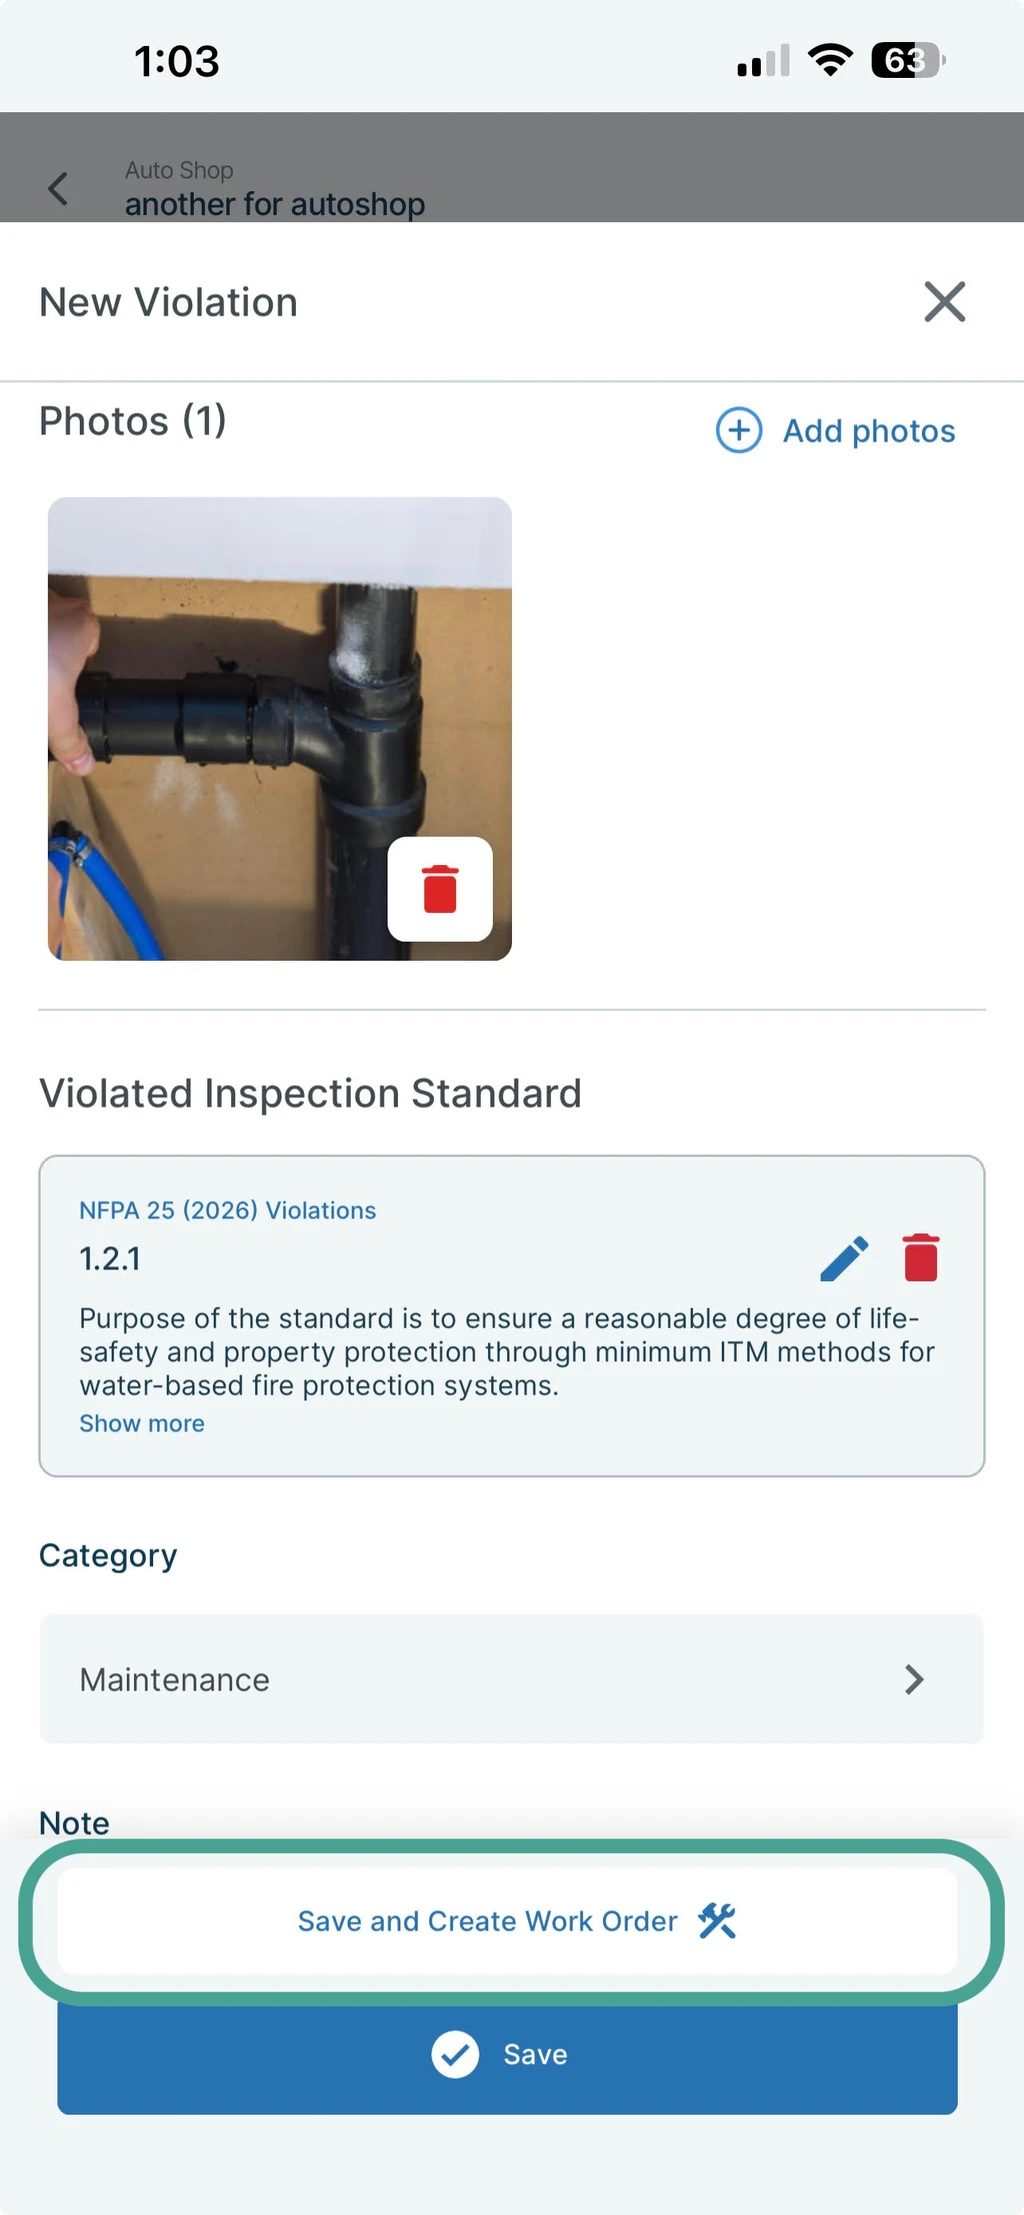
If a work order needs to be created for the violation, tap Save and Create Work Order. This opens the work order form and carries the violation and its note into the work order.
When you are finished documenting the results for a location, tap Finish Location.
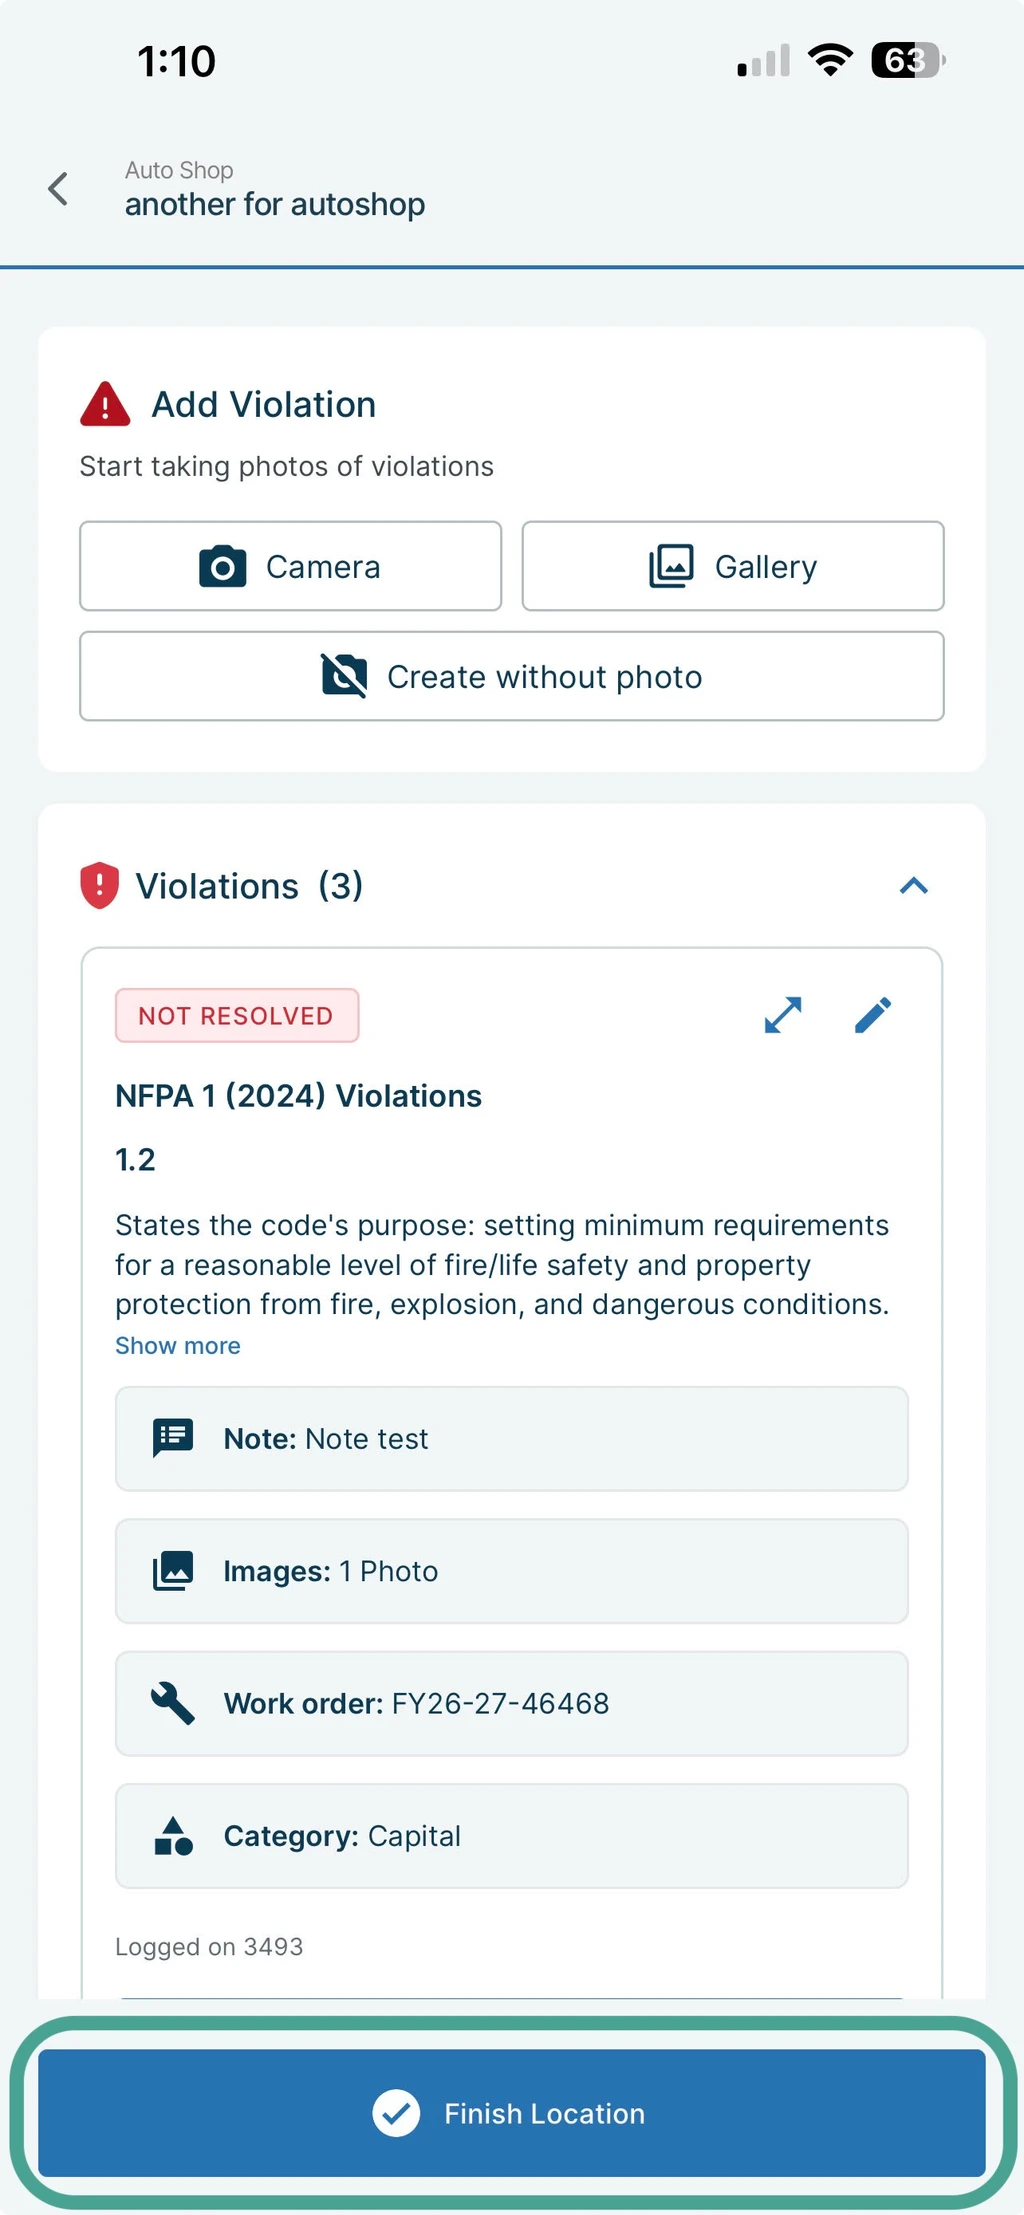
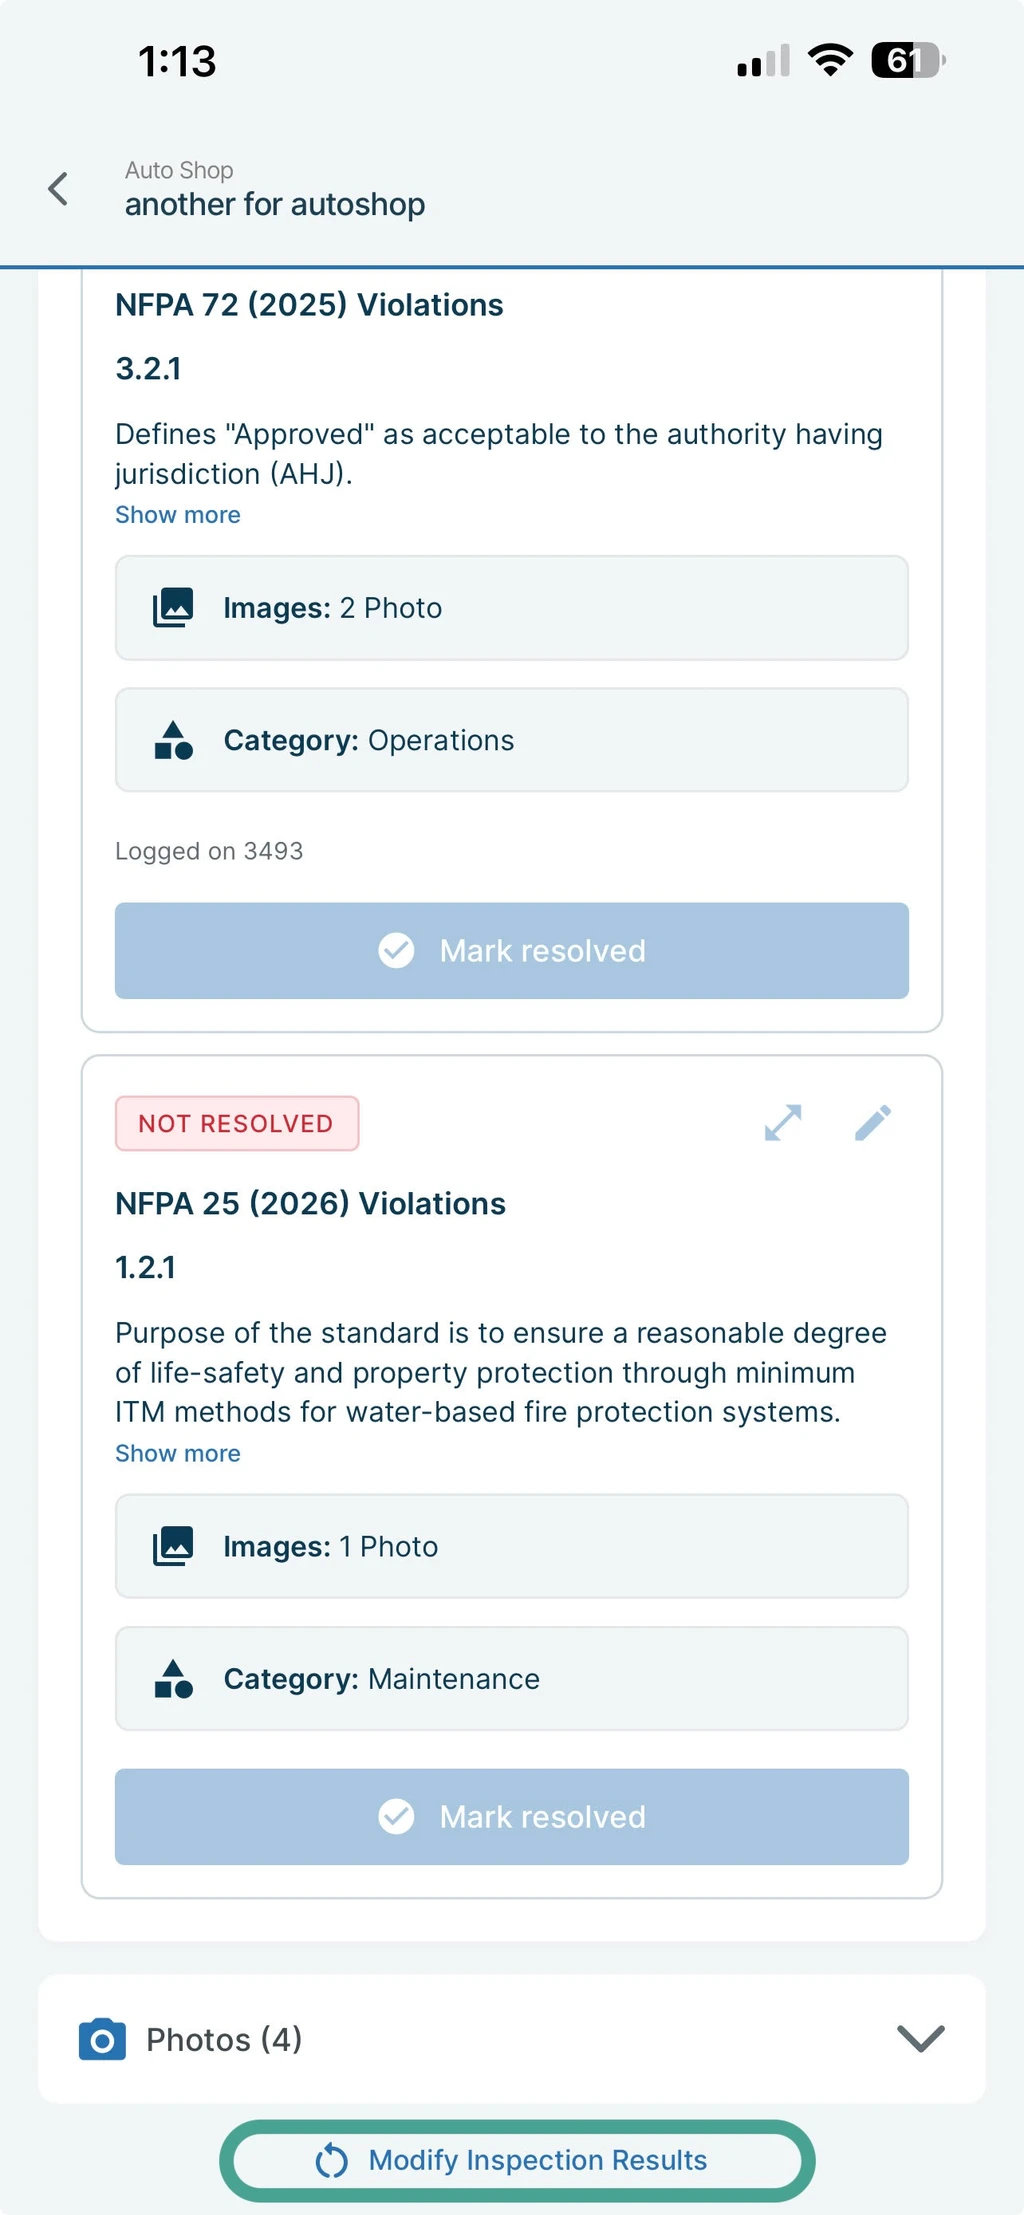
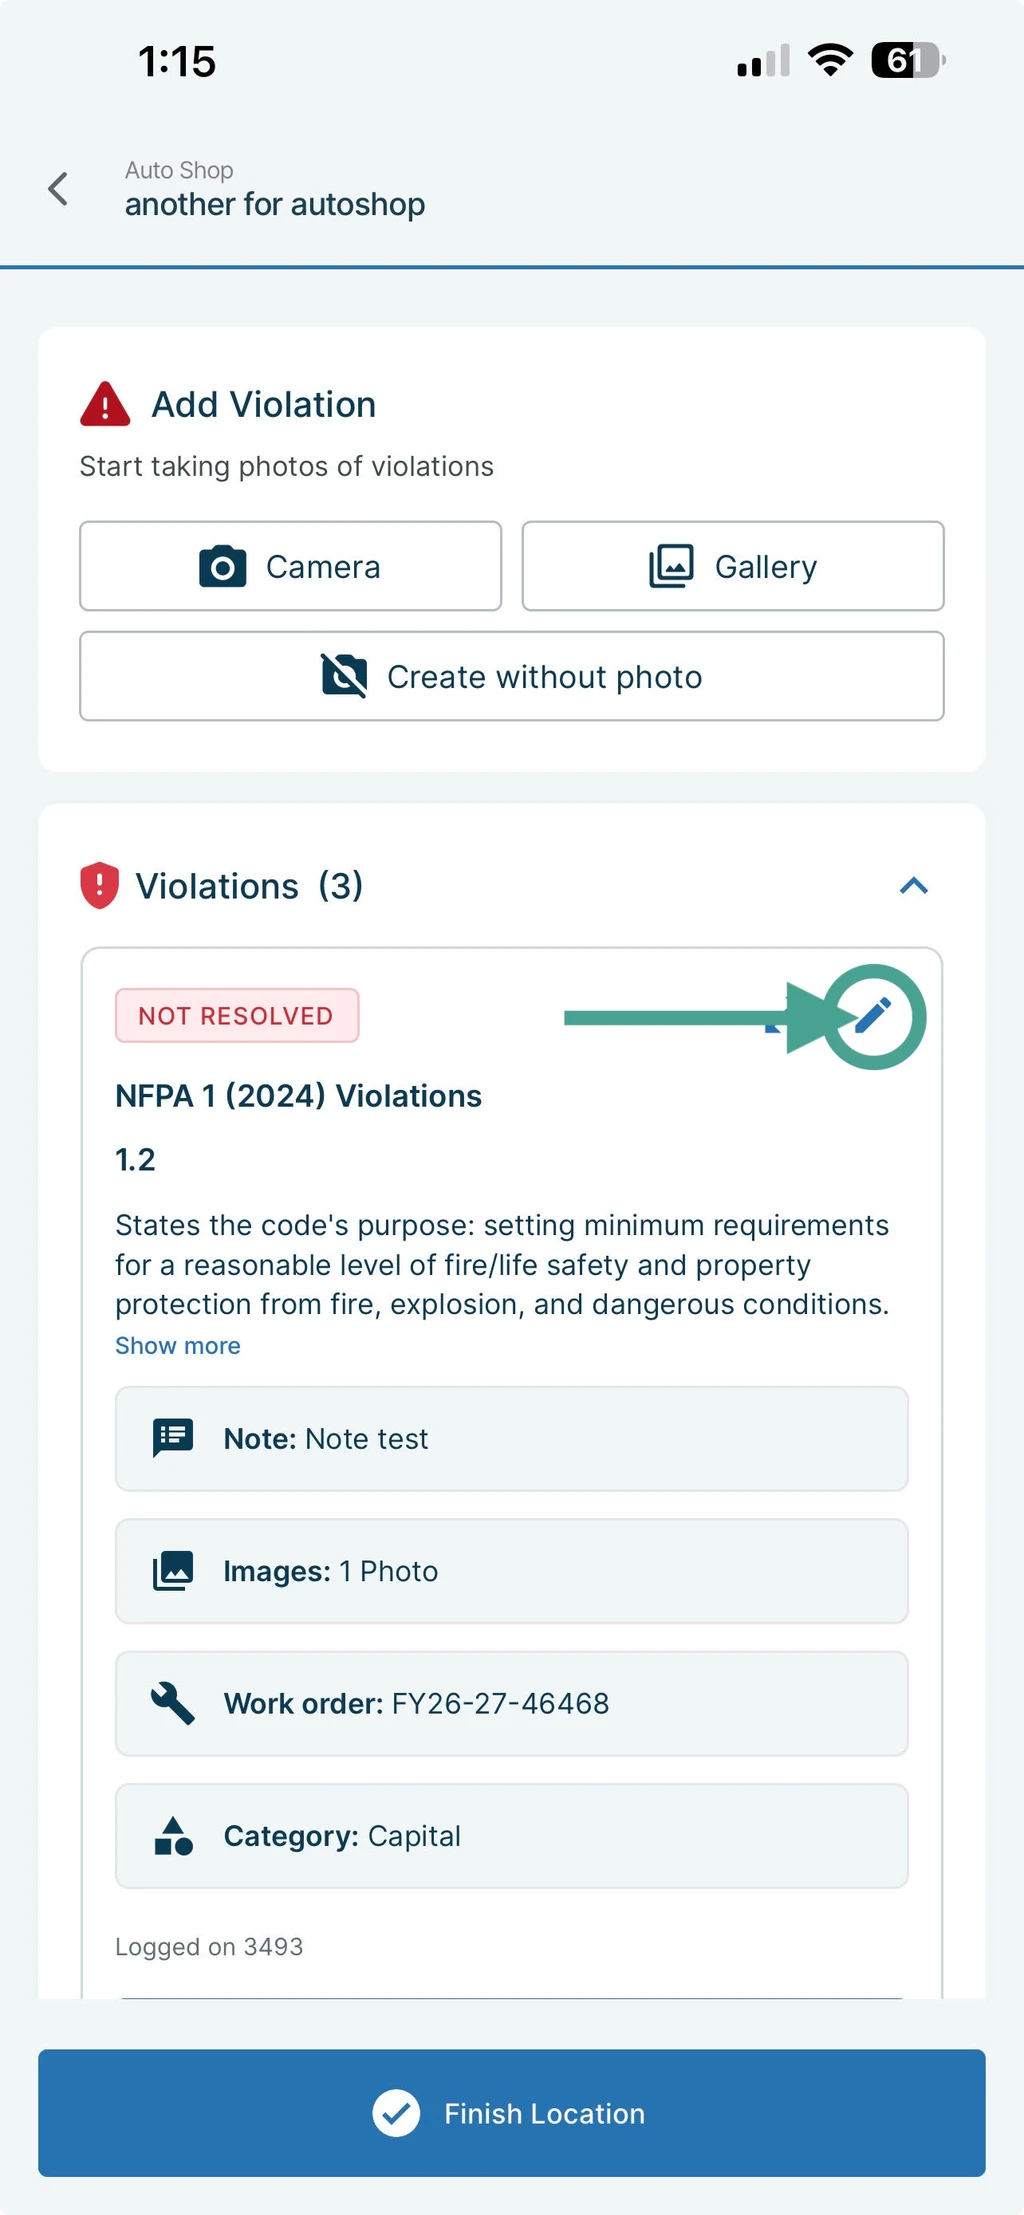
Finishing the location locks in its inspection results and marks the location complete. If you need to make a correction afterward, tap Modify Inspection Results, then use the pencil icon to edit the previously entered information.
2. Identify and Complete Locations With Violations
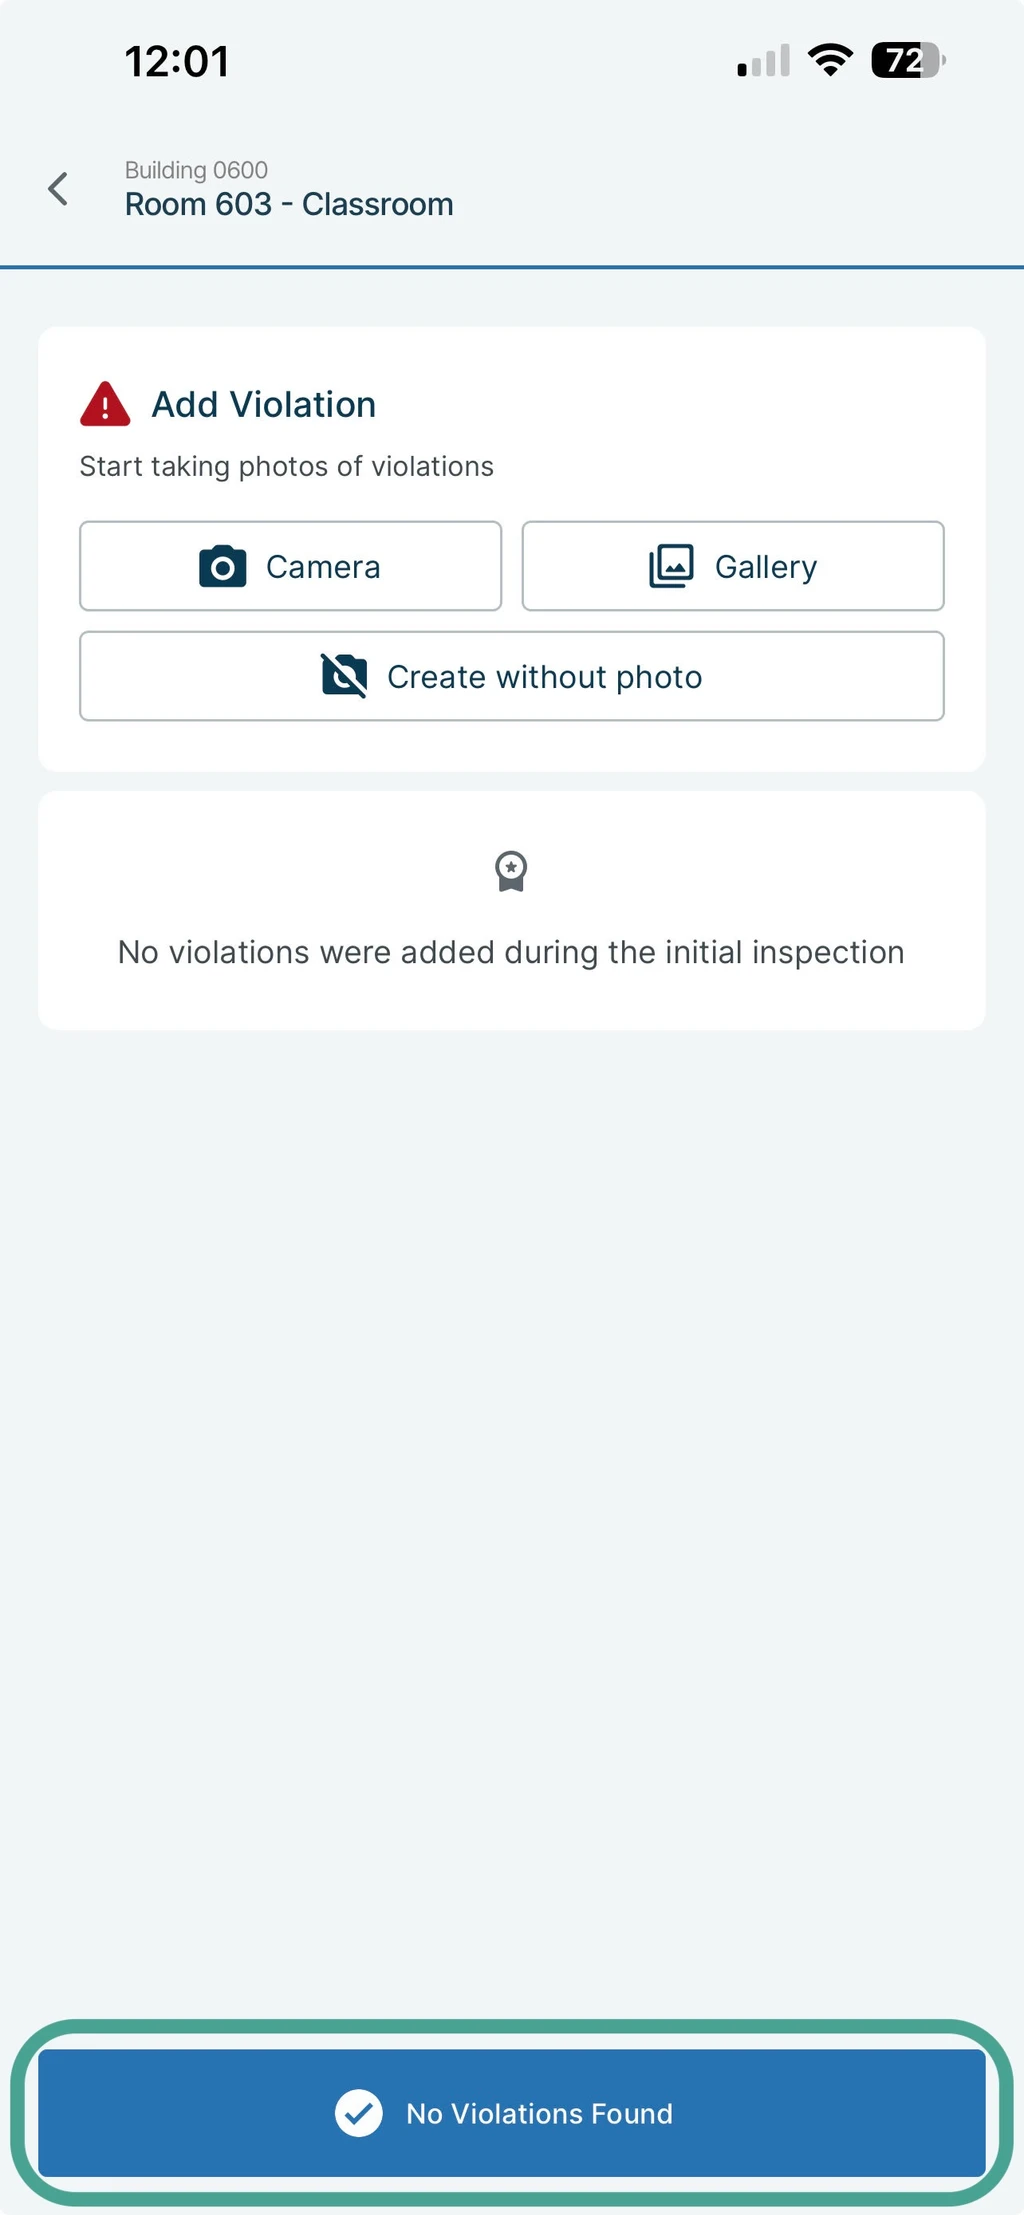
Continue through the inspection and document any additional violations. For locations where no violations are found, select No Violations Found to mark the location as passing.
If you have inspected the necessary rooms and want to mark the remaining locations in the building as passing, use Mark Remaining as Passed.
Before creating a re-inspection, make sure all applicable locations are finished. If a location is still in progress, FIT will display an alert when you attempt to create the re-inspection.
Return to the unfinished location and select Finish Location before continuing.
3. Create the Re-Inspection
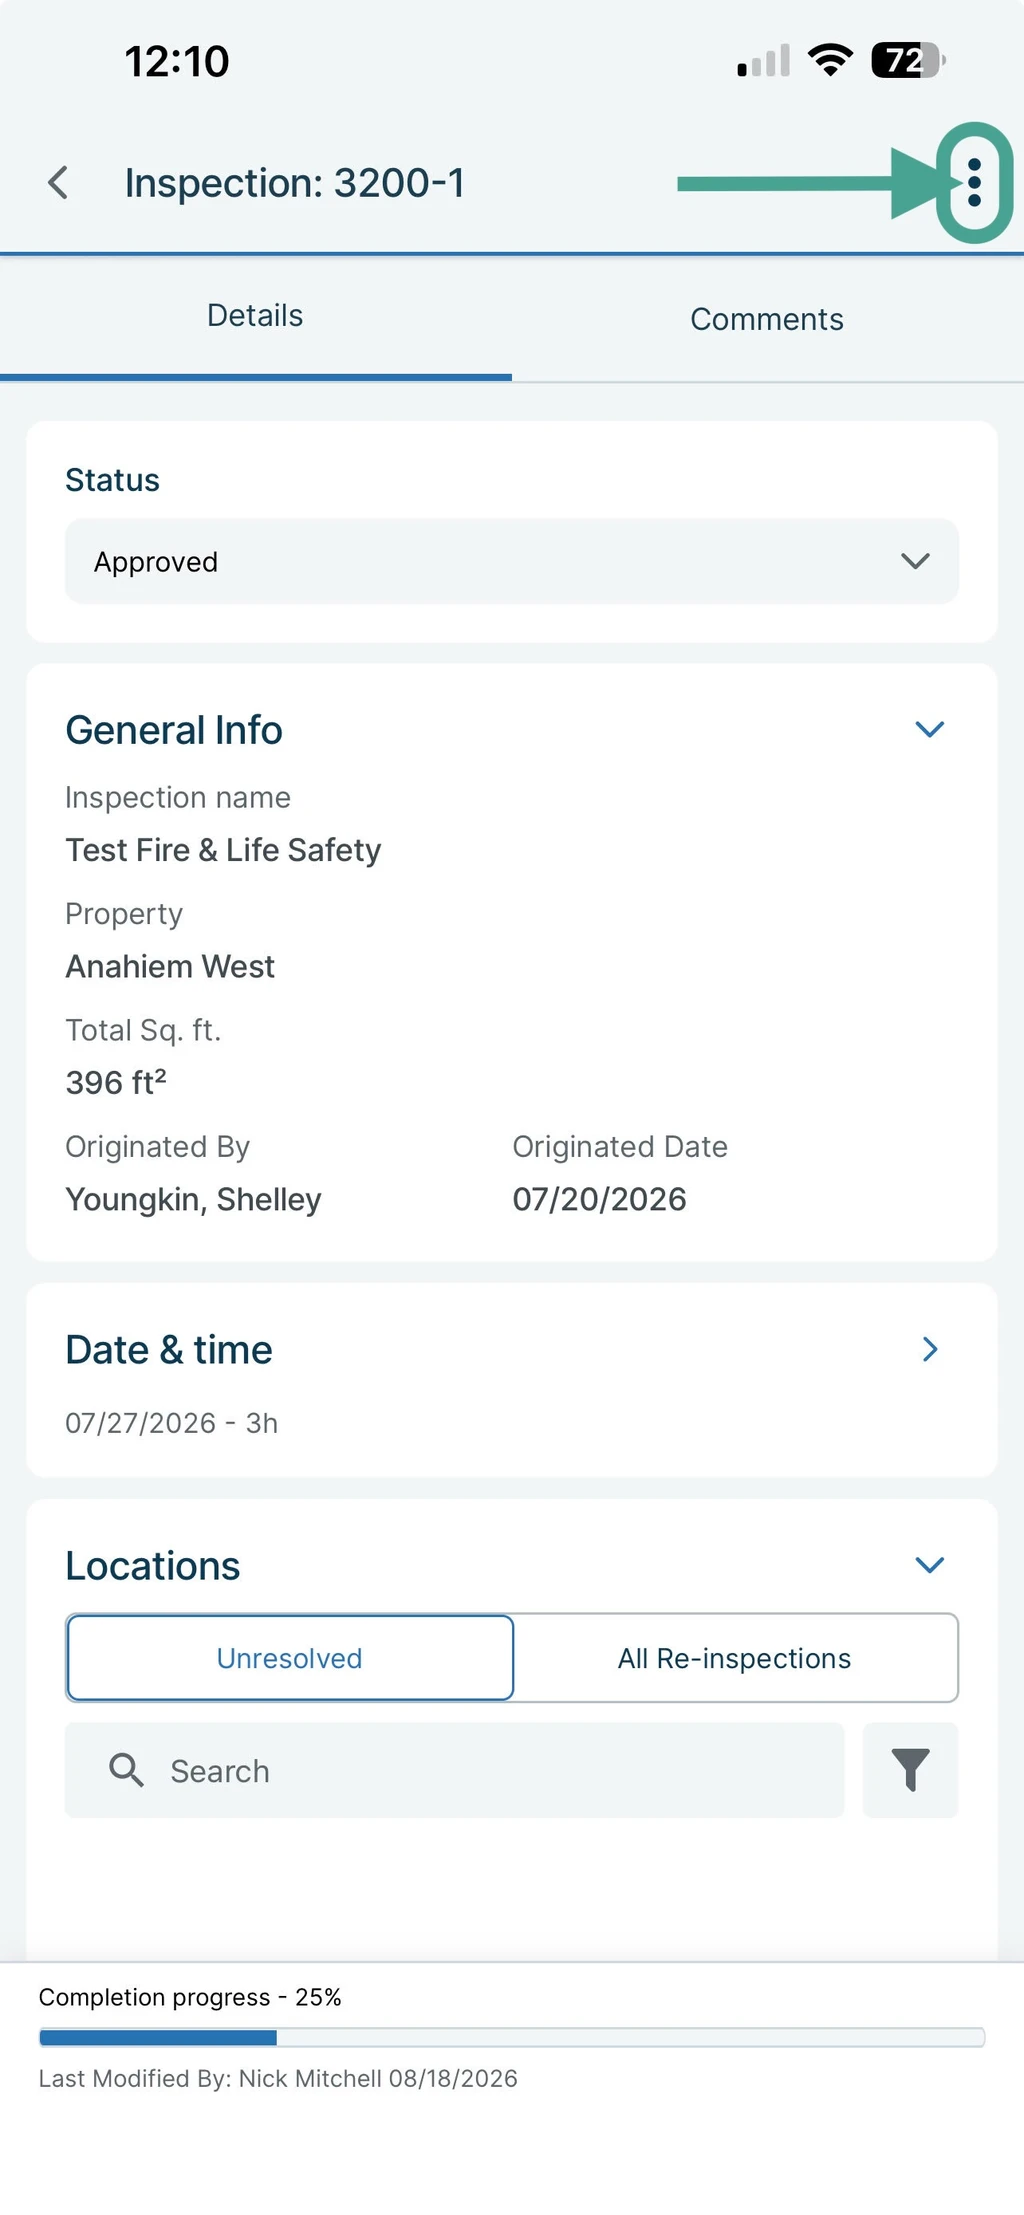
After the original inspection is complete, open the inspection and tap the ellipsis (three dots) in the top right corner.
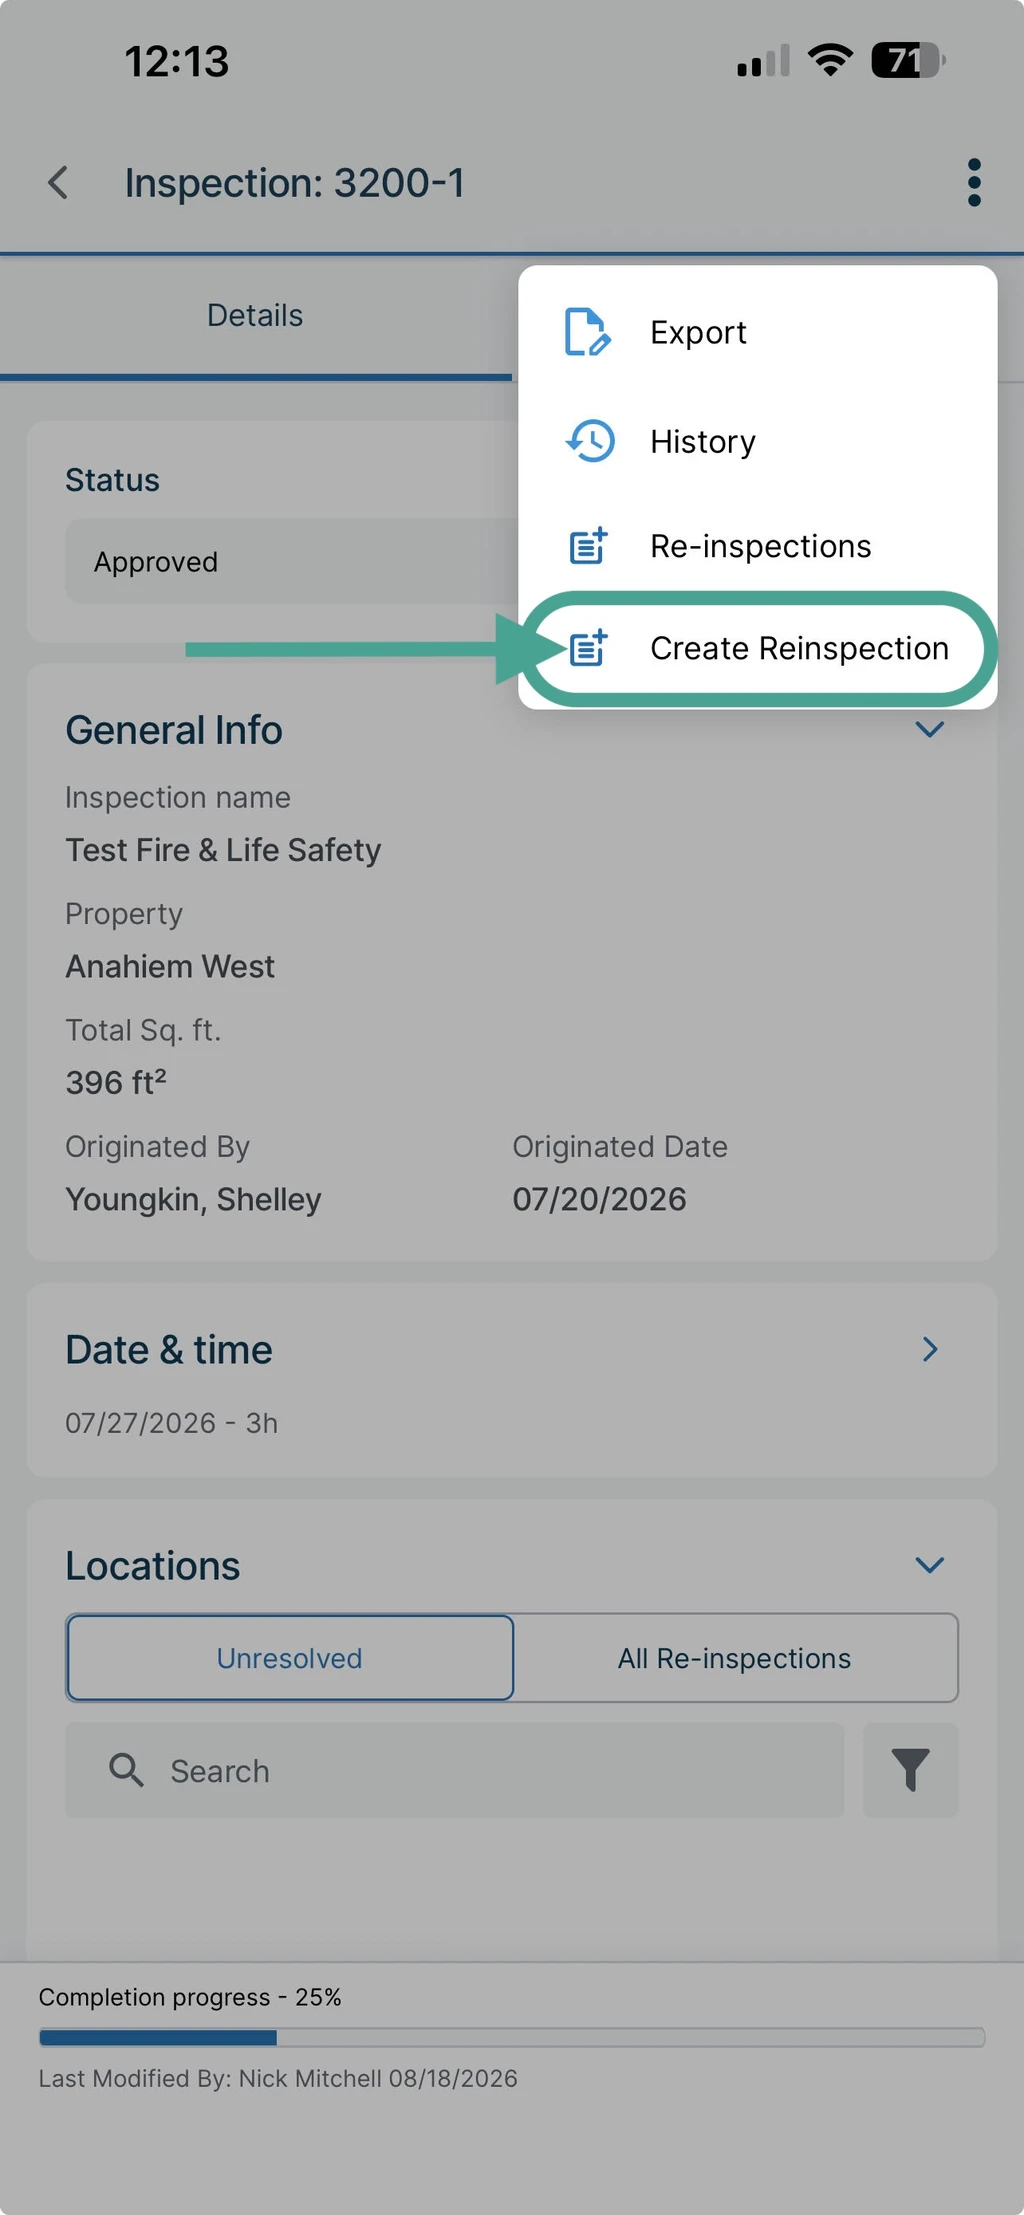
Select Create Re-Inspection.
Choose when the re-inspection should occur. You can schedule the re-inspection a specified number of days from the original inspection or on a custom date. After the re-inspection is created, it will automatically open in FIT.
4. Review Unresolved Violations
Re-inspections include an Unresolved Violations view.
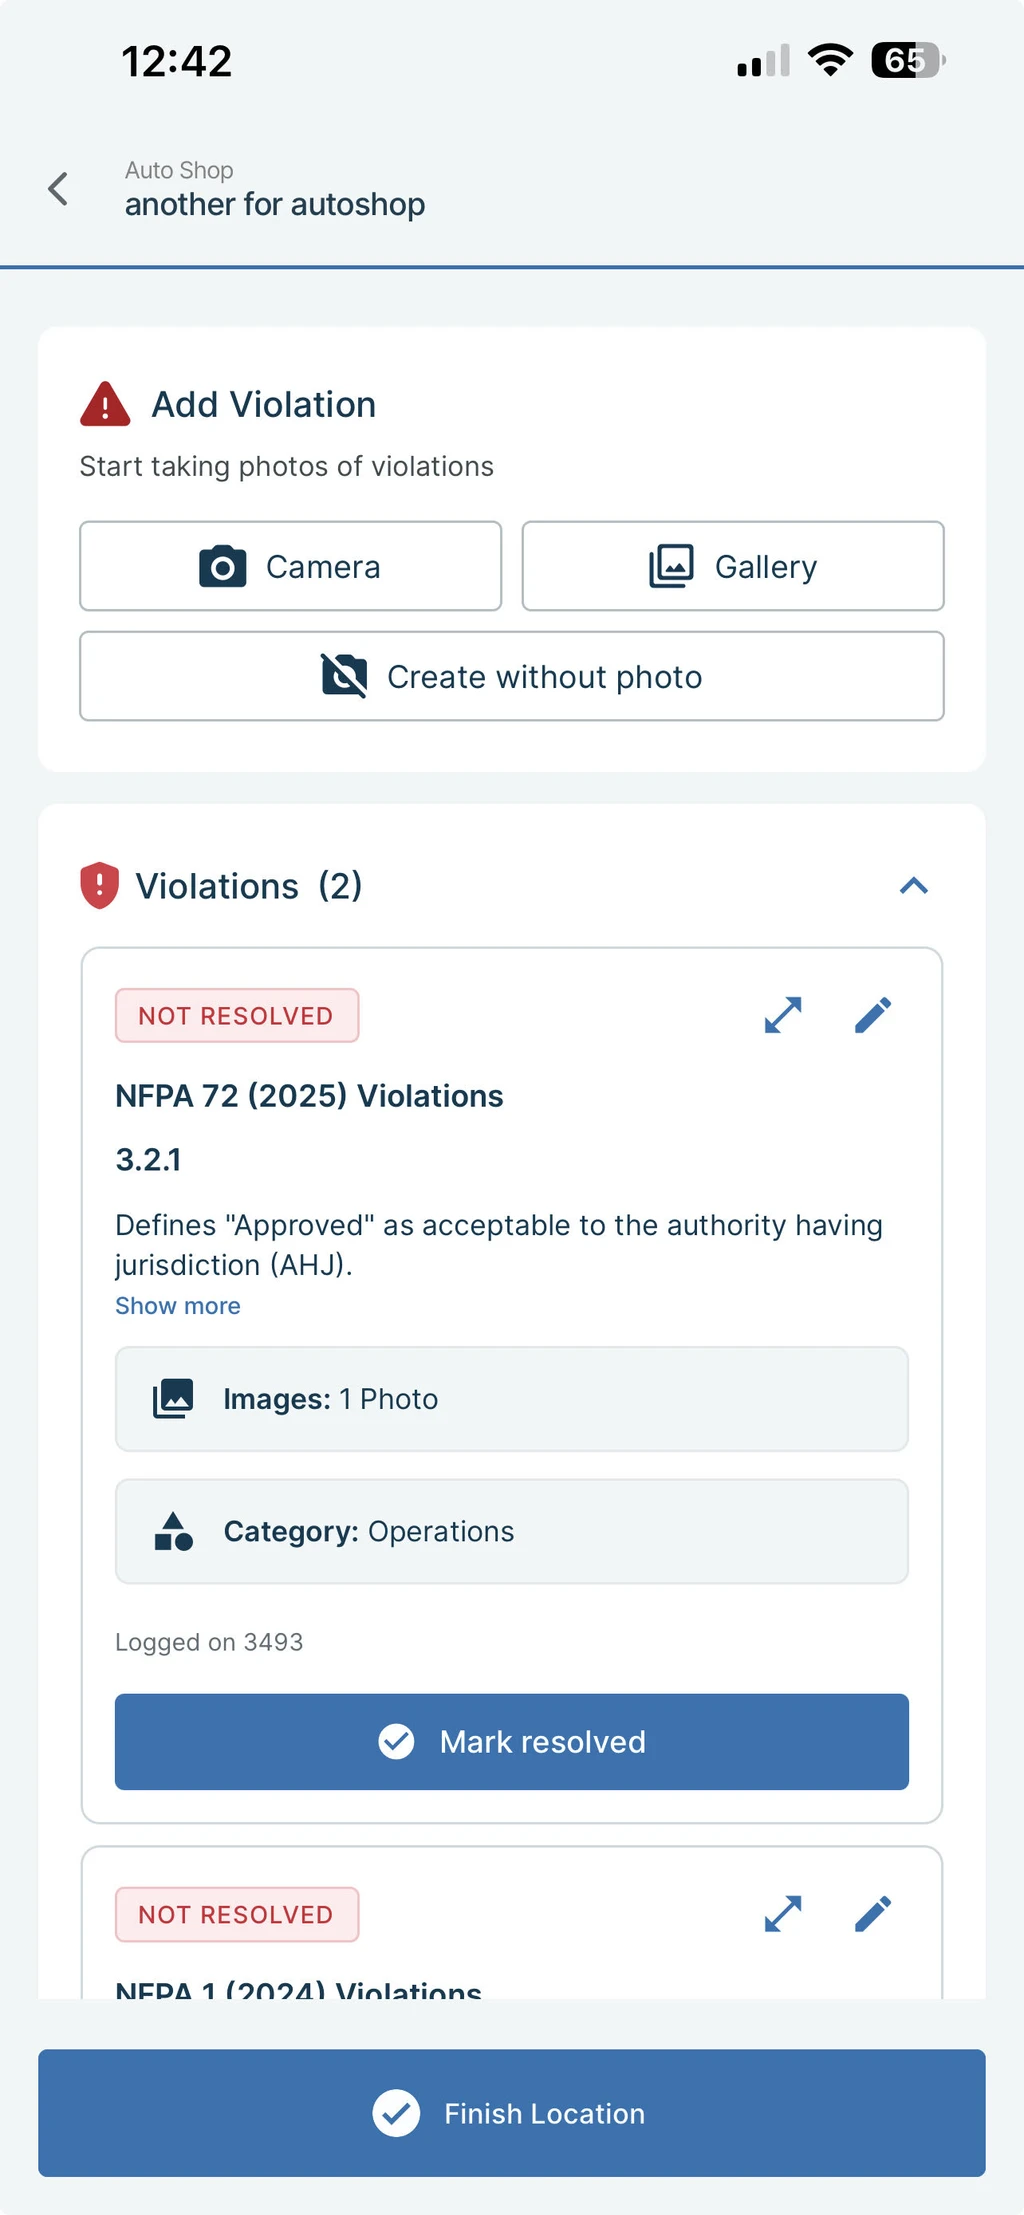
This view displays only locations that had unresolved violations during the previous inspection. You do not need to inspect every location from the original inspection again. Select a location to review its outstanding violations.
5. Verify Whether Violations Have Been Resolved
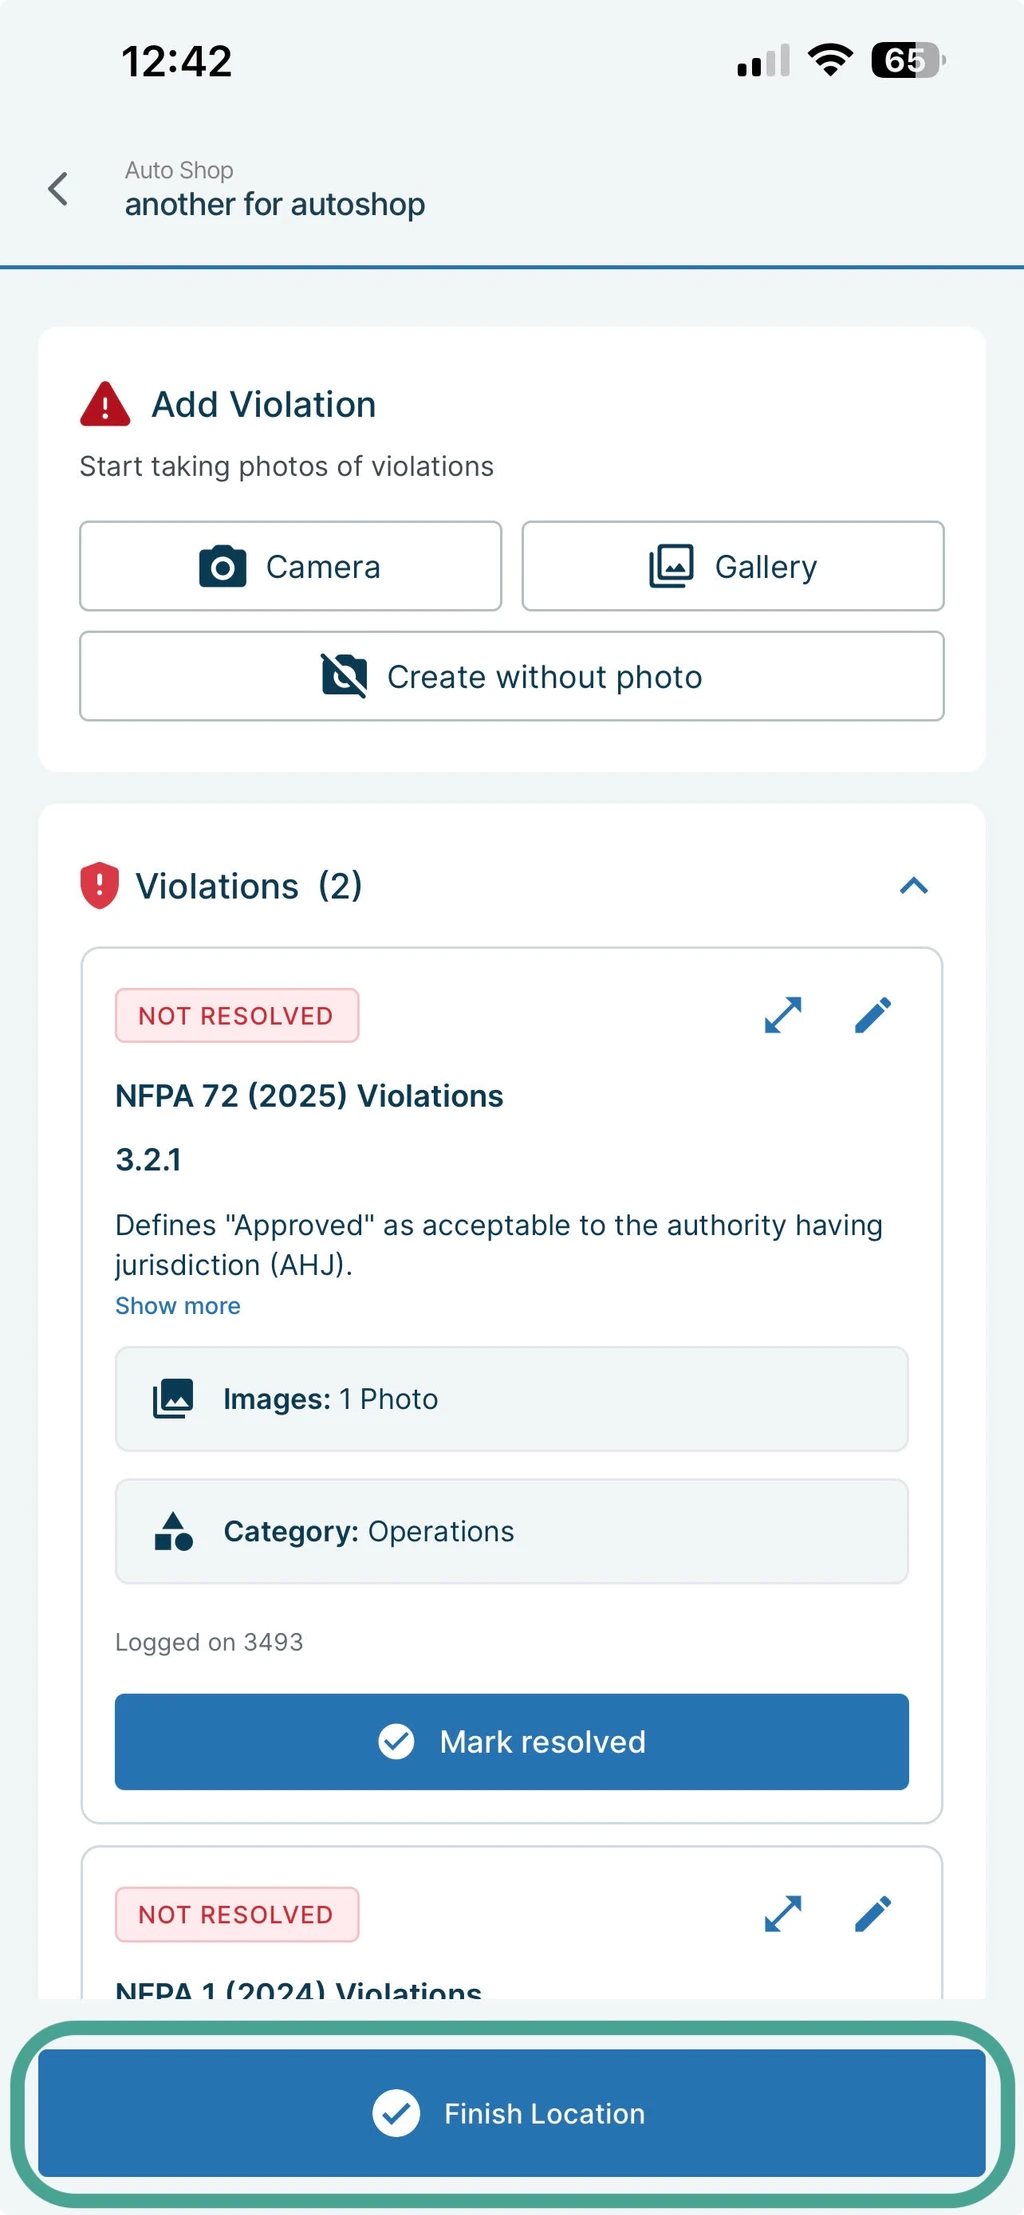
For each affected location, review the previously documented violations and confirm whether they’ve been resolved.. If the issue has been corrected, mark the violation as resolved and complete the location. If the issue has not been corrected, leave it unresolved and tap Finish Location. The unresolved violation can then continue into another re-inspection if additional follow-up is required.
Creating Additional Re-Inspections
FIT numbers re-inspections sequentially: the first uses -1, the second -2, and so on.
If a violation remains unresolved after the first re-inspection, create another re-inspection using the same process. Once a re-inspection has been created, re-inspection cards also appear in FIT. These cards show the relationship between the original inspection and its subsequent re-inspections, providing an audit trail of the inspection history and the current status of unresolved items.
For additional assistance, please reach out to Facilitron Support at (800) 272-2962, or email us at support@facilitron.com.
Was this article helpful?
That’s Great!
Thank you for your feedback
Sorry! We couldn't be helpful
Thank you for your feedback
Feedback sent
We appreciate your effort and will try to fix the article