This article guides users in adding equipment to their asset inventory in WORKS.
Note: The optional user menu Regional Roll Up Reporting must be added to your role in WORKS to continue. This will give you access to the ellipses icon and corresponding menu options that are shown in the examples below. Please reach out to M&O leadership or your Facilitron account manager to confirm if Regional Roll Up Reporting should be added to your WORKS profile.
Overview
Facilitron Works is capable of tracking asset costs, maintenance, and manufacturer recommended routine maintenance on said asset. Once fixed assets are added to the system, work orders can be assigned or associated with these fixed assets to allow the tracking of maintenance costs associated with all the major assets being maintained by the district. You can see the various data points the system can track on the asset inventory page by clicking the Add New button.
Asset Inventory
Inventory is broken up into Assets or Consumables.
- Assets are usually higher-dollar-value pieces of equipment that a district uses and maintains (e.g., HVAC units, vehicles, computers, power washers etc.).
- Consumables are items that are typically expensed or used up (e.g. toilet paper, soap, etc.).
Building Asset Inventory on Works
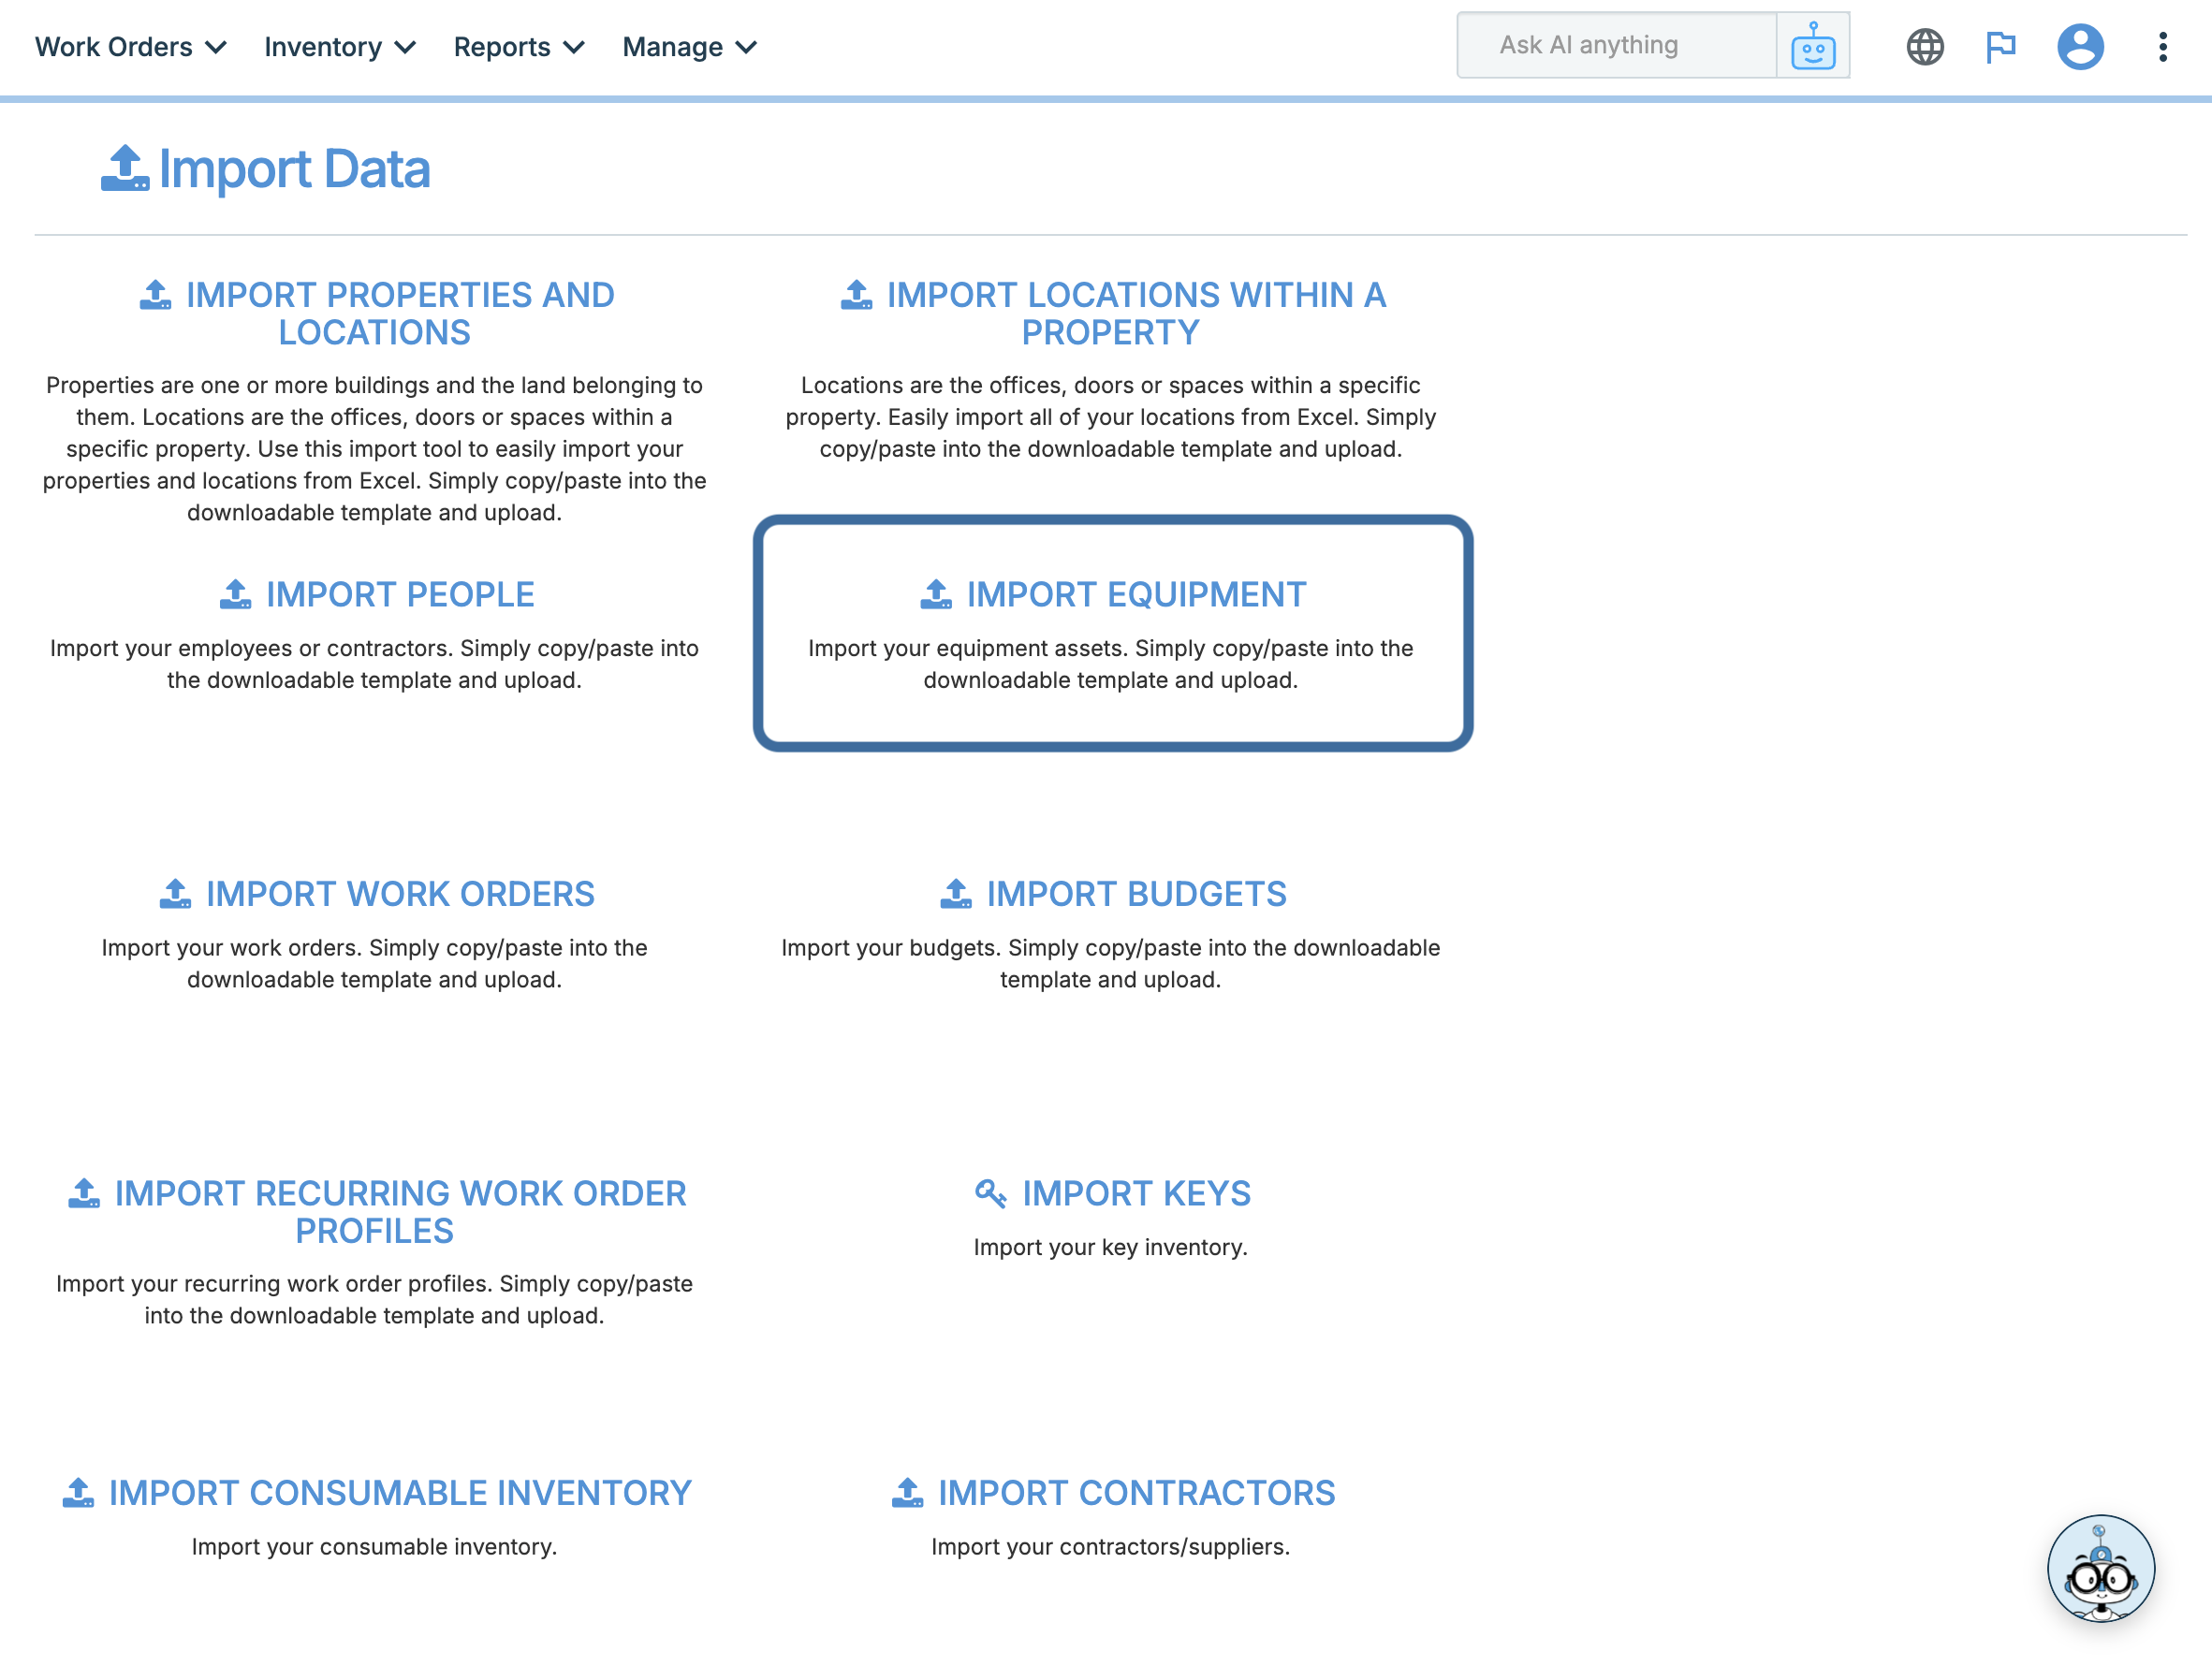
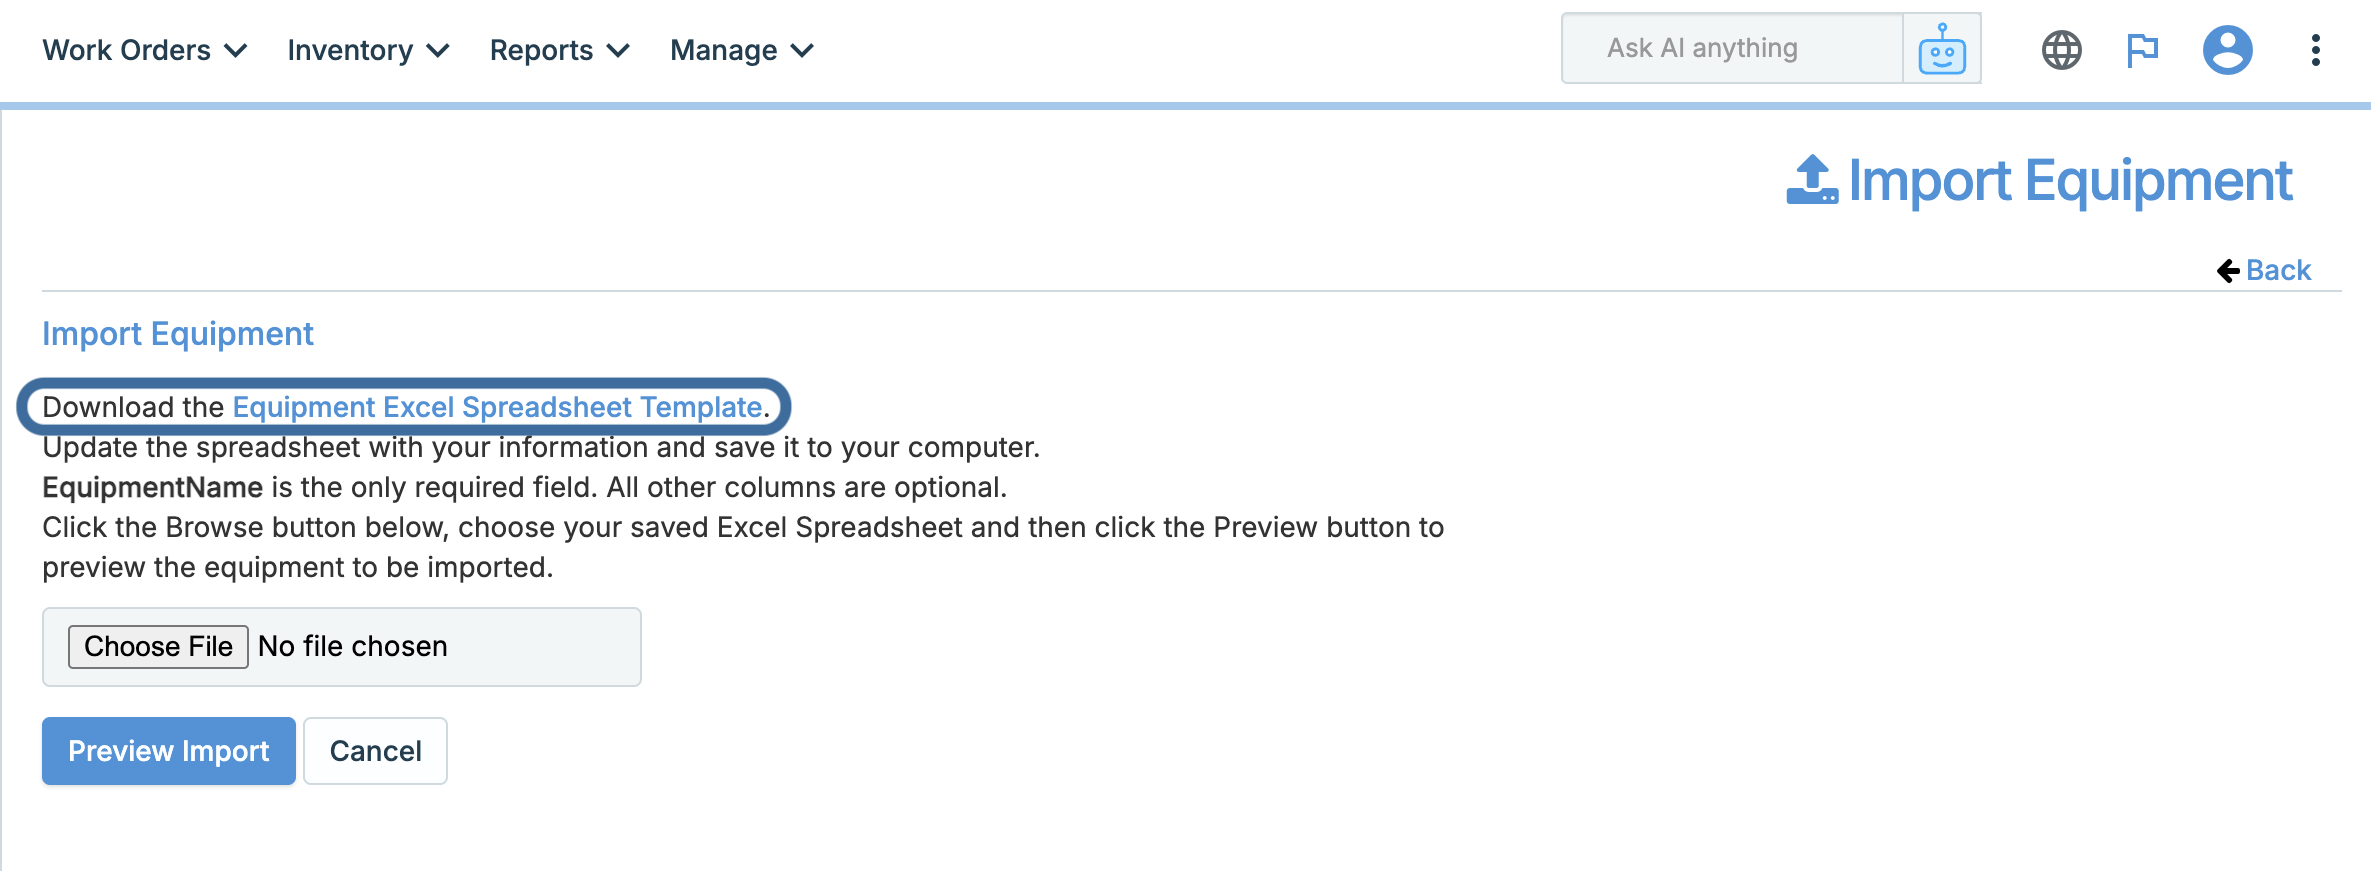
Typically, assets can be uploaded into WORKS by using an export from your accounting system. A formatted Excel spreadsheet template is provided for proper formatting. This template can be found by clicking the vertical ellipses in the upper right corner > clicking Import Data > select IMPORT EQUIPMENT on the next page> click Equipment Excel Spreadsheet Template on the final page to download the template. This process is demonstrated below.
1.
2. 
3. 
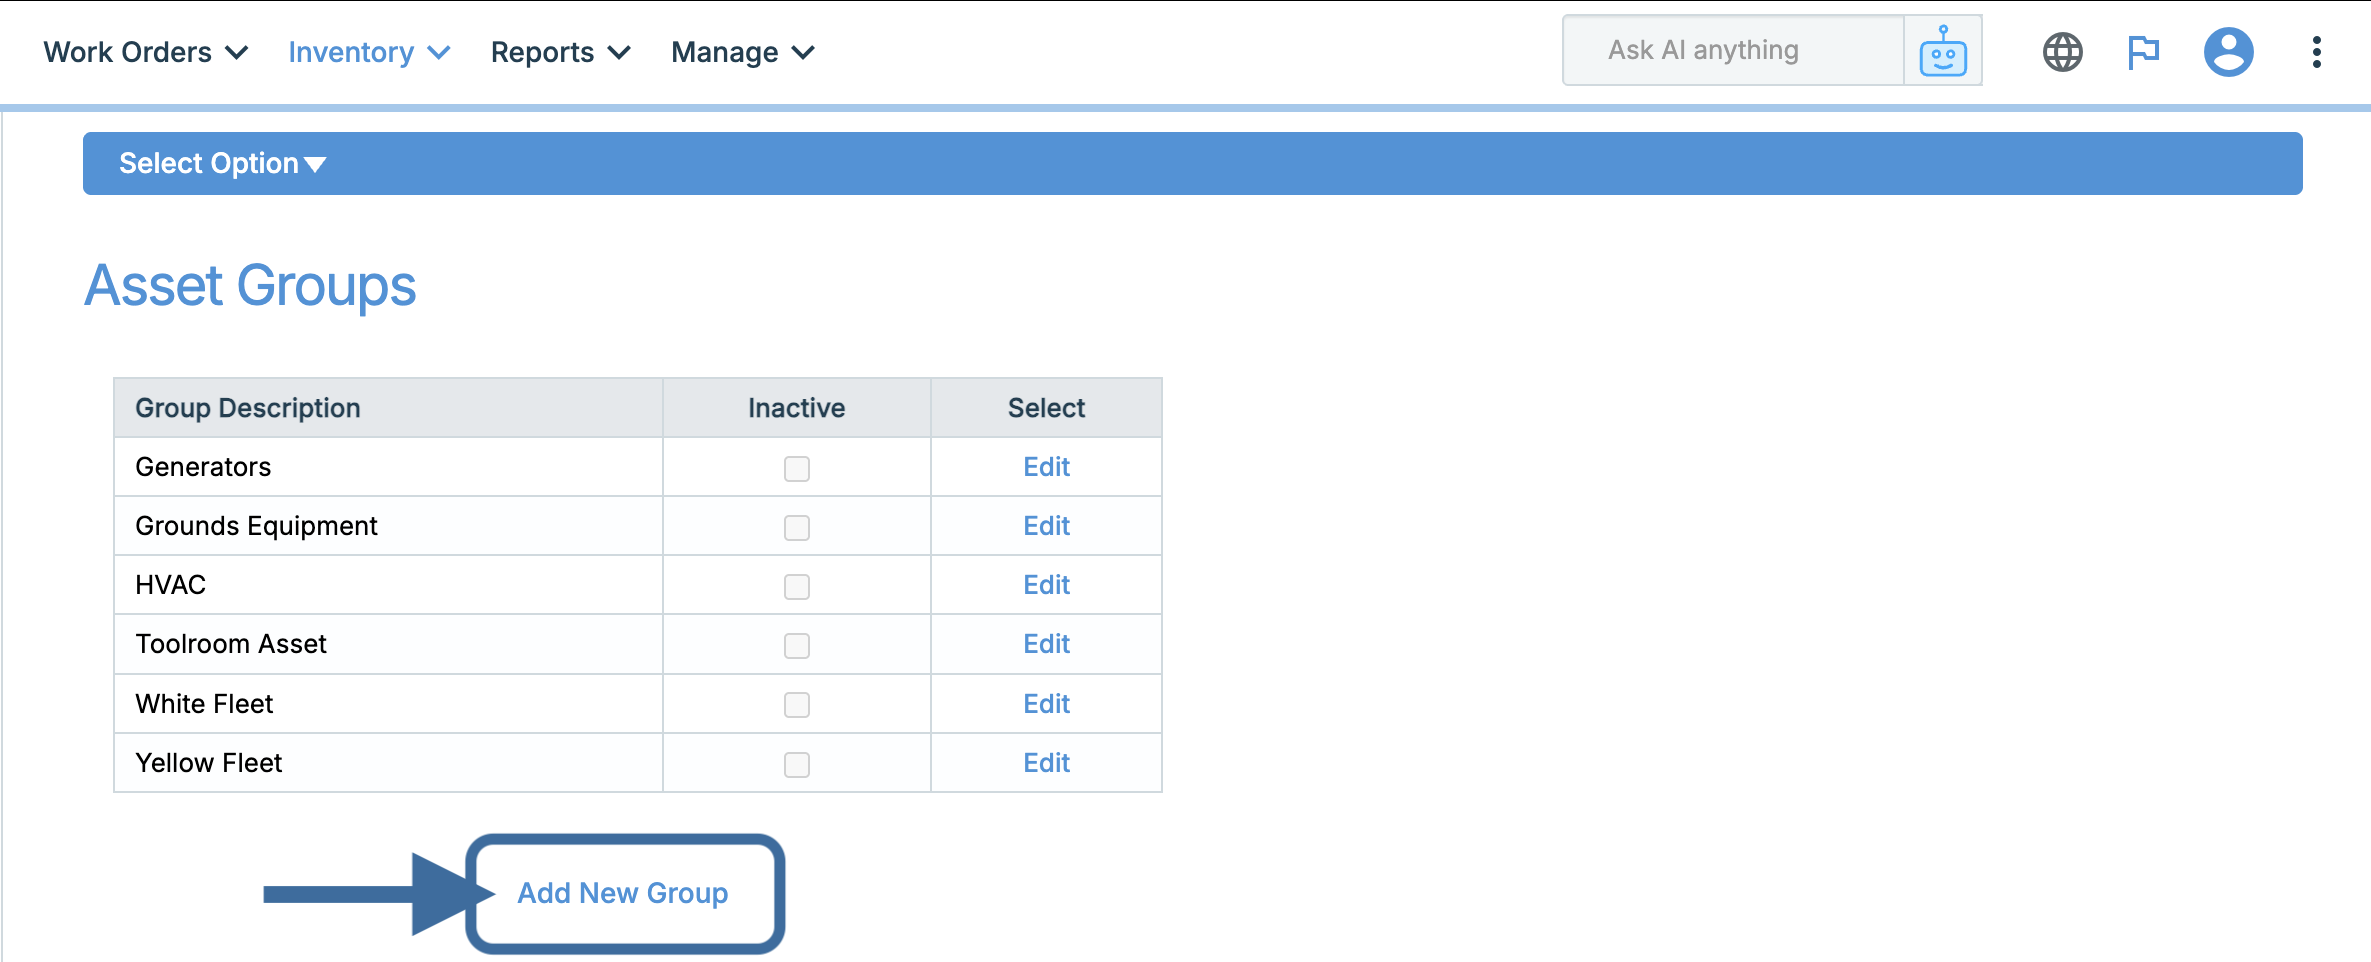
Assets belong to various groups like Generators, HVAC, Vehicles etc. These groupings allow you to appropriately sort your assets lists to focus on the specific type of asset you are working with. Asset groups can be added by going to Inventory > Assets > Asset Groups and clicking Add New Group. To view these groups, you can export asset data by going to Reports > Exporting > Export Asset Data.
Adding New Assets on Works Manually
1. Go to Inventory > Assets > Assets/Equipment. Click the blue Add New button.
2. Add the information pertaining to your asset. As a best practice, the Asset Name and Property/Location should always be included. To allow users to select the asset on work orders, check the box next to Allow Users to Select for Work Orders. This is roughly halfway down the page.
You can include as much information as needed regarding the asset by filling out the corresponding fields on the page. Click Insert at the bottom of the form to submit.
For additional assistance, please reach out to Facilitron Support at (800) 272-2962, or email us at support@facilitron.com.
Was this article helpful?
That’s Great!
Thank you for your feedback
Sorry! We couldn't be helpful
Thank you for your feedback
Feedback sent
We appreciate your effort and will try to fix the article