This article will assist Order Administrators and Order Processors with submitting RWOs for preventative maintenance and other recurring maintenance tasks. Use the links below to jump to a specific section.
- About Recurring Work Orders (RWO)
- Inspection Profile Setup
- Adding Properties/Locations/Assets
- Scheduling
- Configuring a Schedule
- Inspection Tasks
- Attachments
- Viewing Profile Statuses
- Viewing & Modifying Existing Work Orders
- Updating the Schedule for an Existing Profile
About Recurring Work Orders (RWO)
Recurring Work Orders (RWOs) and Preventive Maintenance (PMs) work orders are essentially the same. In Facilitron Works, they are referred to as RWOs to clarify that these types of auto generated work orders are simply recurring, and can be used for any kind of maintenance - not only preventative maintenance. An RWO can also be created for any inspection (e.g., quality of service reminders or a task list to be performed at a certain time of year).
RWO’s may also have tasks added to them, enabling you to create multi-point inspections. We will go through this below as well.
Inspection Profile Setup
General Information and Frequency
From the navigation bar at the top, go to Work Orders > Recurring > Add/Edit Inspection Profile. Within this profile, you may designate an RWO’s frequency - weekly, monthly, quarterly, etc. Click Add Profile to create a new RWO.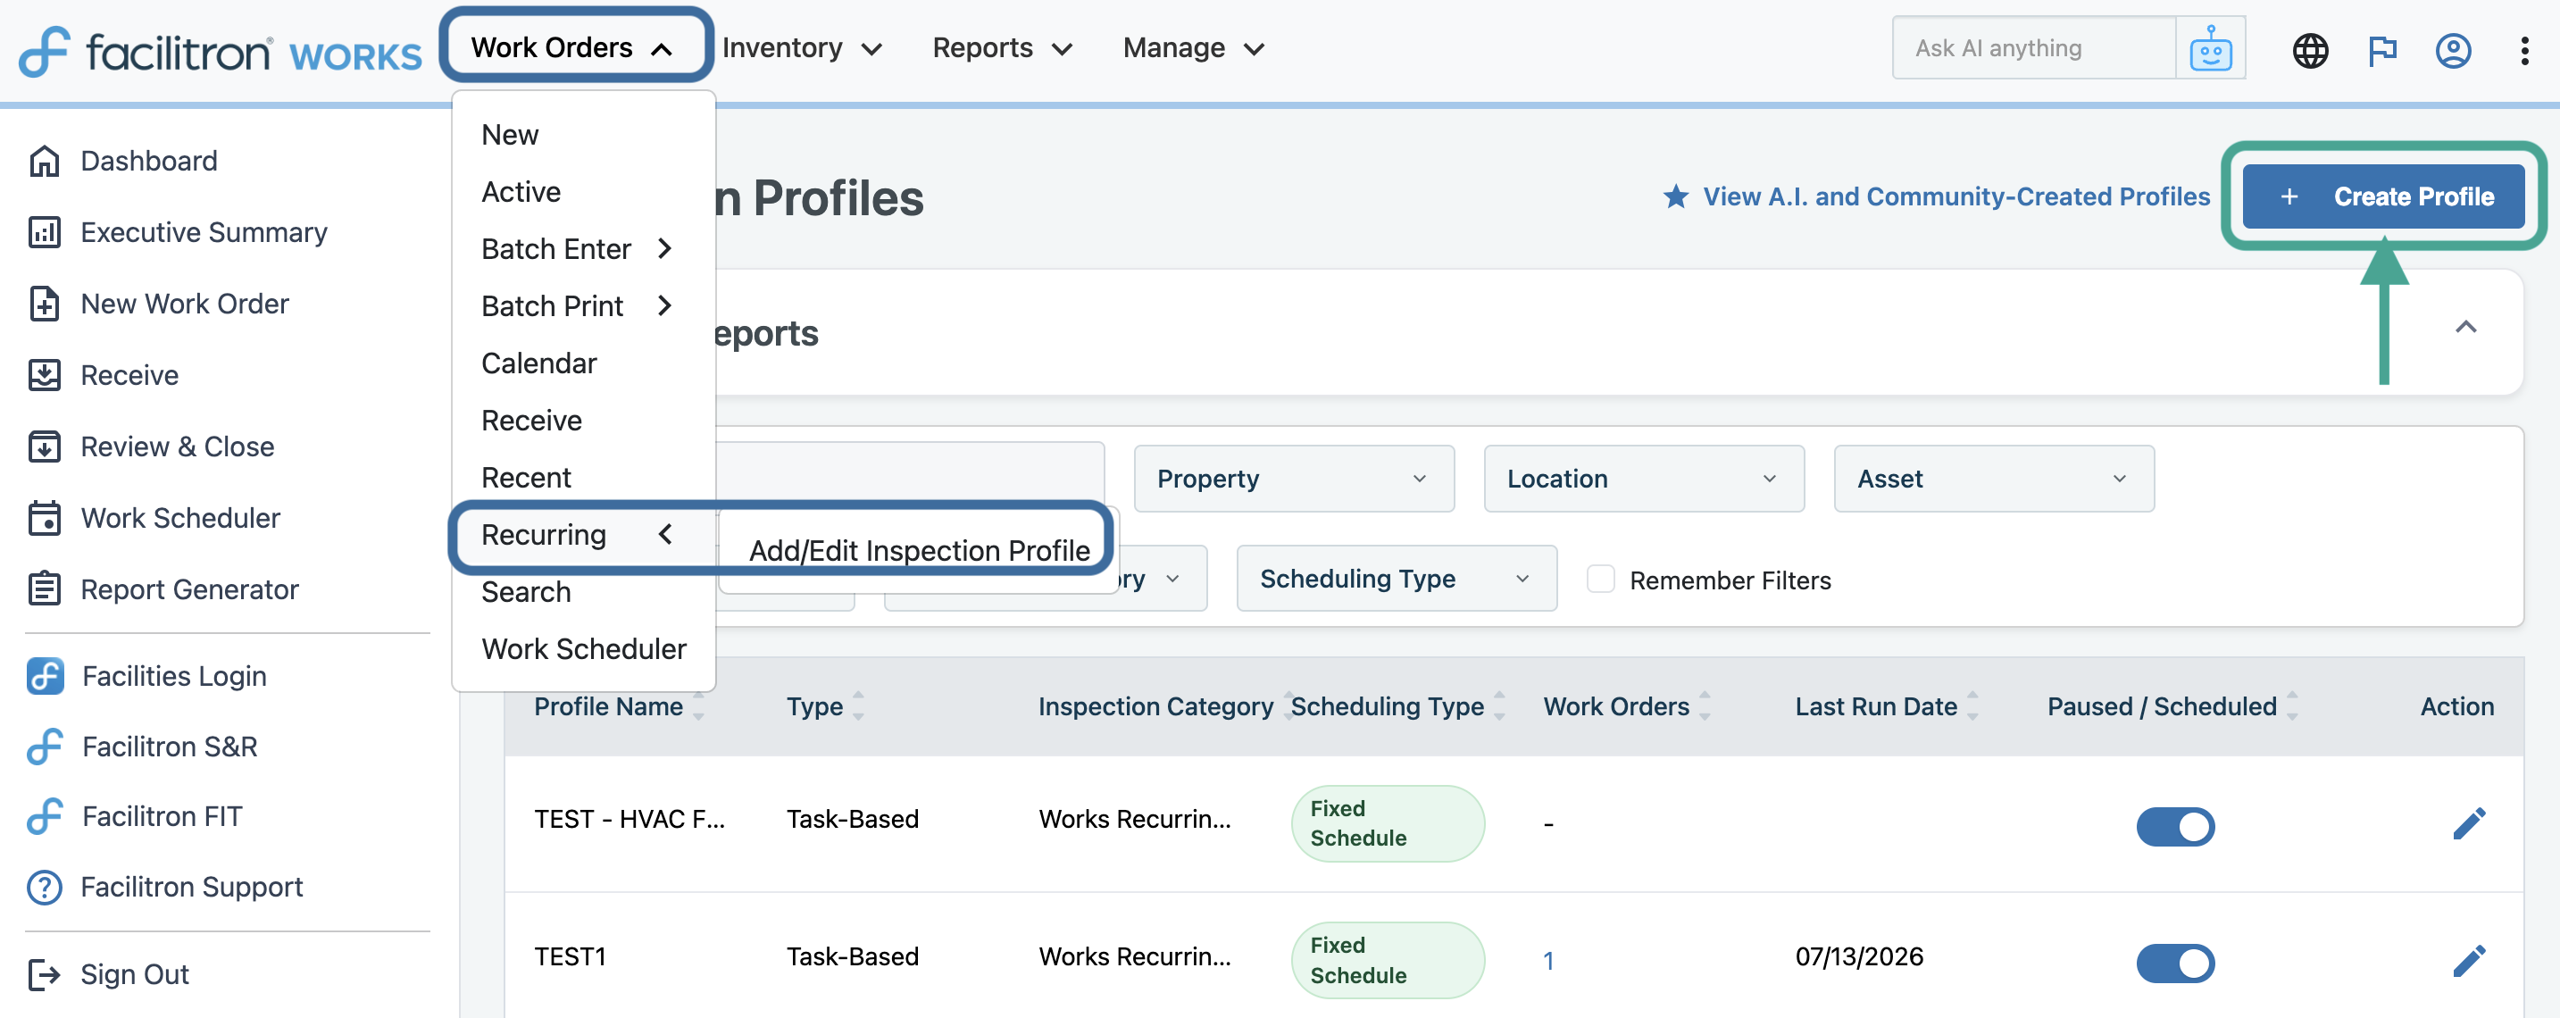
Next, fill in the blanks on the form and press Save. A profile name and inspection category are required.
Then, fill in the following fields as needed for the inspection profile. Purpose and Status to Assign are required. These are located in the Elective Settings section.
 The fields present in the General Info and Elective Settings sections are further explained below:
General Info
- Profile Name: This populates in the Description box when a work order is generated from the profile.
- Inspection Category: This classification used to organize inspections by type or operational purpose.
- Inspection Standard: If the RWO profile you are creating requires this, you can configure it via Manage > Web Site Configuration > Inspection Standards & Ratings, otherwise you can default to Not Set.
- Governing Agency: This is an optional field. Complete only if applicable to this profile.
- Governing Code ID: Optional field. Enter only if a governing code or compliance requirement applies.
- Materials: Optional field. Include materials only if they are relevant to this profile.
Elective Settings
- Purpose: The purpose is the most general categorization of a work order, primarily used to route work orders to the correct department. For RWOs the purpose is usually preventative maintenance. This dropdown includes other pre-configured purposes to choose from to fit a wide array of maintenance needs.
- Trade: The trade determines which type of staff will be getting the work done (e.g. grounds, custodial, etc). Assigning a trade allows all workers assigned to the selected trade to access the RWO if needed.
- Work Category: Work category is a specific label to categorize the type of work getting done related to the trade and purpose.
- Calendar Foreground Color: This is optional. Here, you can set the text color for work orders generated from this profile when displayed on the calendar.
- Calendar Background Color: This is optional. Here, you can set the background color for work orders generated from this profile when displayed on the calendar, helping visually identify this type of recurring work on the schedule.
- Status to Assign: If a status is selected here, the status will automatically be applied to RWOs created using this inspection profile.
If no workers or contractors were selected, set the Status to Assign to "Approved" for the newly created RWOs to populate in the Receive screen. Options in the Receive screen can also be used to add further dimension to work orders, e.g., assigning to a site’s supervisor. You may also set RWOs to an Approved status so they appear on the Receive screen or in the Dispatcher inbox where the supervisor can assign as needed.
The Status to Assign can be set to Received to have the work orders directly sent to the worker or contractor if a default worker or contractor was selected.
Note: NEVER set "Status to Assign" to "Received" or "Assigned" with no workers or contractors. If this happens, no one will be assigned to the work order, and it will not be completed.
Status to Assign can also be set to "Approved" to have the work orders still populate in the Receive screen with the worker pre-selected.
- Priority: The priority helps identify the urgency of the work order, ensuring the work order is addressed as quickly and efficiently as possible. Here you may designate if an RWO is low, medium, or high priority.
- Requestor: The person who requested the work order.
- Contact Email: The email address for the person who requested the work order
- Budget: This dropdown lists available budget lines to assign to the work order. When recurring work orders are created, the budget code will only be assigned to work orders whose location supports the selected budget code.
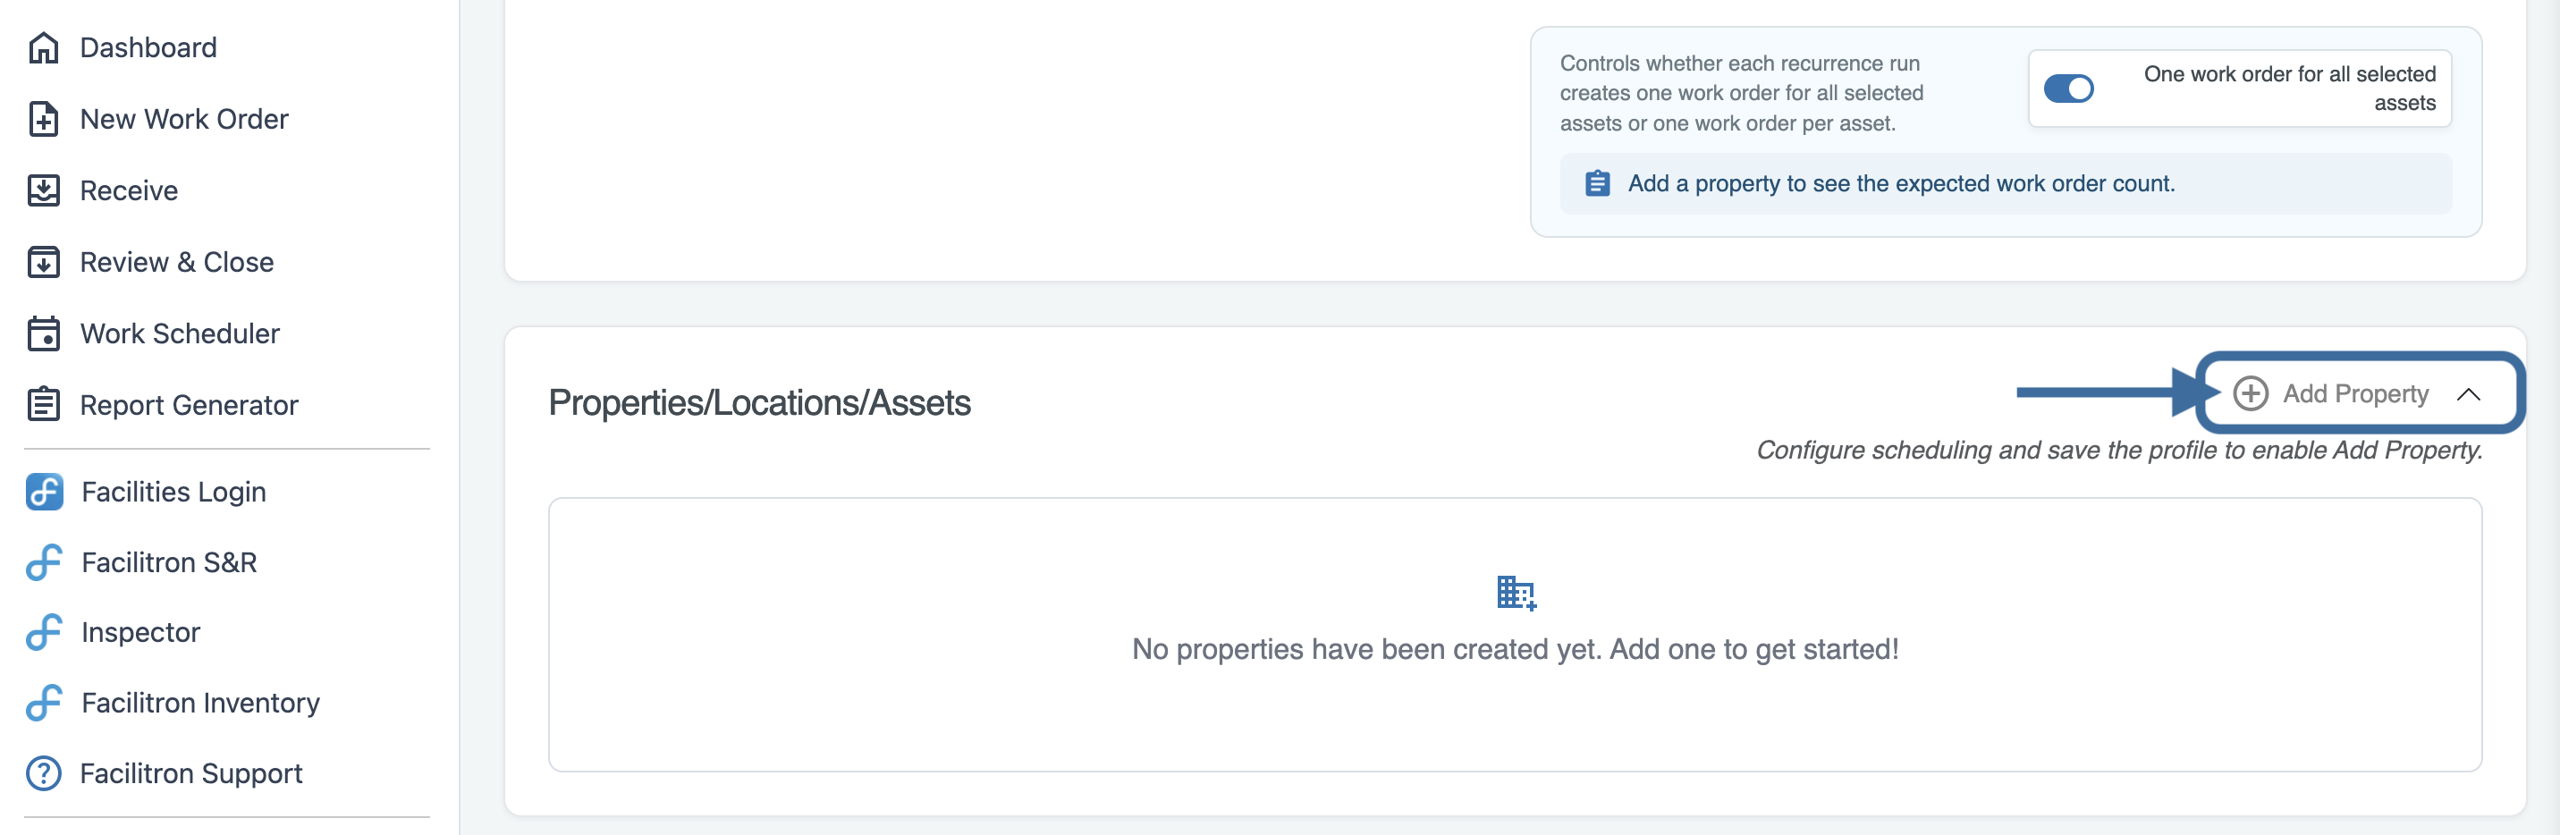
At the end of the Elective Settings section, you’ll see an option to create one work order per selected asset. This setting controls how RWOs are generated when multiple assets are associated with the profile.
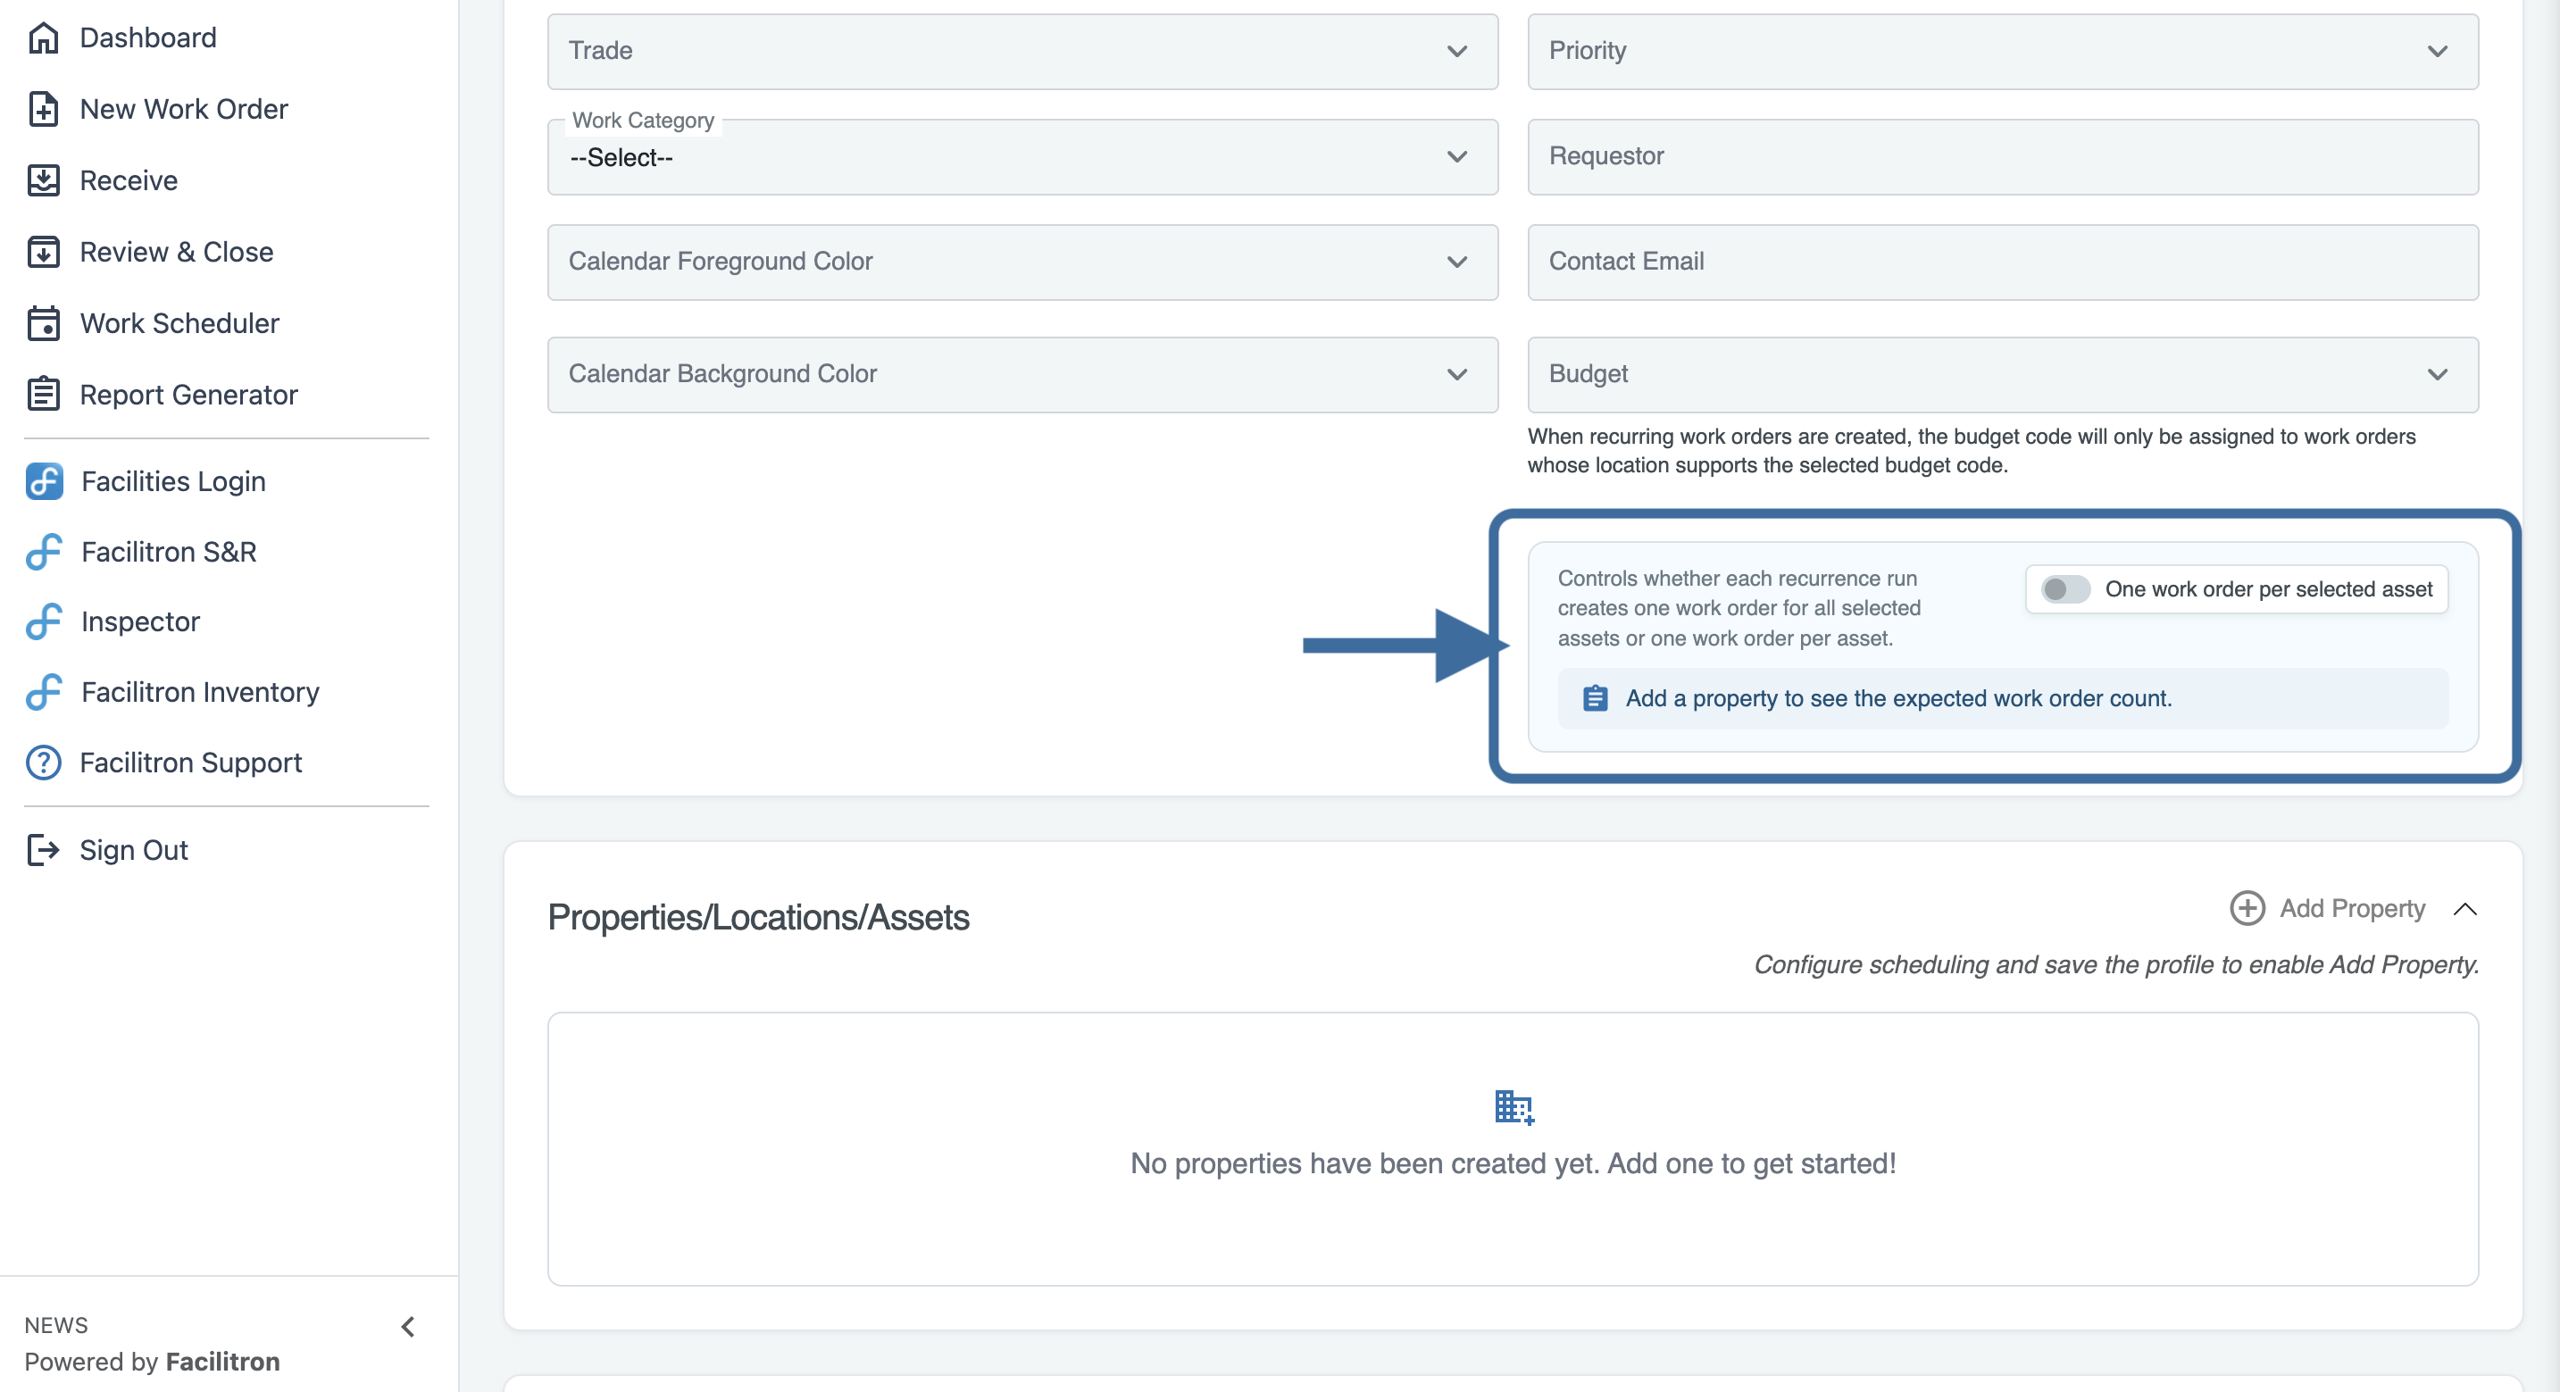
When toggled on, One work order per selected asset will generate a separate work order for each selected asset. For example, if five assets are selected, the system will create five individual work orders (one for each asset) each time the profile runs.
By default, this option is toggled off. When toggled off, the system will generate one work order that includes all selected assets together into one multi-asset work order. For more information about multi-asset work orders, please see How to Create a Multi-Asset Work Order.
The expected work order count will display once a property is selected, and you will be able to see how many work orders will be created for each recurrence cycle.
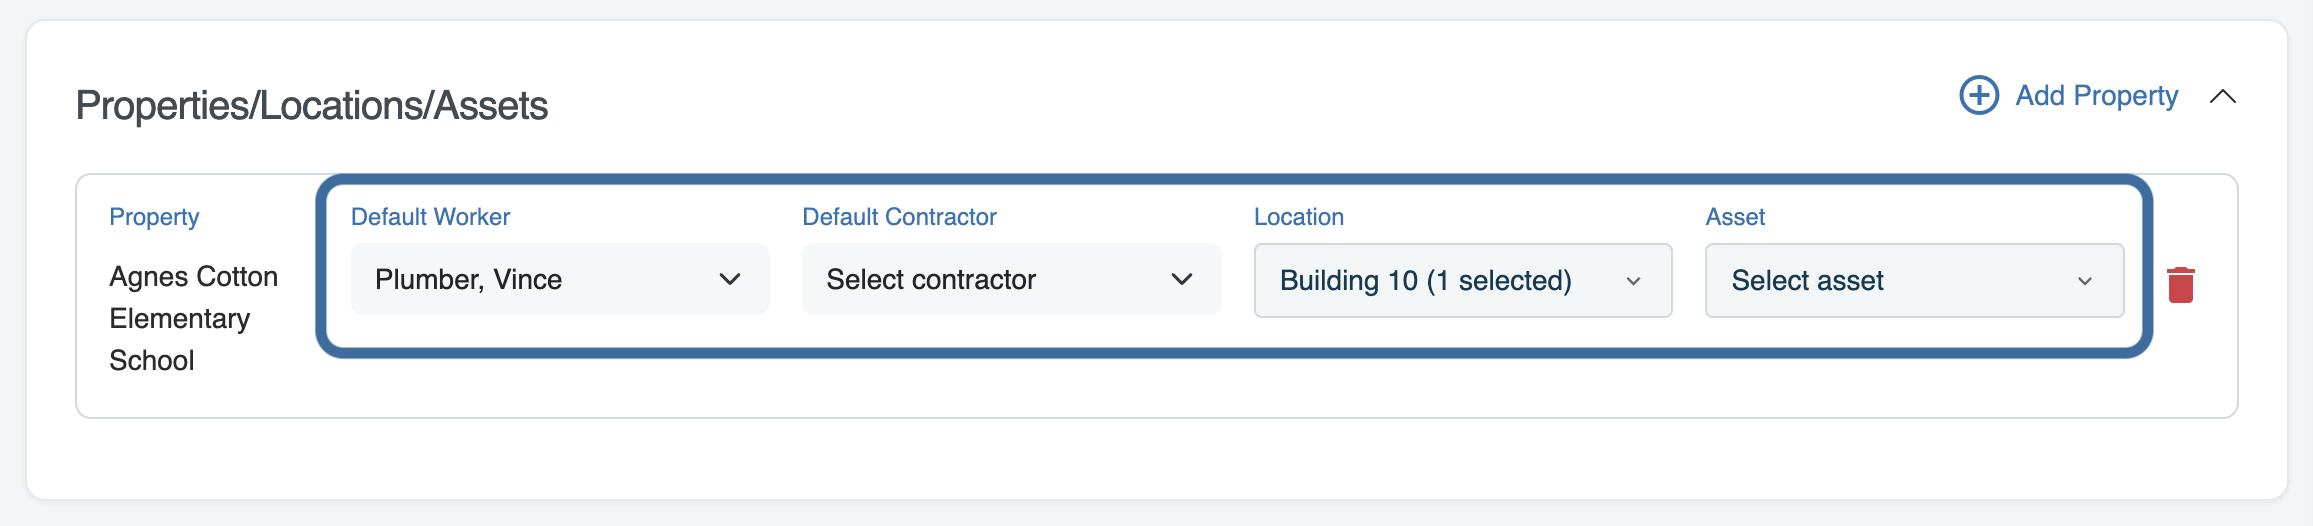
Adding Properties/Locations/Assets
Configure scheduling and save the profile before adding properties. After saving the profile, you can come back in and add the property by clicking + Add Property.
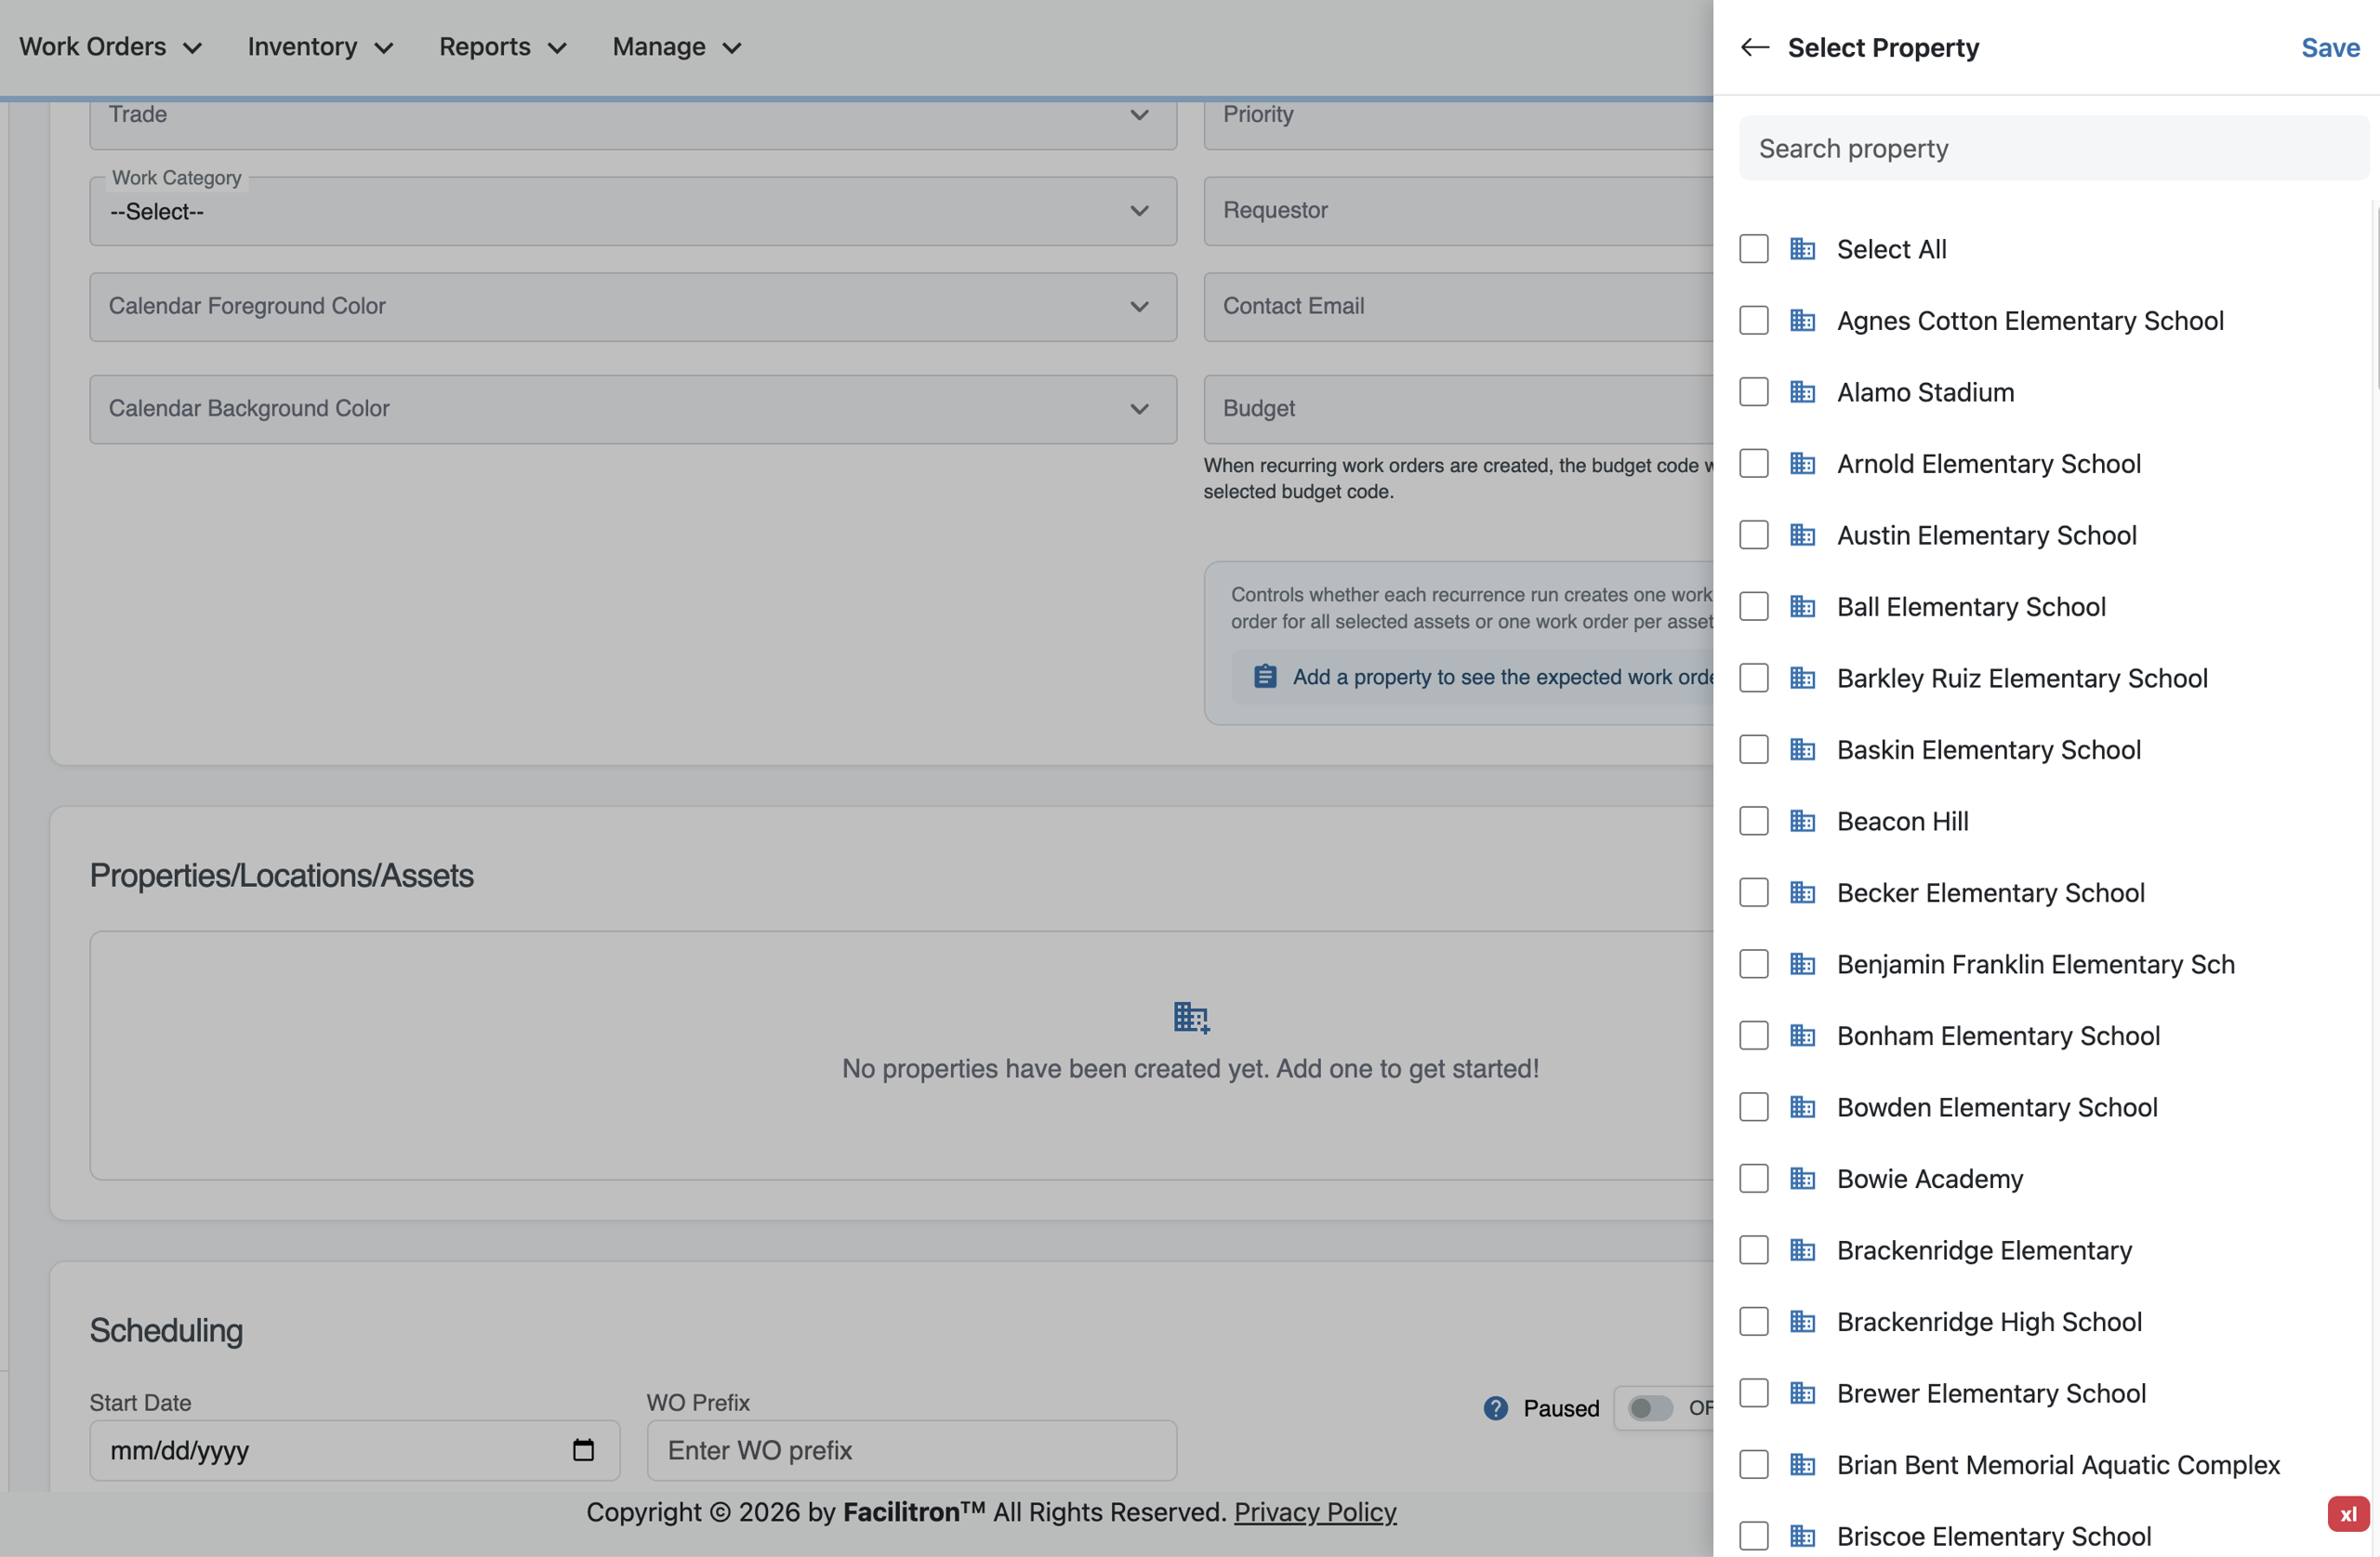
After selecting a property, you will see options for adding a worker, contractor, location, and asset. Use the corresponding dropdowns to select any of the information needed to fill in these fields.
Scheduling
RWOs are scheduled directly from the Scheduling section of the RWO profile. The system will automatically generate work orders based on the start date, frequency, and lead time configured in the profile. This section determines the following:
- When the recurring schedule becomes active (start date)
- How often maintenance should occur (frequency)
- When work orders should be generated (lead time)
Once configured, the system automatically manages future work order generation.
Configuring a Schedule
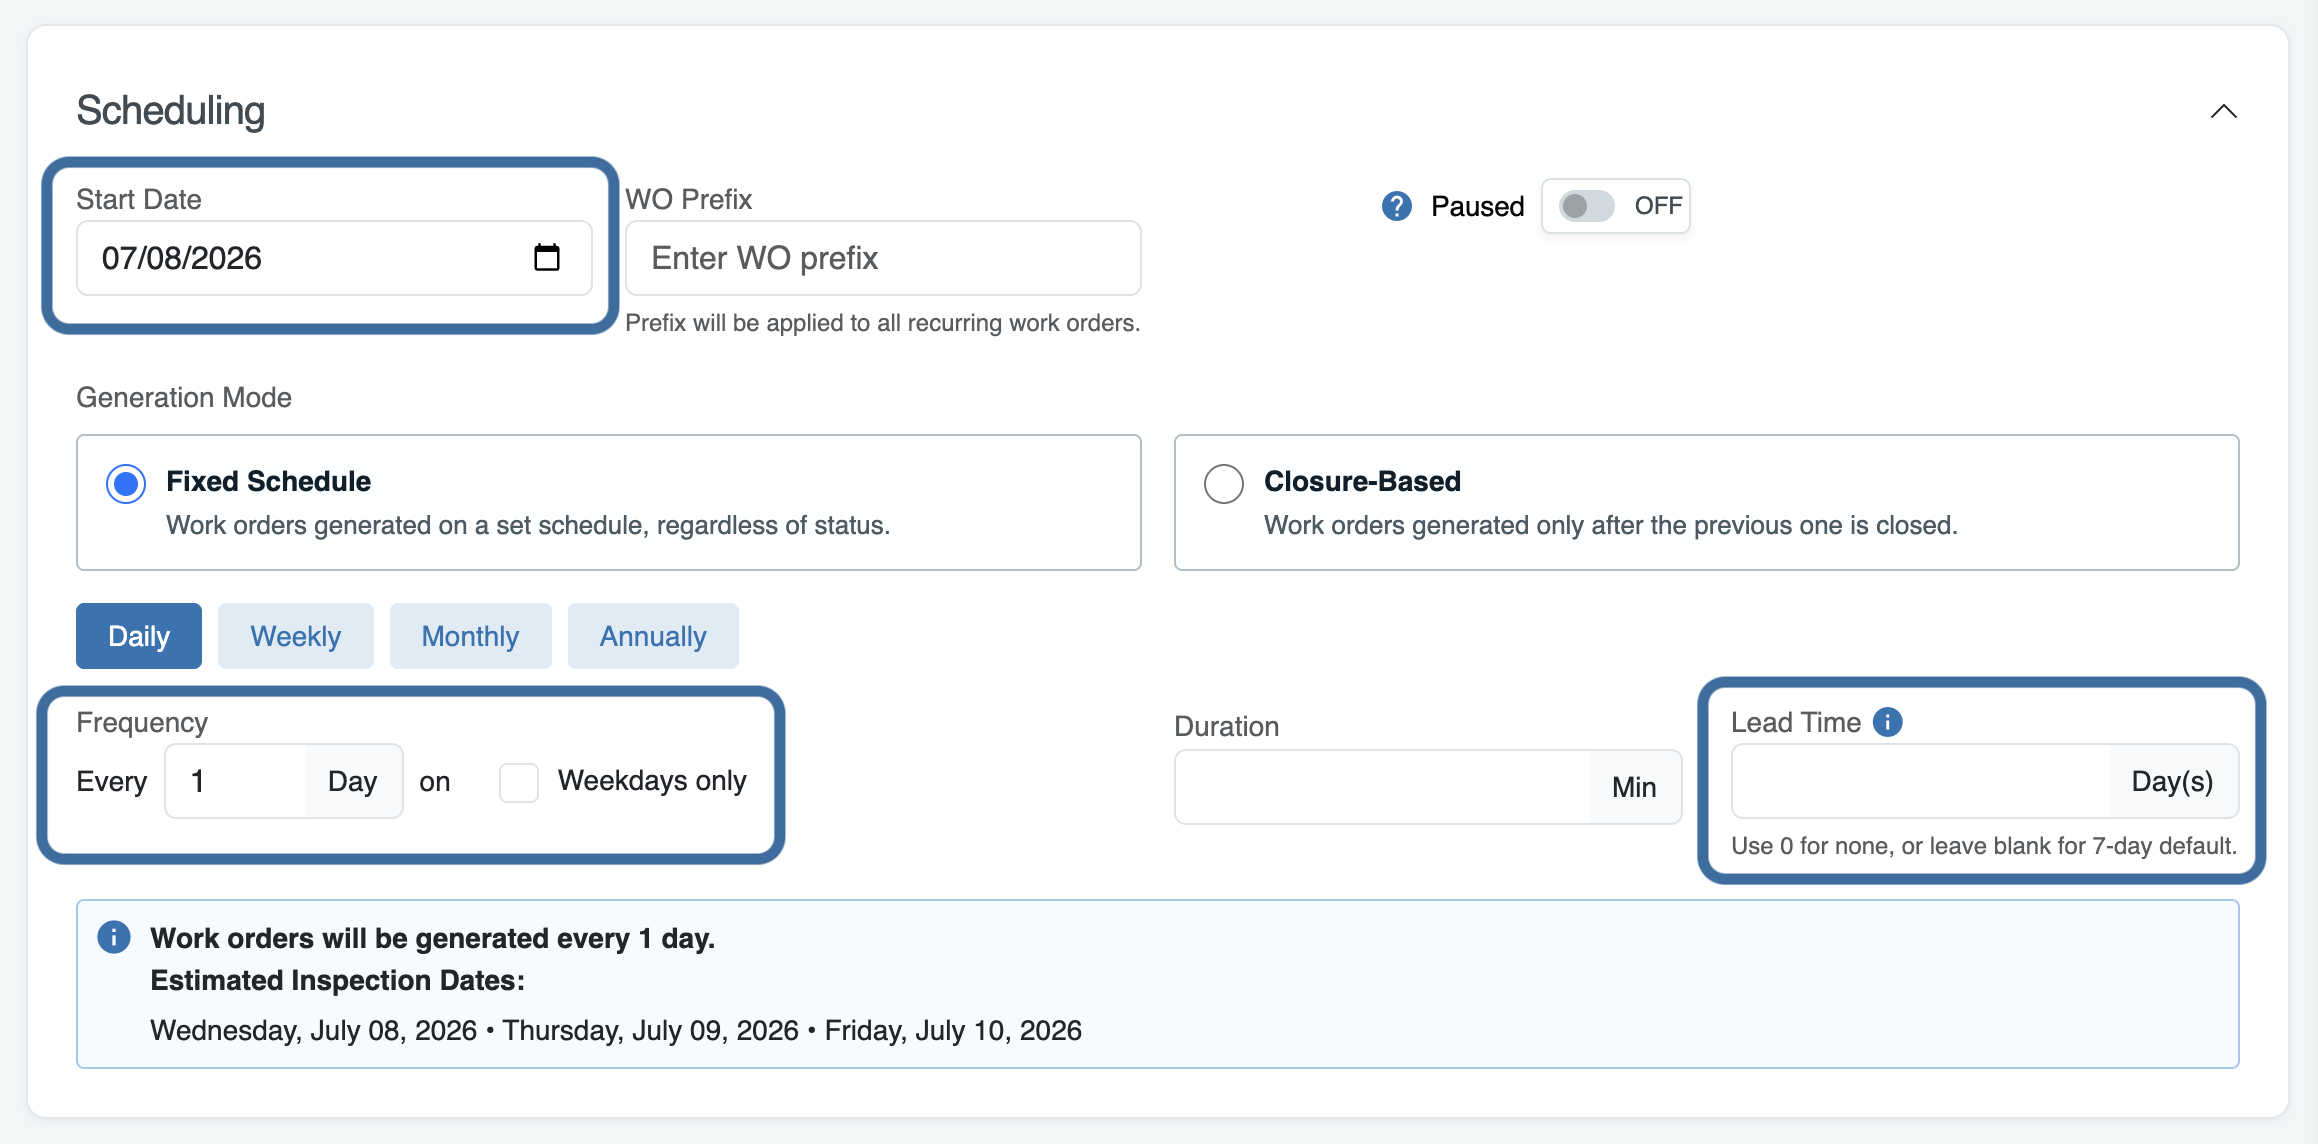
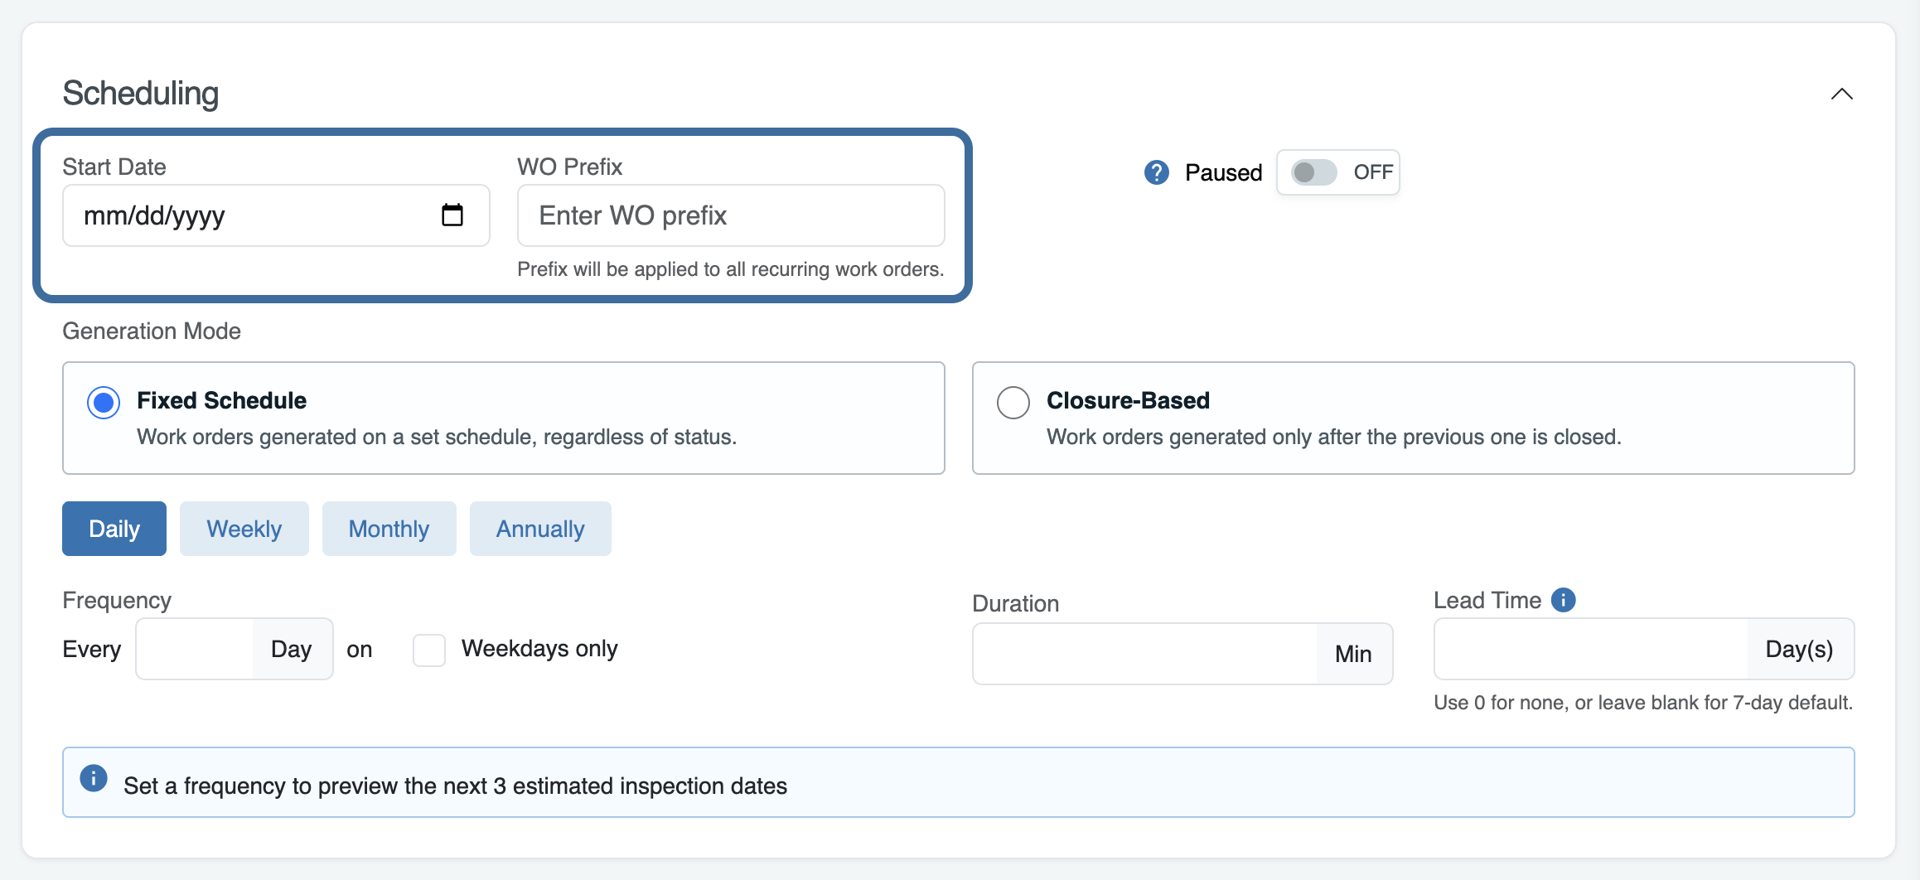
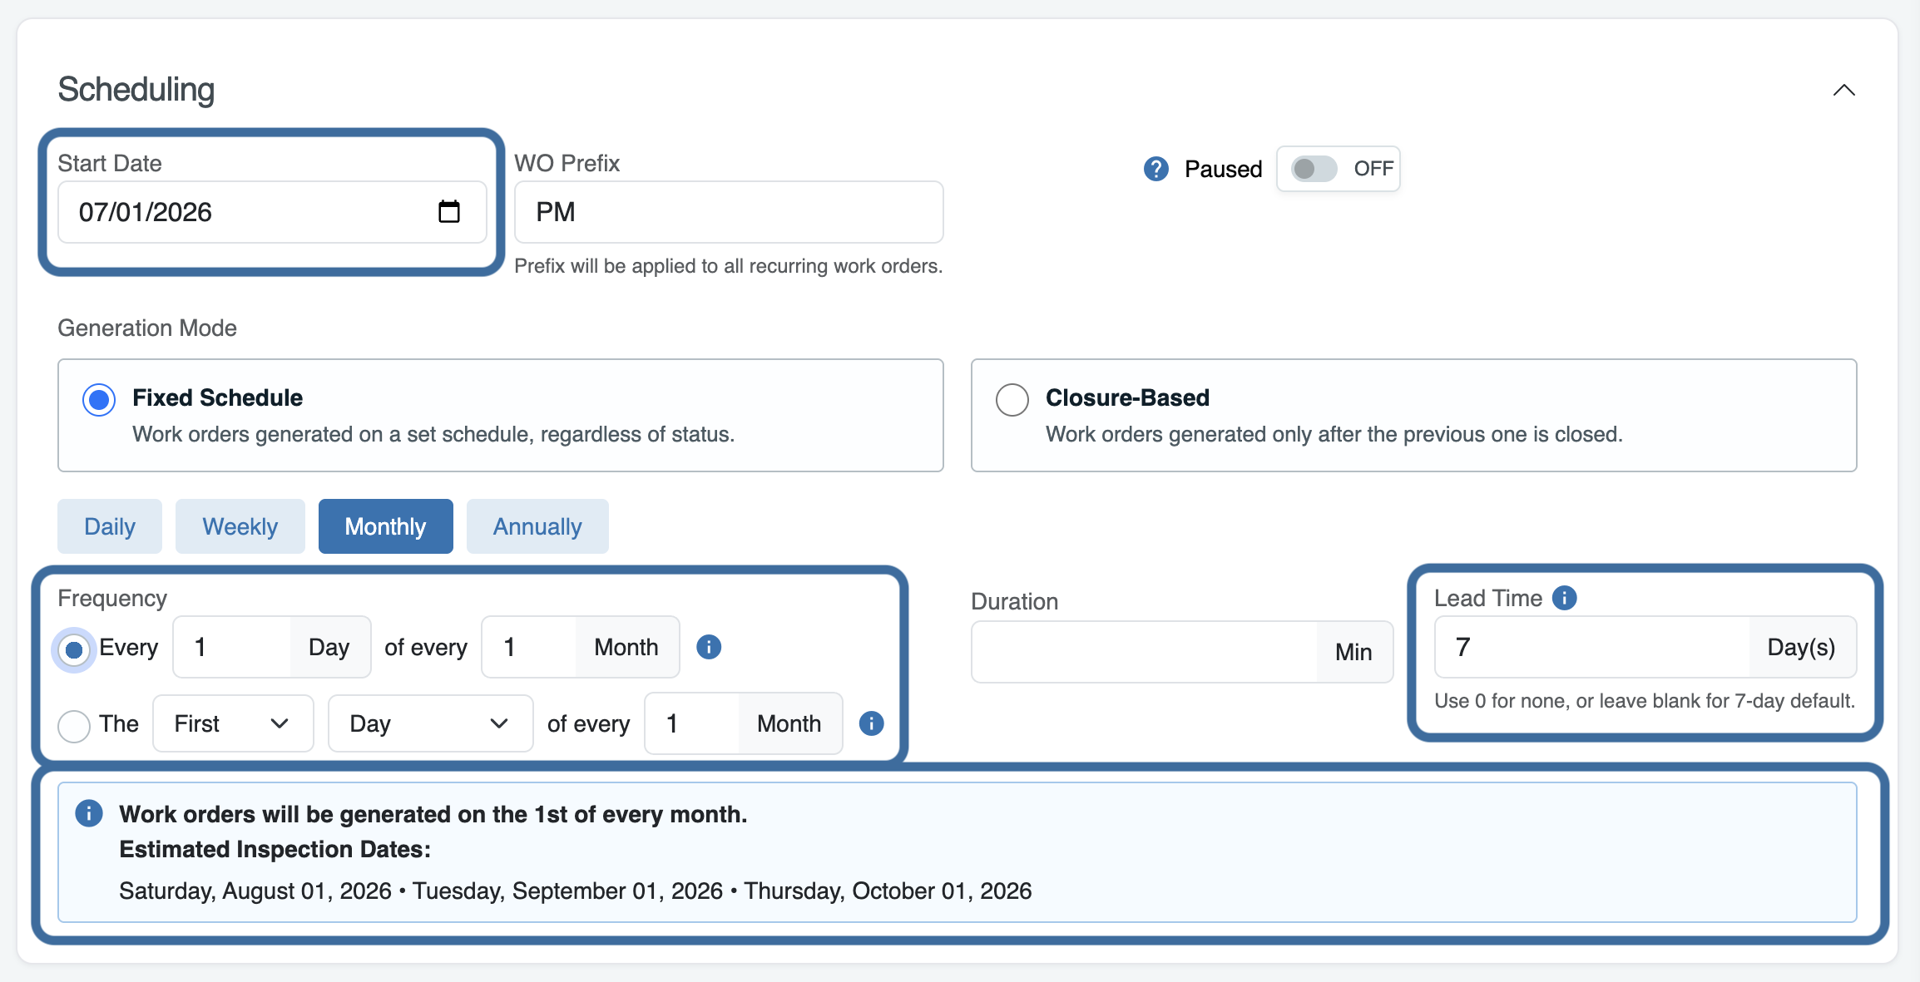
1. Set the Start Date
The start date represents the date the recurring schedule becomes active. Beginning on this date, the system evaluates the profile using the configured frequency and lead time to determine when RWOs should be generated. You can also set a designated prefix in the work order number if needed. This allows work orders created from a specific profile to be easily distinguished from other work orders. For example, using the prefix PM would create work orders such as PM-10025 instead of the standard fiscal year format like FY25-26-10025.
Think of the start date as telling the system:
"Starting on this date, begin following the recurring schedule defined for this profile."
The start date does not necessarily represent the date a work order will be generated or when the maintenance will occur.
Note: If the start date falls after a scheduled occurrence, the system skips that occurrence and schedules the next valid occurrence based on the configured frequency. To change the scheduling for an inspection profile, you can do so by changing the start date and adjusting the frequency and lead time as needed for the new schedule.
2. Select a Generation Mode
Next, choose either a Fixed Schedule or Closure-Based work order generation mode. The Fixed Schedule option is selected by default.
The Fixed Schedule mode schedules work orders to generate on set dates or at defined intervals. For example, work orders can be scheduled for the first of every month, every Monday, or every 60 days from the start date, regardless of when the previous work order was completed. This option is usually best for tasks that must be done on specific dates, such as compliance inspections.
The Closure-Based mode generates the next work order at a set interval after the previous work order is closed. The lead time buffer generates the work order X days, weeks, months, or years after the previous work order is closed, per property, location, and equipment combination. This option is typically ideal for interval-based preventive maintenance that depends on real completion timing (HVAC, filter changes, equipment service, etc.).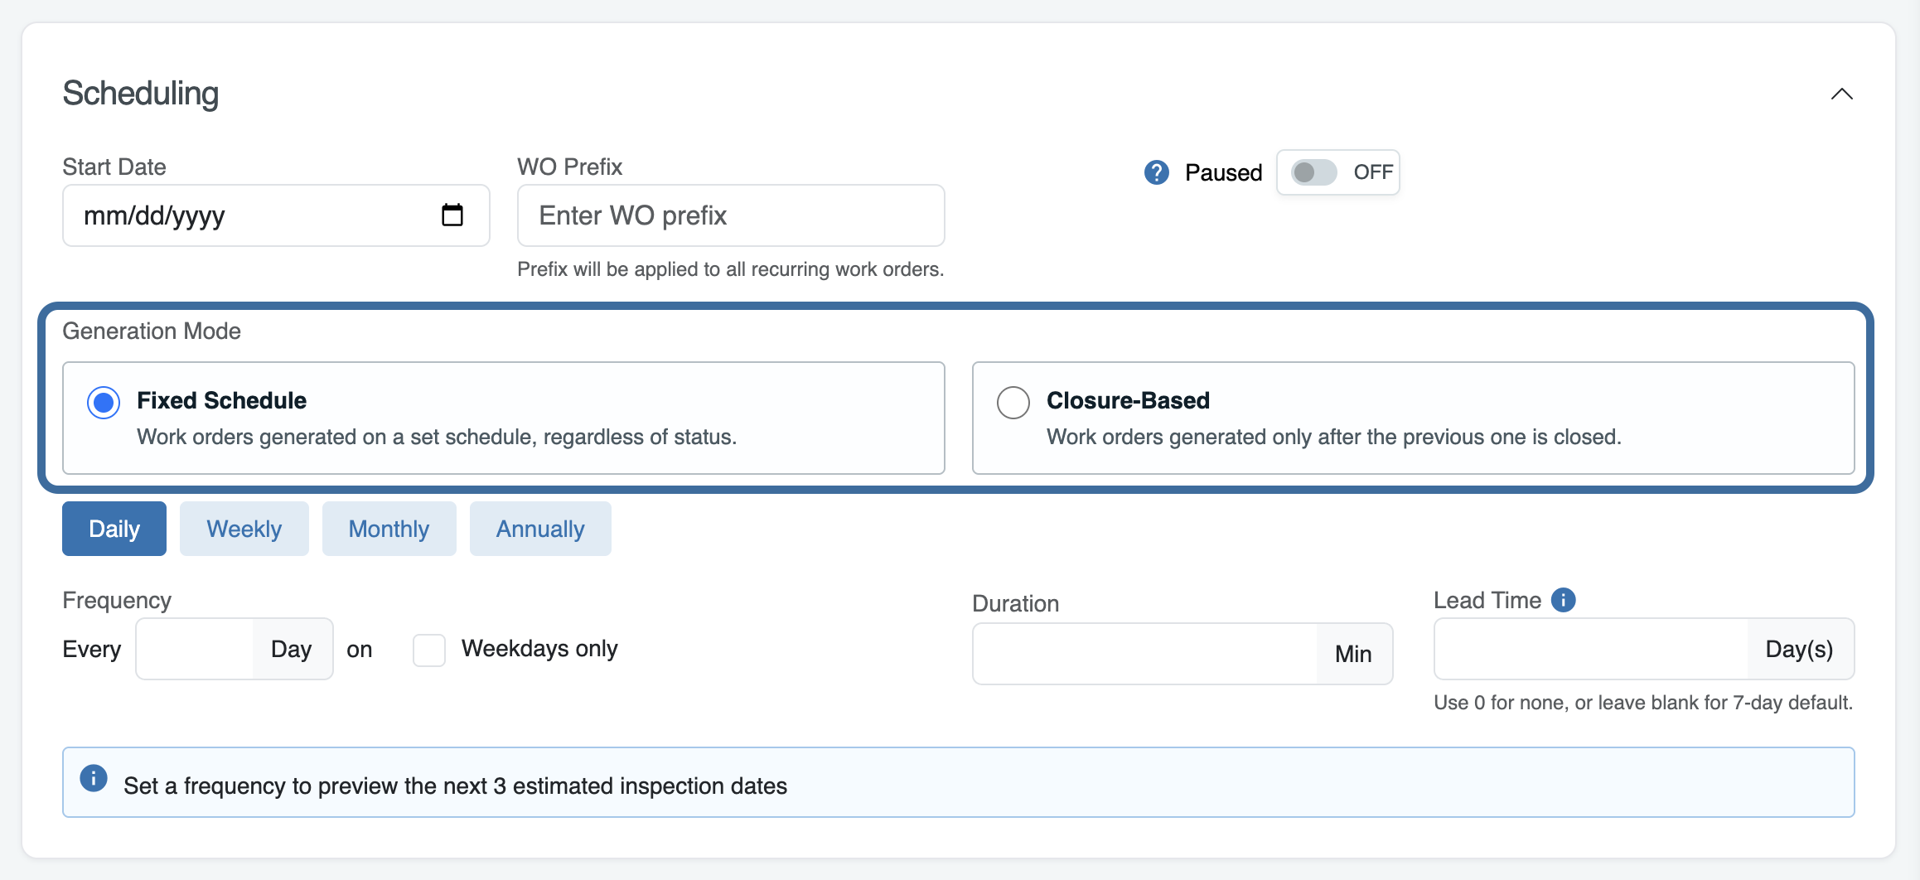
Note: If you ever need to review a profile’s generation mode in the future, you can quickly identify which generation mode a profile uses in the Scheduling Type column on the Inspection Profiles page.

3. Configure the Frequency
Next, select how often the recurring maintenance should occur. Available frequency options include, daily, weekly, monthly, and annually.
When setting the frequency, please note:
- The Weekdays only checkbox is available for Monday - Friday schedules and excludes Saturday/Sunday generation.
- Duration (Min) is optional and can be used to estimate completion time for the inspection.

For maintenance schedules that occur every few months, use the monthly frequency with the appropriate interval. The selected frequency determines the recurring maintenance schedule beginning with the configured start date.
| Maintenance Schedule | Configuration |
| Every Month | Monthly – Every 1 Month |
| Every 3 Months (Quarterly) | Monthly – Every 3 Months |
| Every 6 Months (Semi-Annually) | Monthly – Every 6 Months |
| Every 12 Months | Annually |
Note: Quarterly and semi-annual schedules are configured using the monthly frequency with a 3-month or 6-month interval. They are not separate frequency options.
4. Add a Lead Time (Optional)
The lead time determines how many days before each scheduled maintenance occurrence the work order should be generated.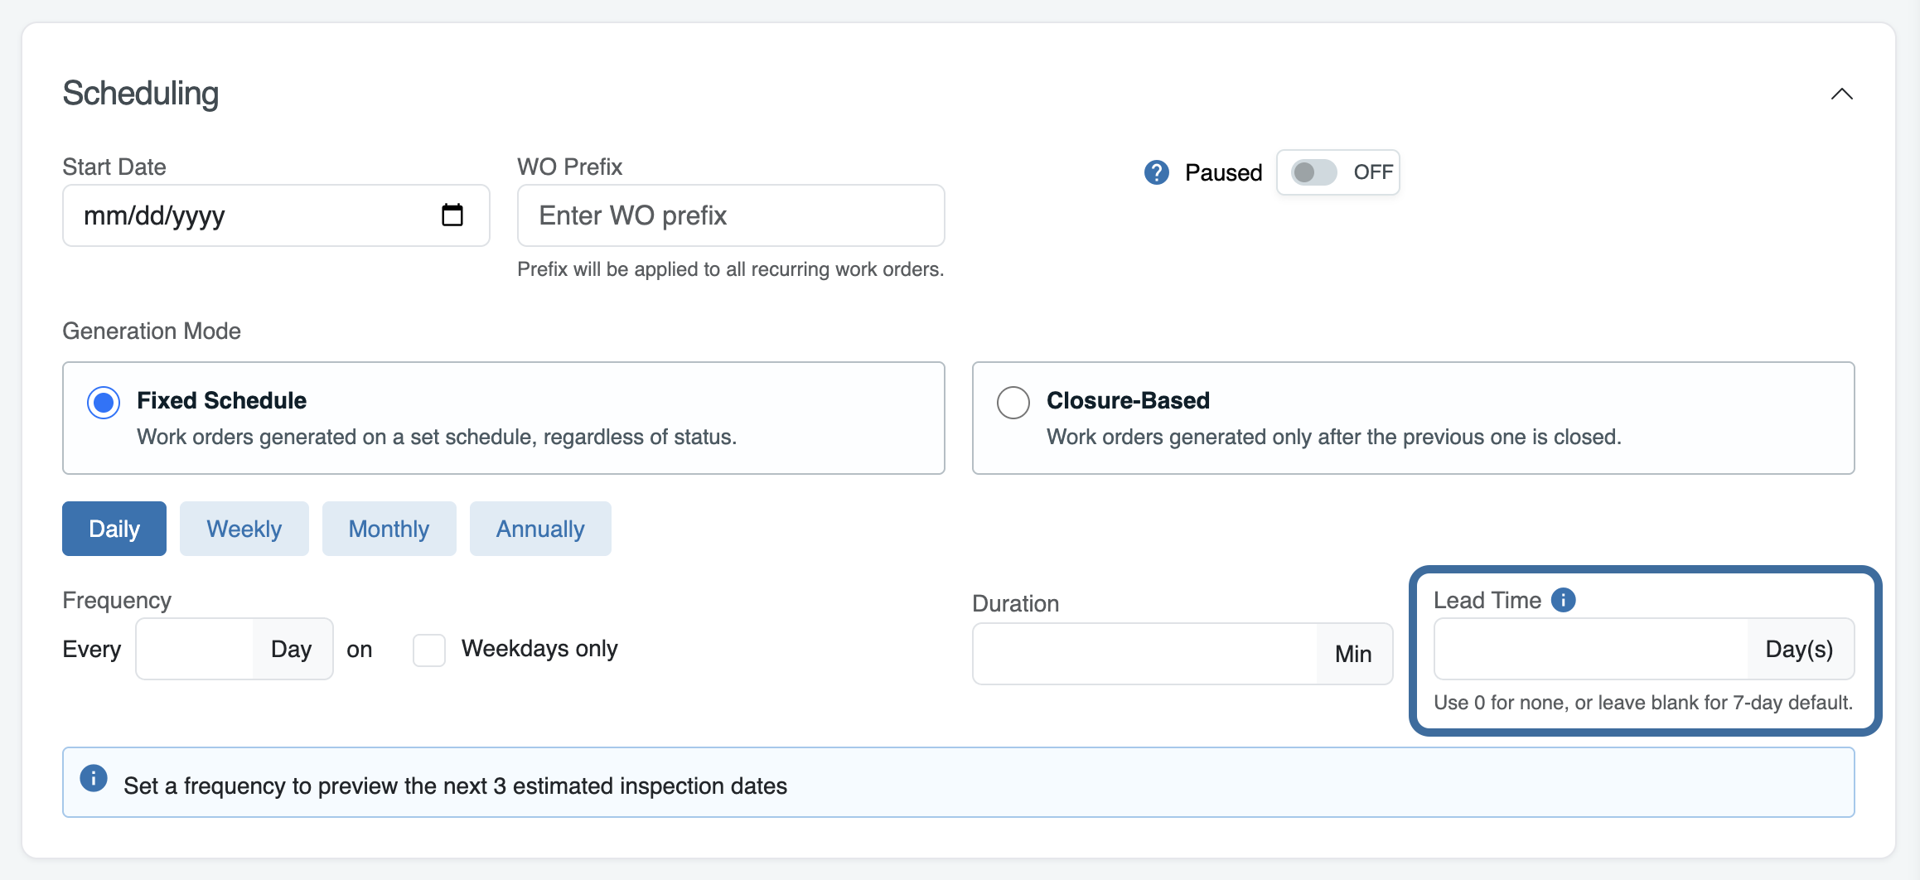
Please see the examples below to see how the work order generation date changes according to the amount of lead time given for a work order with a July 1 maintenance date.
| Scheduled Maintenance Date | Lead Time | Work Order Generation Date |
| July 1 | 0 Days | July 1 |
| July 1 | 7 Days | June 24 |
| July 1 | 30 Days | June 1 |
If maintenance staff need advance notice to complete the work order, configure an appropriate lead time. Otherwise, leave the lead time at 0 so work orders generate on the scheduled maintenance date.
Note: While the lead time affects when the work order is created, it does not change the scheduled maintenance date.
5. Review and Save
The generation schedule will show in the blue box at the end of the Scheduling section. Before saving the profile, review the next 3 predicted generation dates and confirm if the start date, frequency, and lead time (if using) are configured correctly.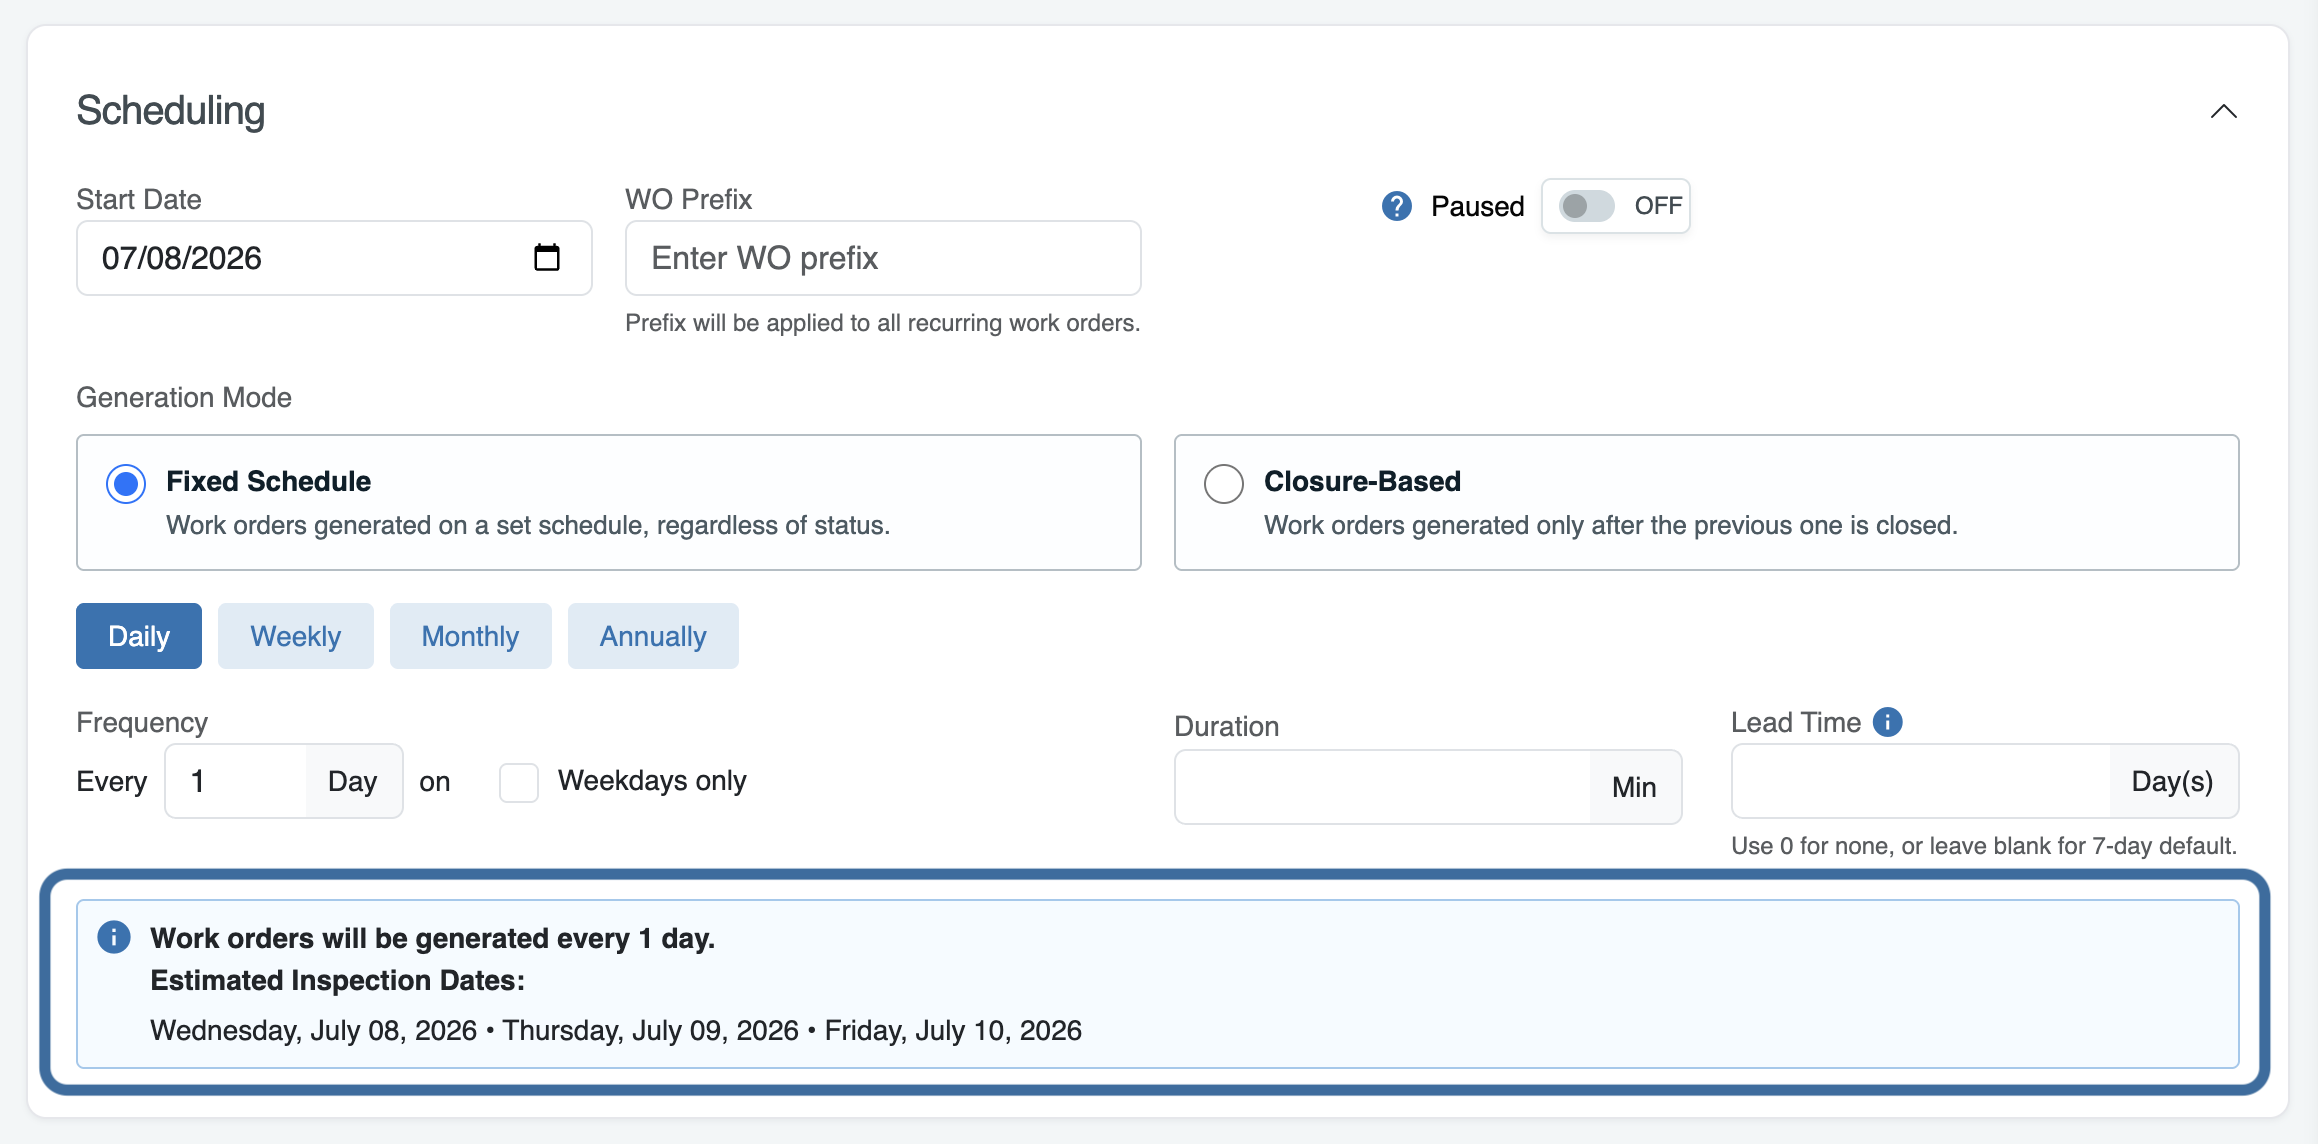
If the predicted generation dates don’t appear to be correct, check if the start date, frequency, and lead time are input correctly. Make any adjustments as needed until the next three predicted generation dates match the intended schedule. Save the profile once everything looks complete. If adjustments to scheduling need to made in the future, come back to the profile and update the start date and other scheduling information as needed to reflect the new schedule and save.
Inspection Tasks
To begin creating a multi-point or other inspection, click + Create Task.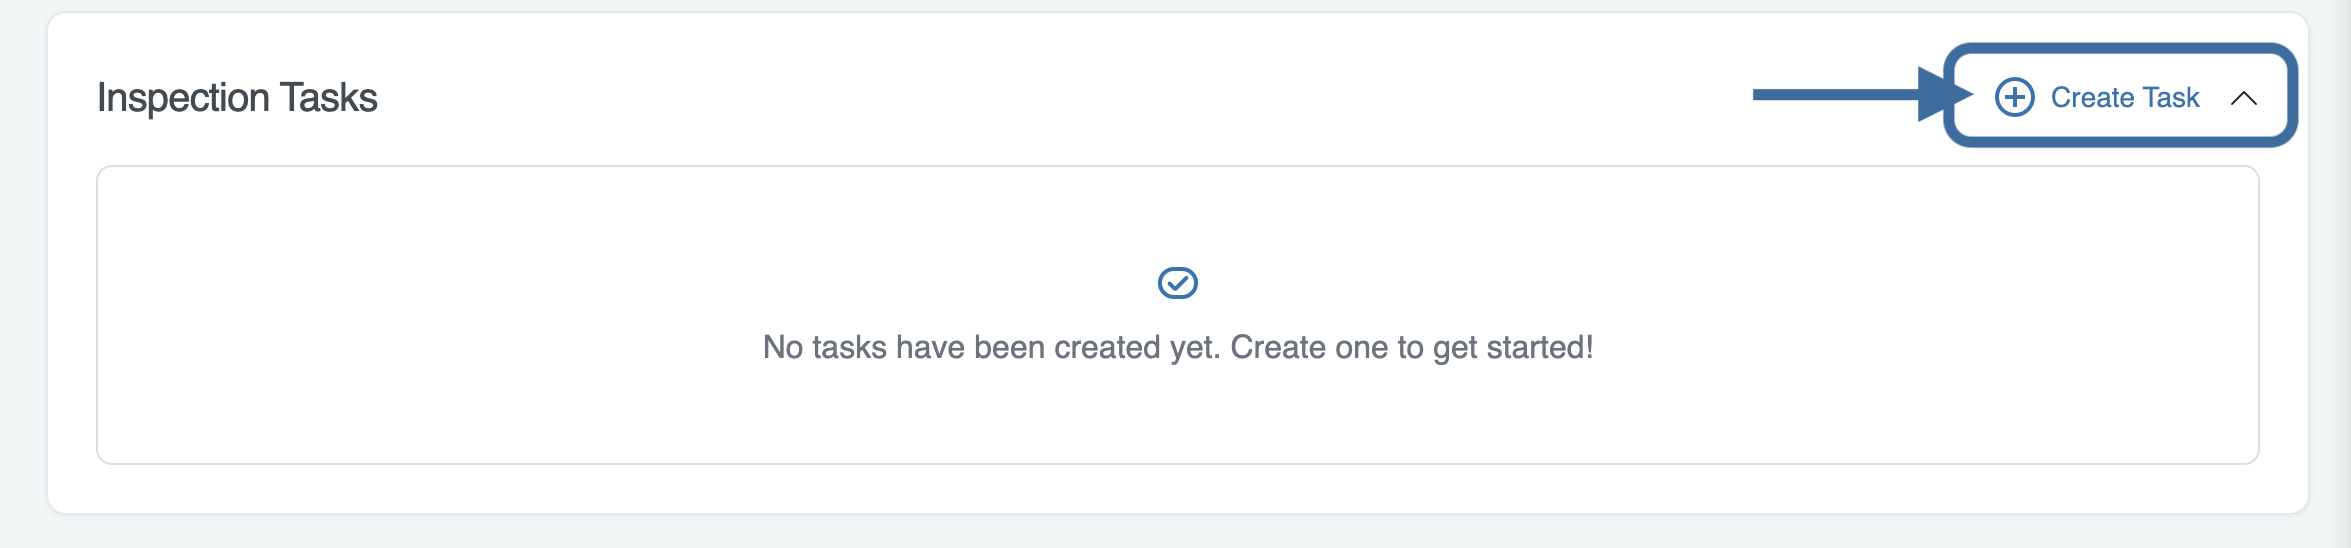
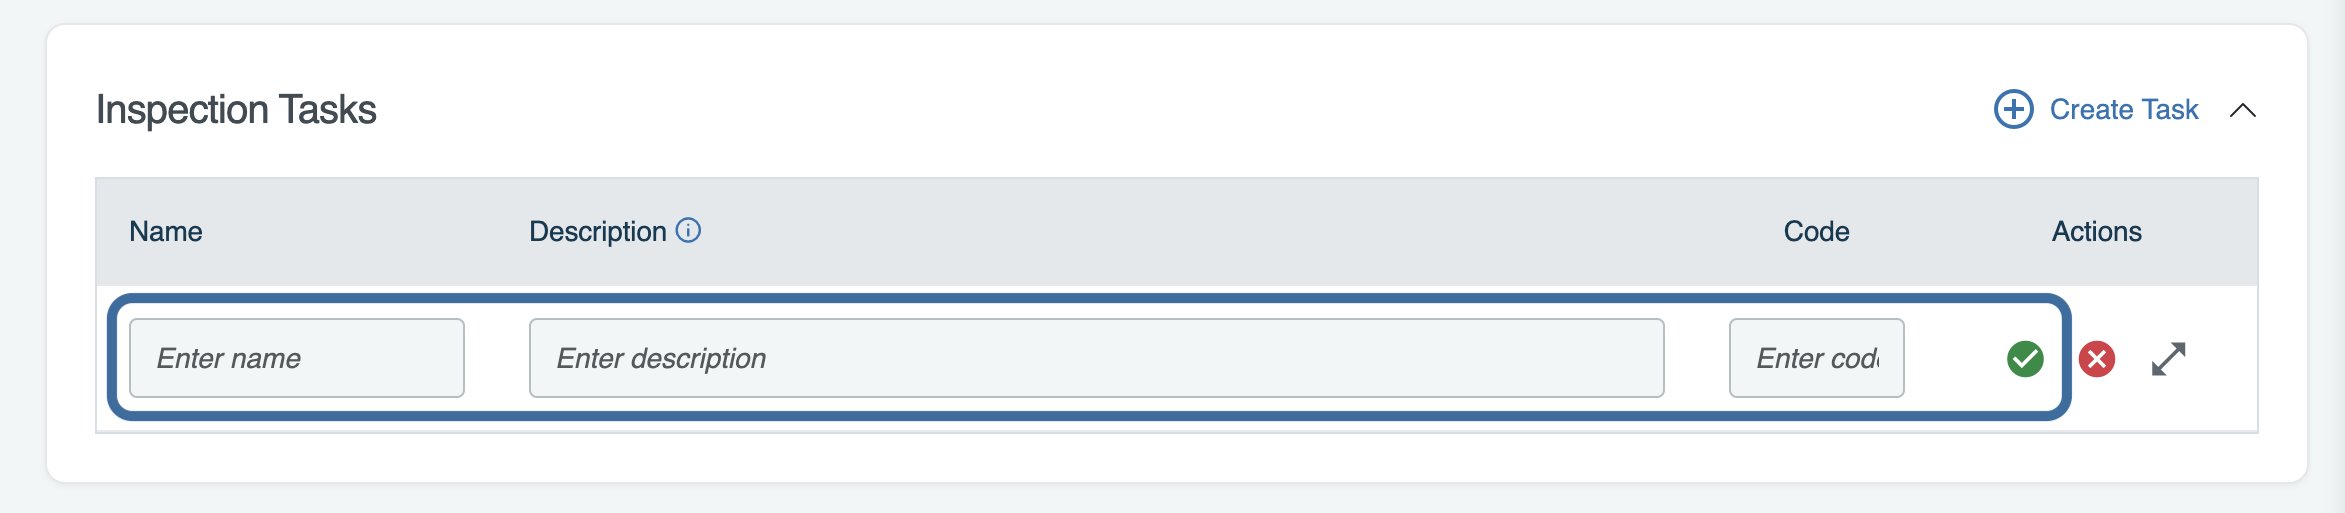
Enter a name, description, and code if needed for the inspection task. Click the green check to add the task.
Continue to add tasks as needed.

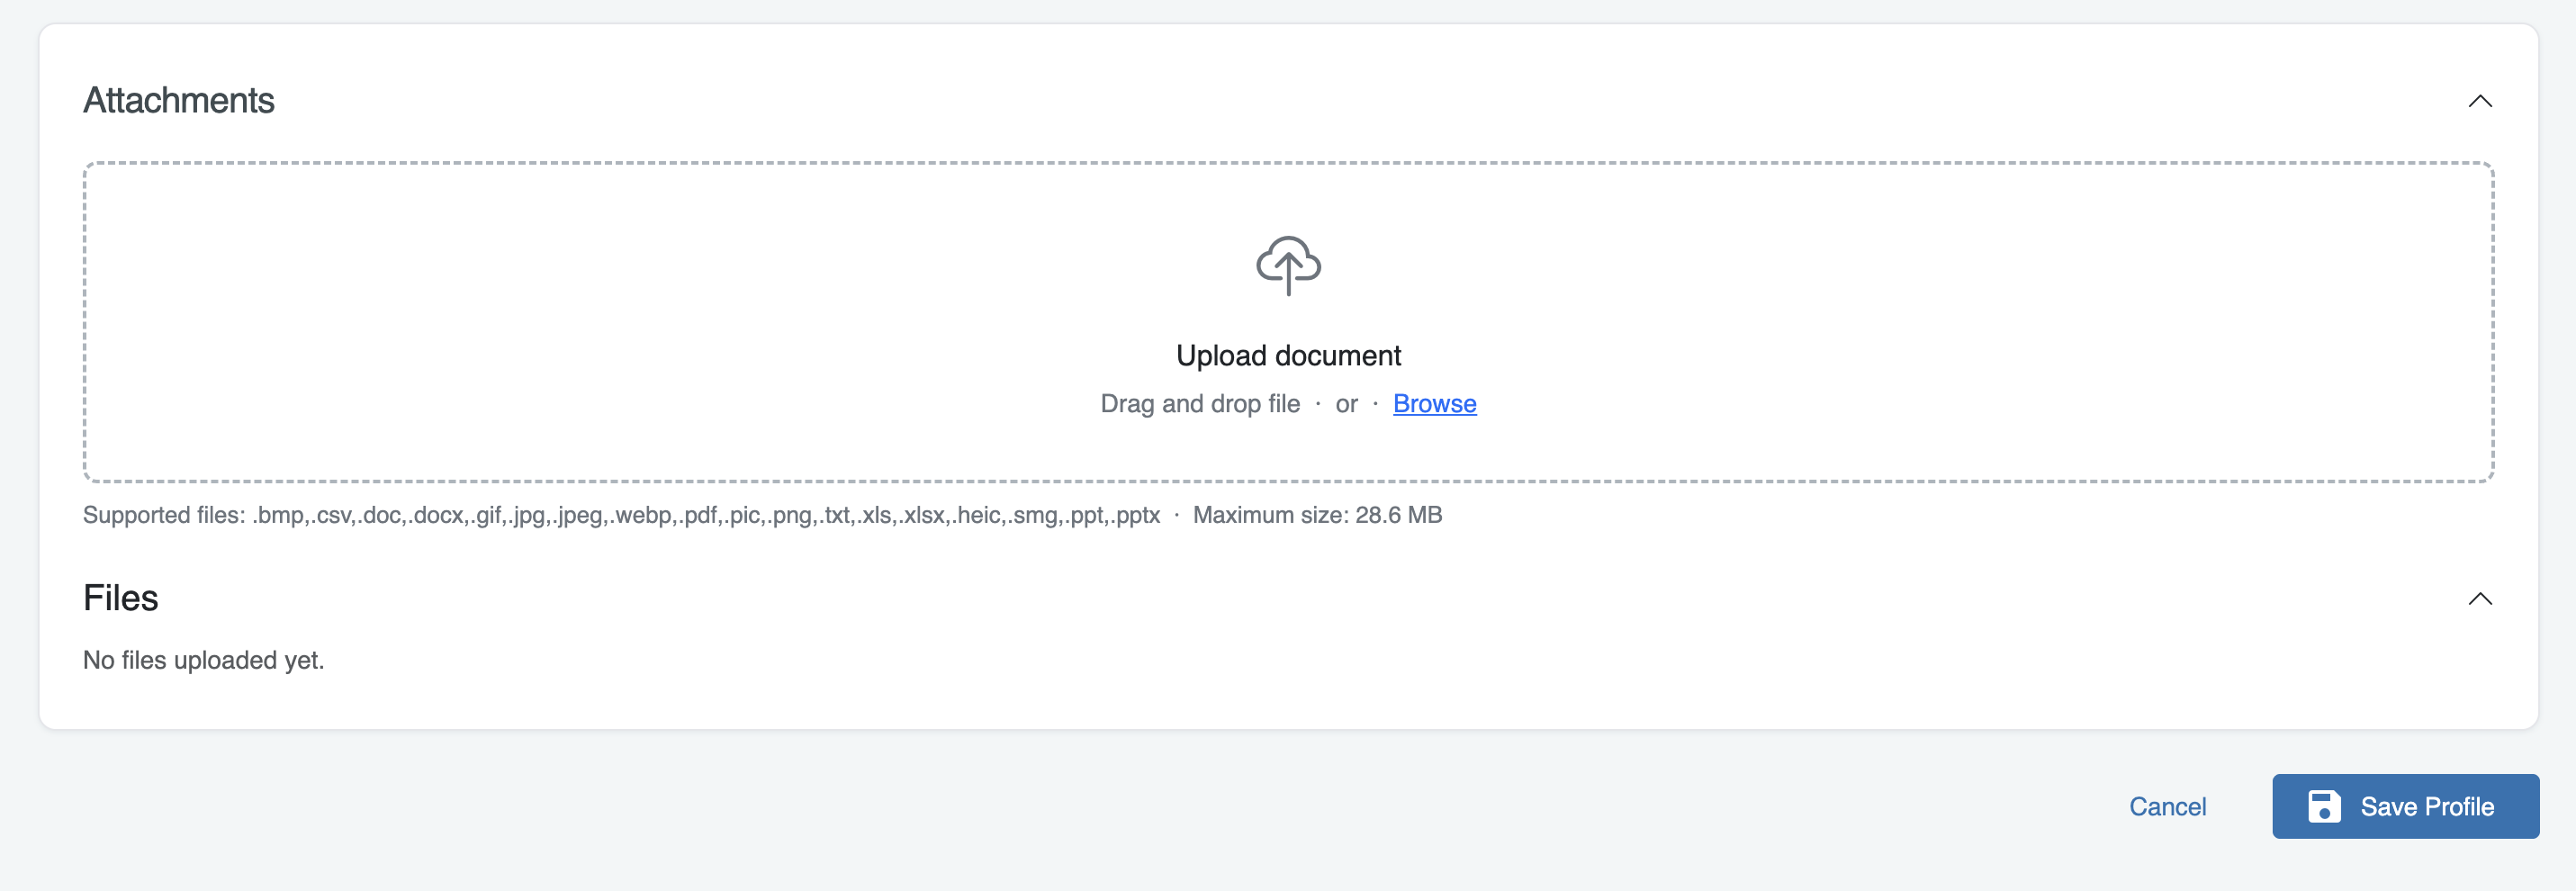
Attachments
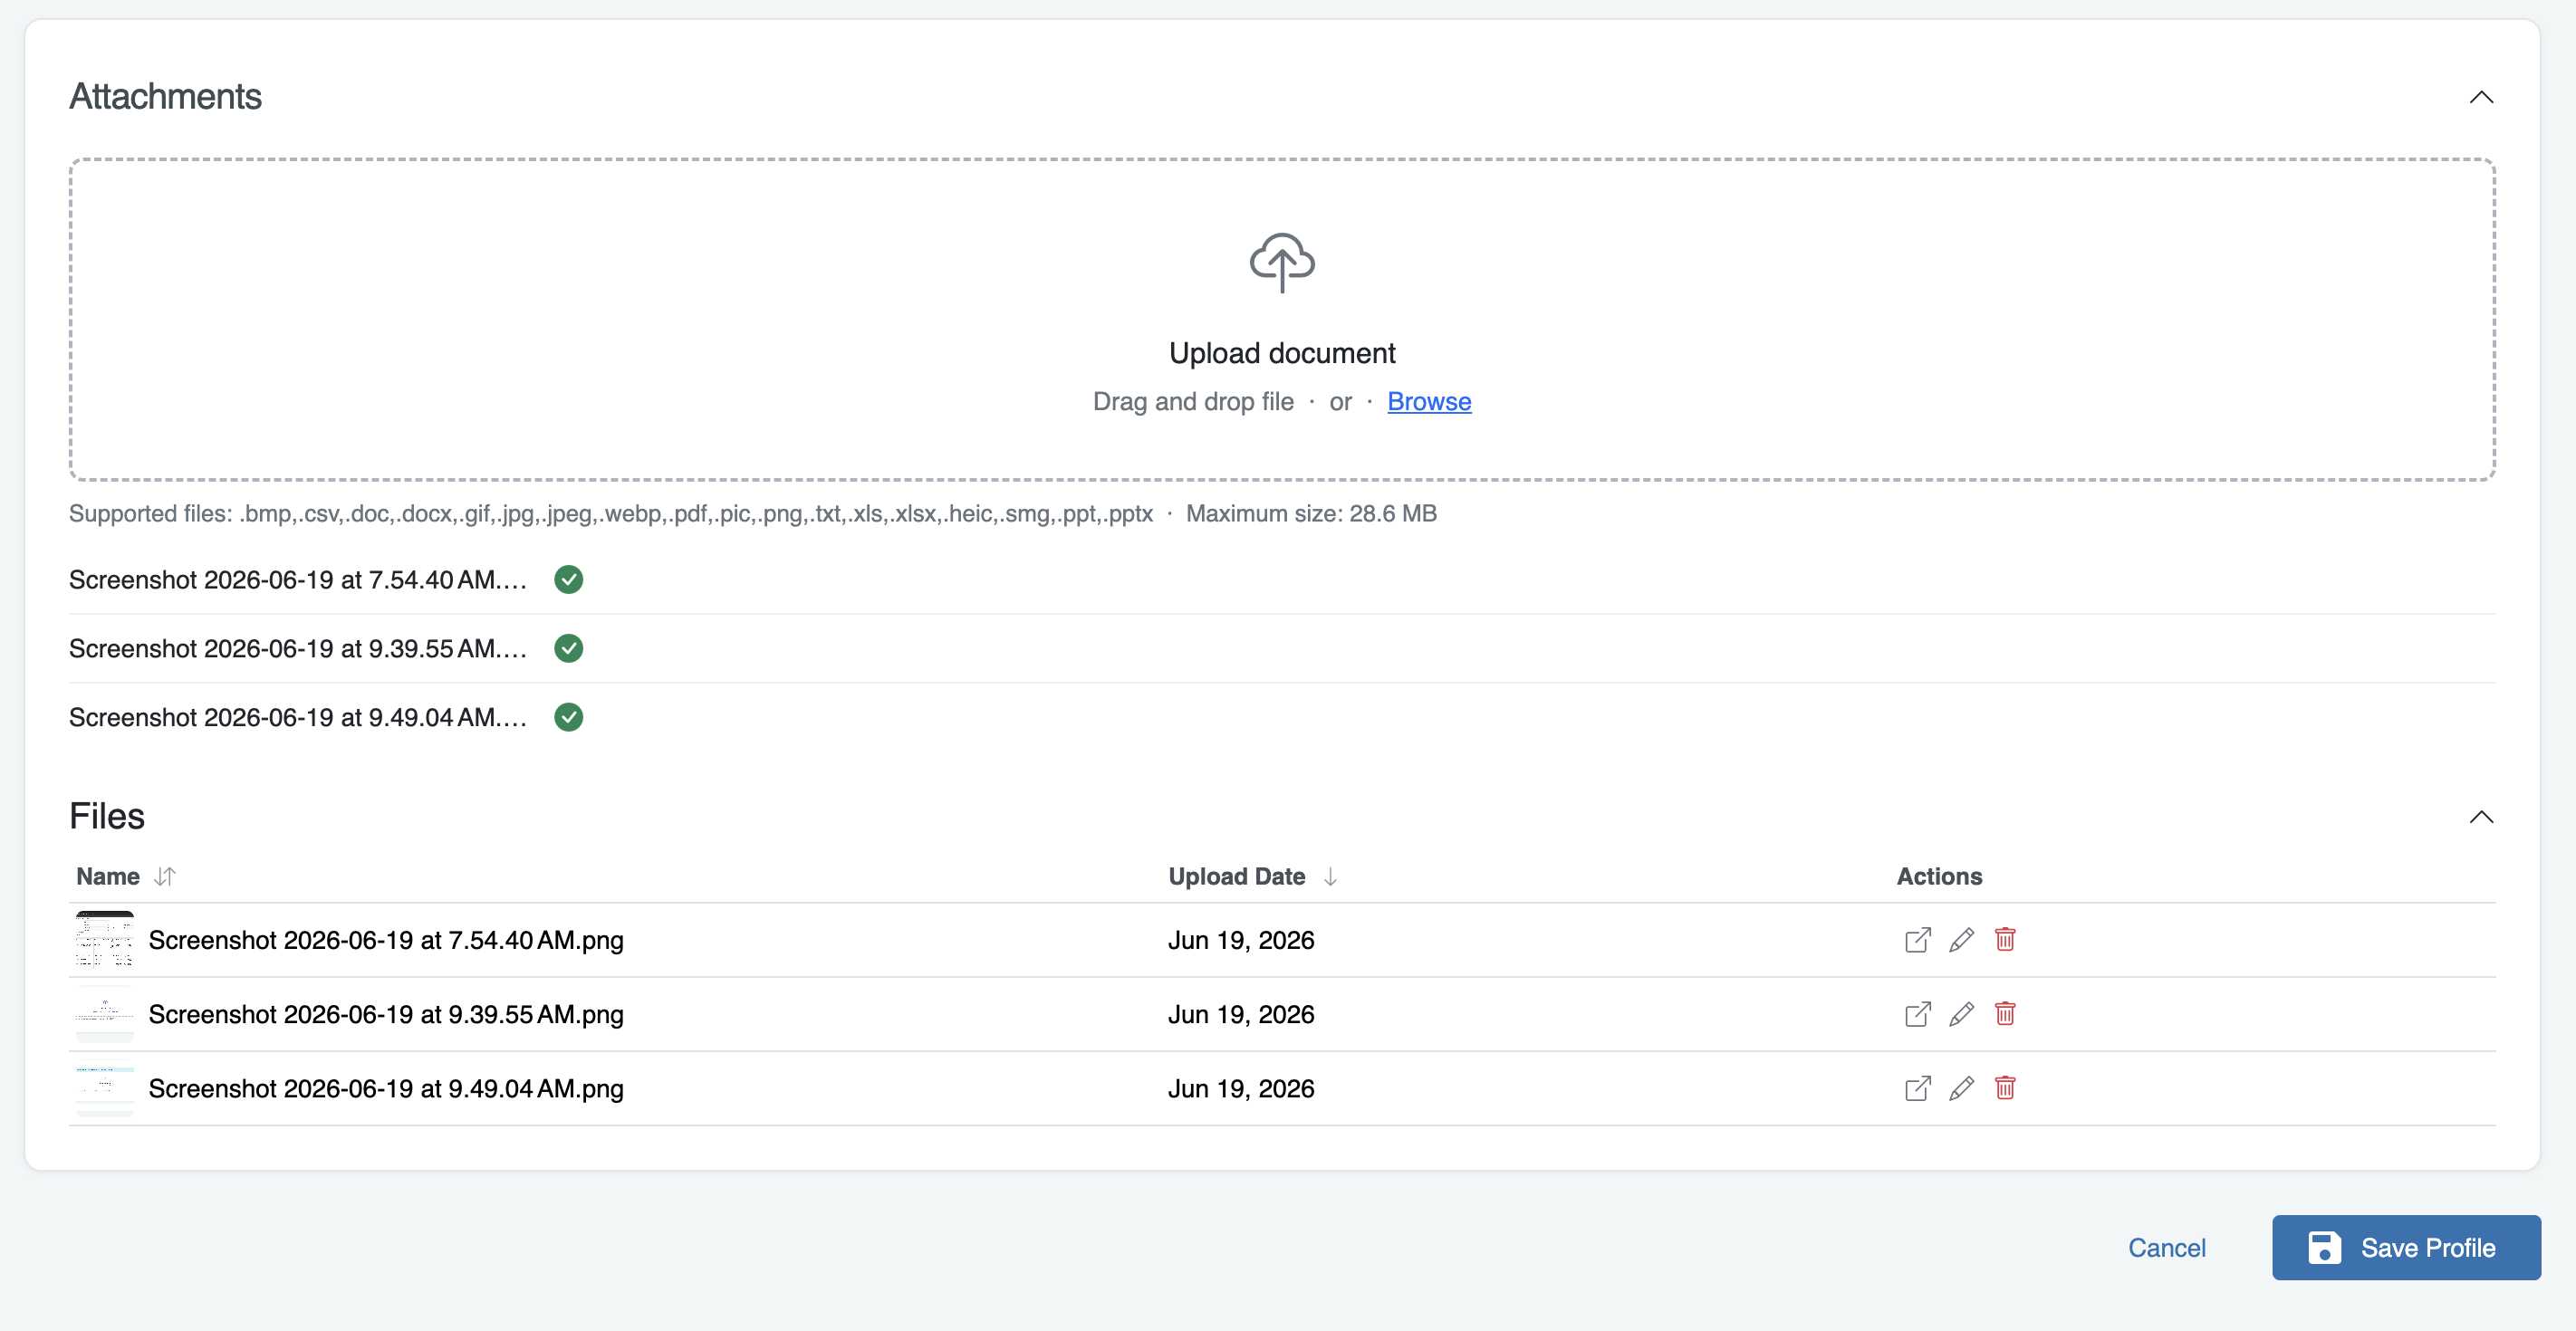
To add an attachment, drag and drop a file into the upload area or select Browse to choose a file from your device. During upload, the system displays a progress indicator for each file. Once the upload is complete, a green checkmark confirms the file was successfully added.
After files are uploaded, they will appear in the Files section below the upload area. The Files list displays the file name and upload date, along with actions that allow users to manage attachments directly from the profile.
Users can:
- Preview a file by selecting the Open icon. The file will open in a new browser tab.
- Rename a file by selecting the Edit icon.
- Delete a file by selecting the Delete icon.
The system enforces the same attachment requirements used for work orders, including supported file types, file size limits, and maximum attachment counts.
Note: For standard Recurring Work Order profiles, any files attached to the profile are automatically copied to every work order generated from that profile, including both Fixed Schedule and Closure-Based recurring work orders. The copied attachments will appear in the generated work order's Attachments section alongside any other work order files.
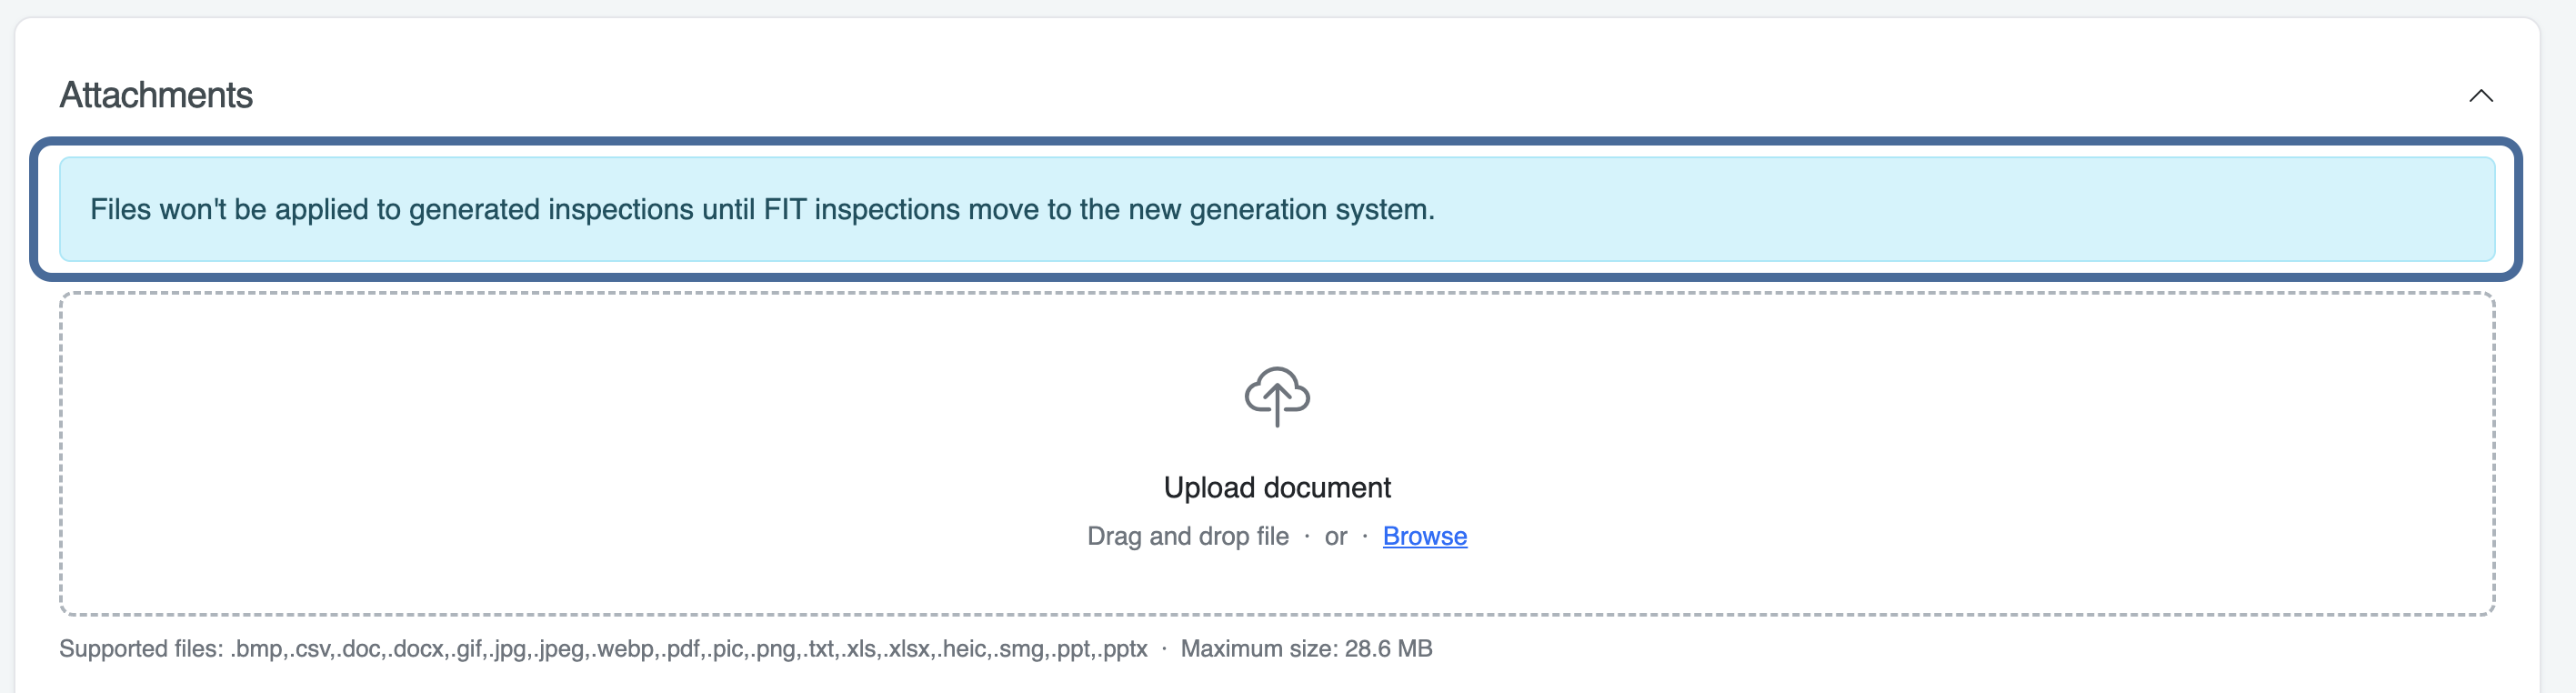
For inspection profiles, attachments can be added and managed on the profile; however, attachments are currently stored on the profile only and are not copied to generated inspections.
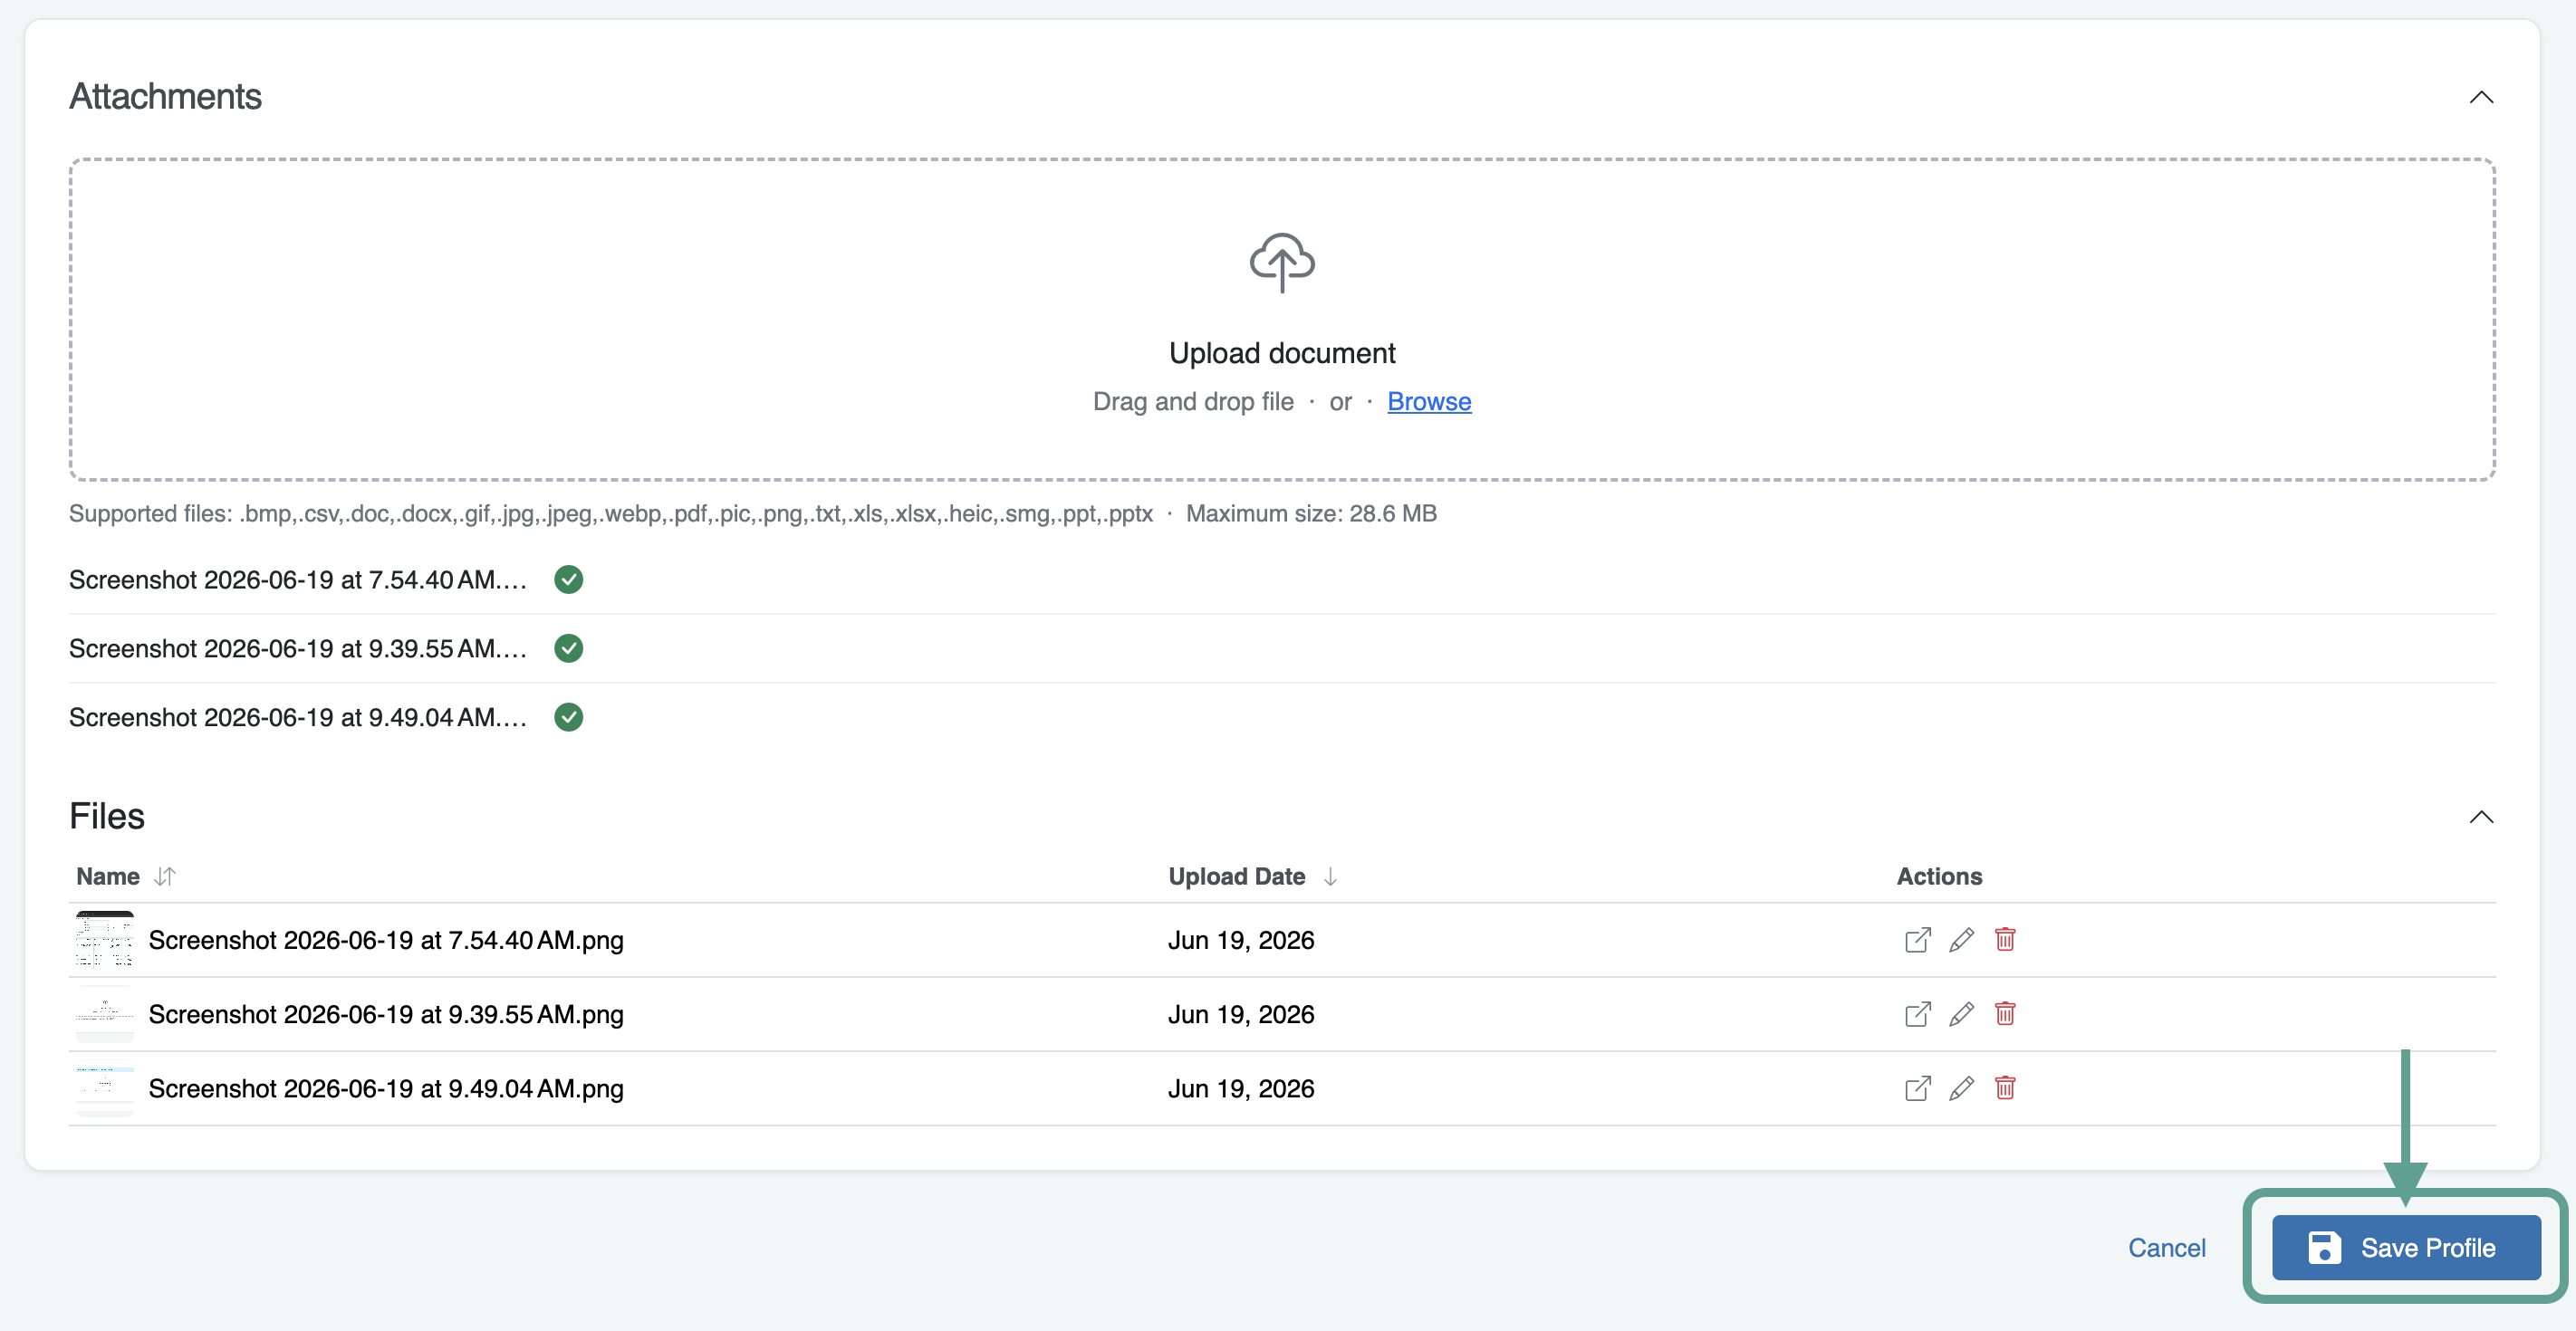
If you’re finished with creating your inspection profile, scroll down and press Save Profile. This button is located towards the bottom right of the page.
Viewing Profile Statuses
For Closure-Based RWOs, each profile will display a status badge that clearly indicates its current state. Profiles will show either Pending Close (Figure A) when the most recent work order is still open, or Next Generation: [Date] ([Work Order Number] (Figure B) when the most recent work order has been closed and the next work order has been generated.
Figure A: Figure B:
 However, if you would like to manually schedule RWOs in order to create several months of RWOs in advance so that you may make minor adjustments to the individual RWOs, check the Pause (pause automated RWO creation) option in the Scheduling section of the inspection profile.
Viewing & Modifying Existing Work Orders
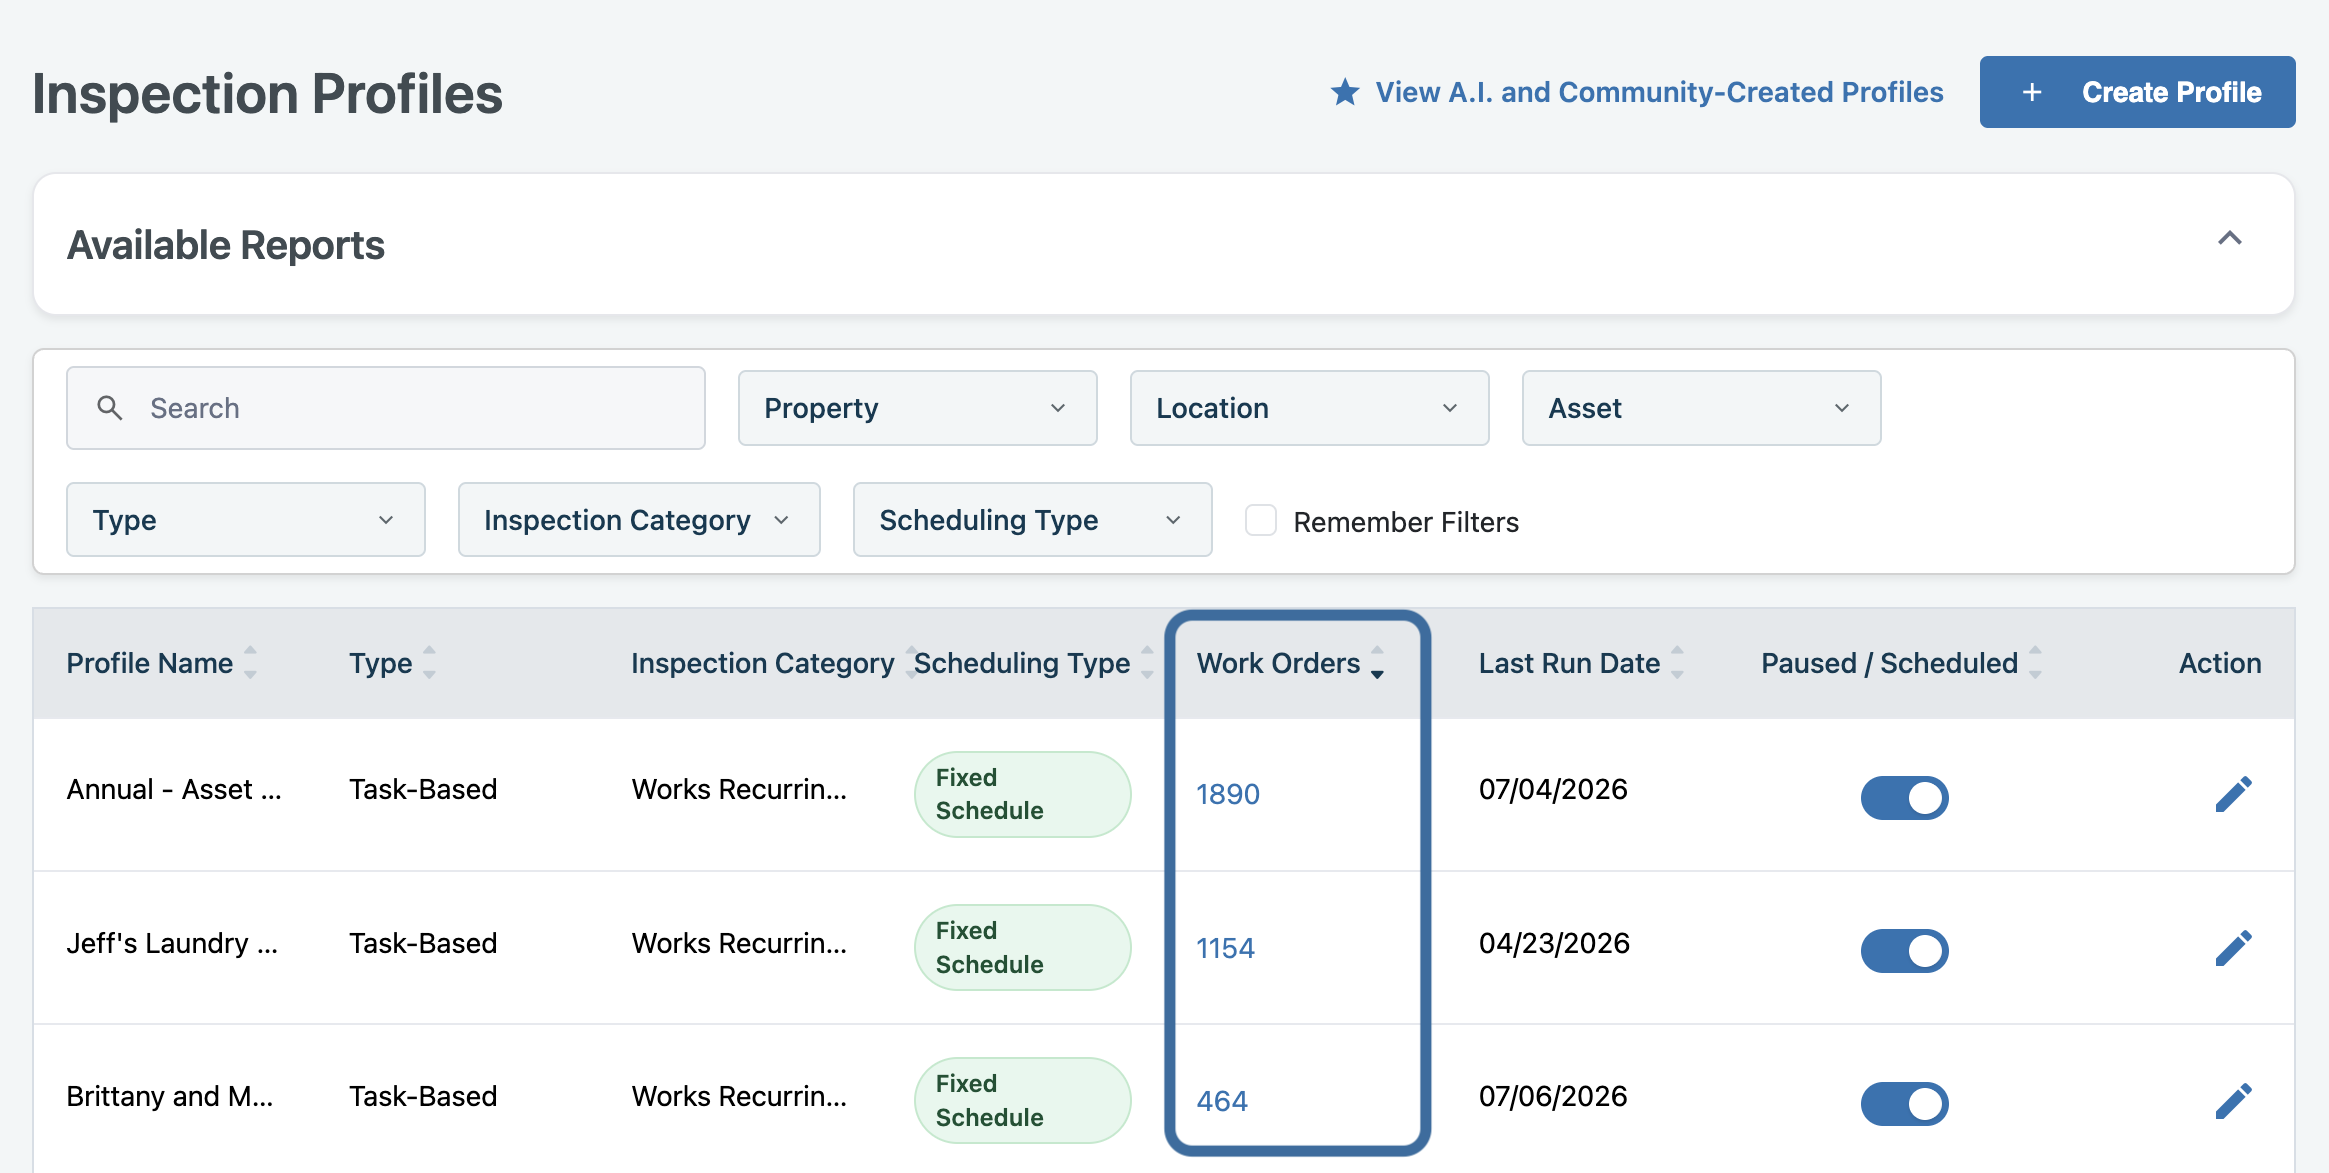
To view work orders for an existing profile, click the number in blue in the Work Orders for the corresponding profile.
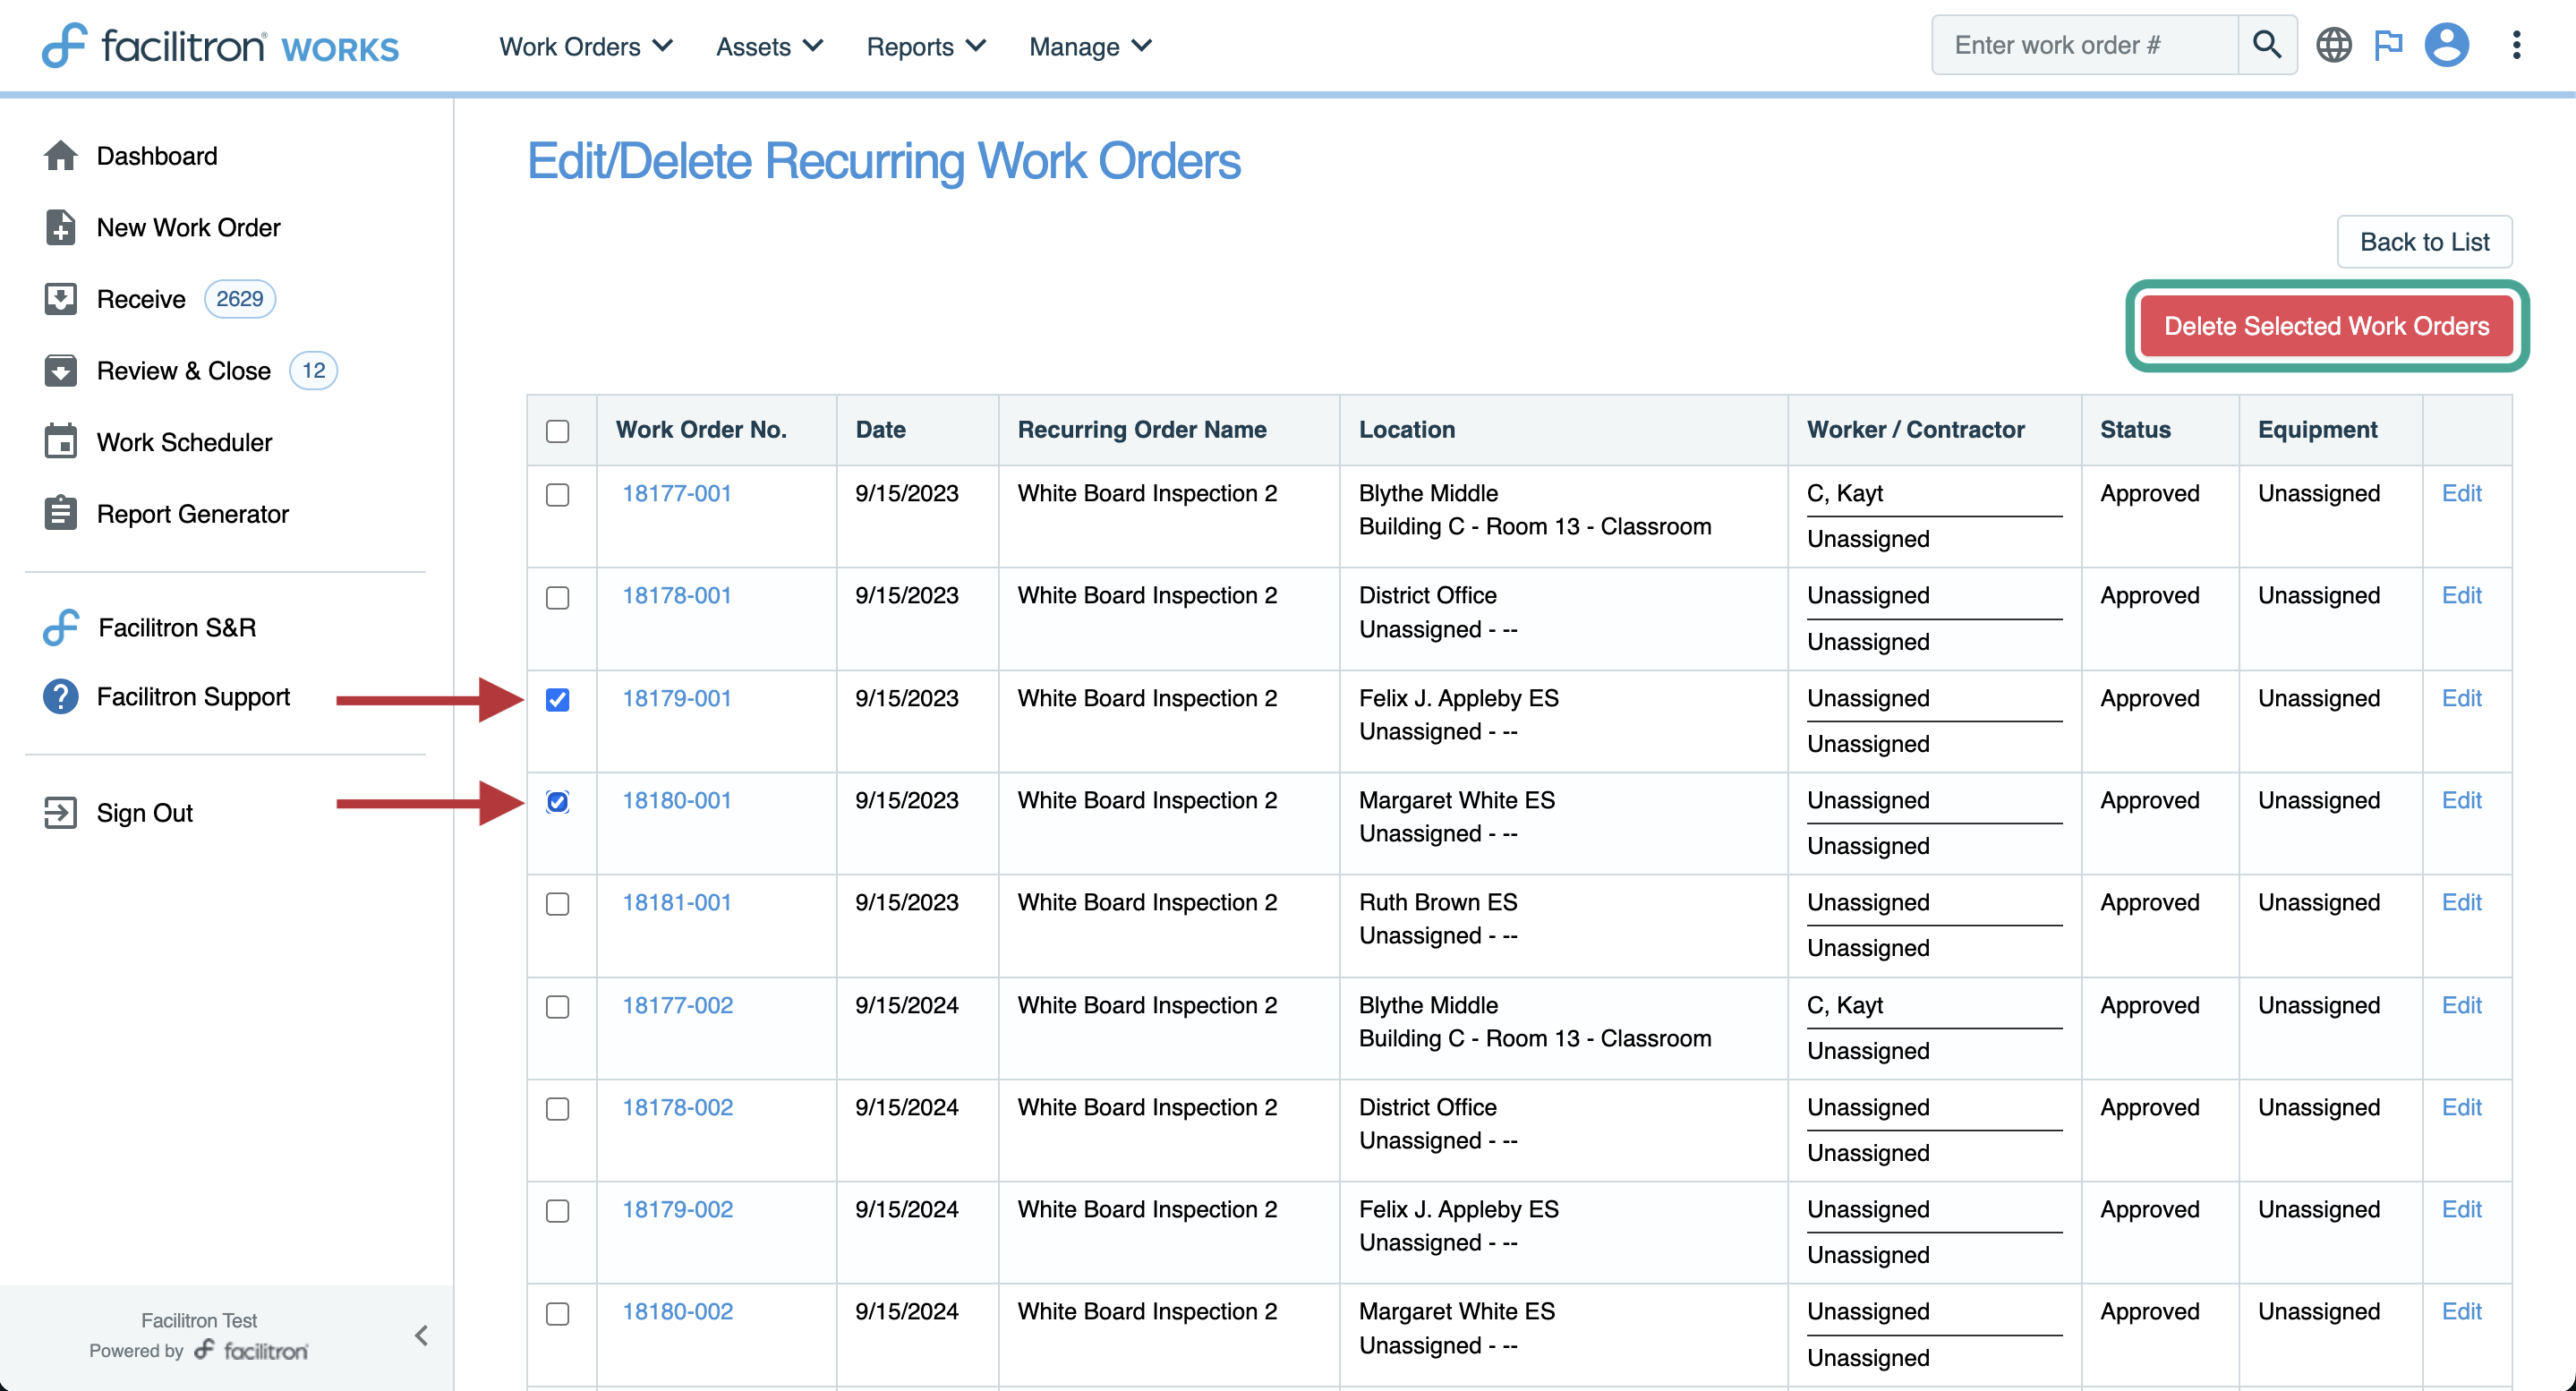
When adjustments need to be made to an existing RWO profile, it is recommended to delete associated future work orders that have been scheduled out, then modify the profile to include any additional updates. If you choose to delete these work orders, you will have to re-schedule any/all future work orders to include those updates. If such rescheduling is required, be sure to select future dates when scheduling the RWO to avoid duplicating previously created work orders.
Updating the Schedule for an Existing Profile
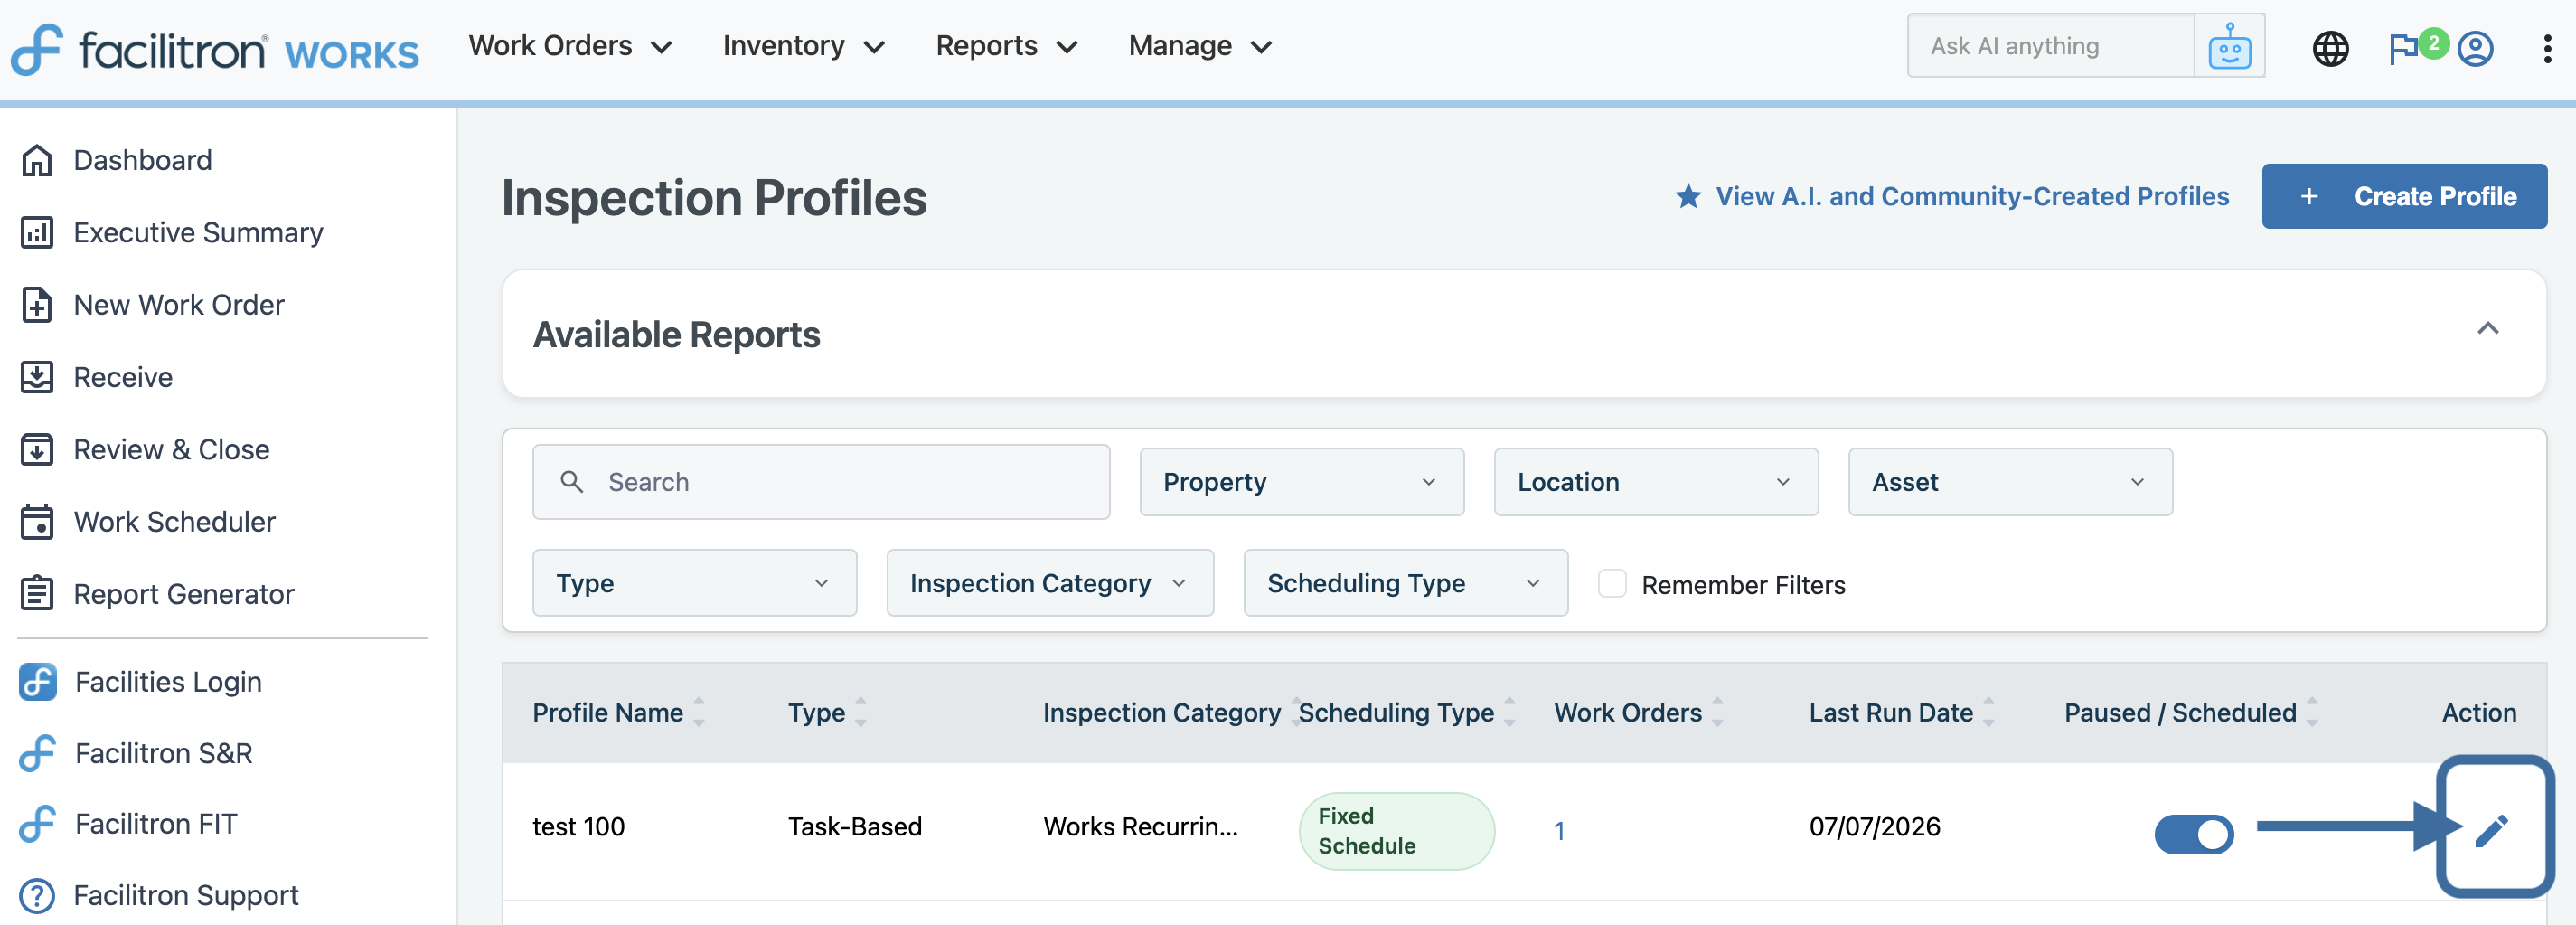
To view or change the scheduling for an existing RWO profile, go to Work Orders > Recurring > Inspection Profiles and search for the inspection profile you need to review. Click the pencil icon to review the profile.
If your maintenance schedule changes, update the RWO profile by making changes in the Scheduling section that reflect the new schedule.
- Update the start date if the new recurring schedule should begin on a different date.
- Update the frequency if the maintenance interval has changed.
- Update the lead time, if necessary, to change when work orders should generate before the scheduled maintenance.
Before saving, review the next 3 predicted generation dates to confirm the updated schedule matches your expectations. Save the profile after confirming that the generation schedule is correct.
For additional assistance, please reach out to Facilitron Support at (800) 272-2962, or email us at support@facilitron.com.
Was this article helpful?
That’s Great!
Thank you for your feedback
Sorry! We couldn't be helpful
Thank you for your feedback
Feedback sent
We appreciate your effort and will try to fix the article